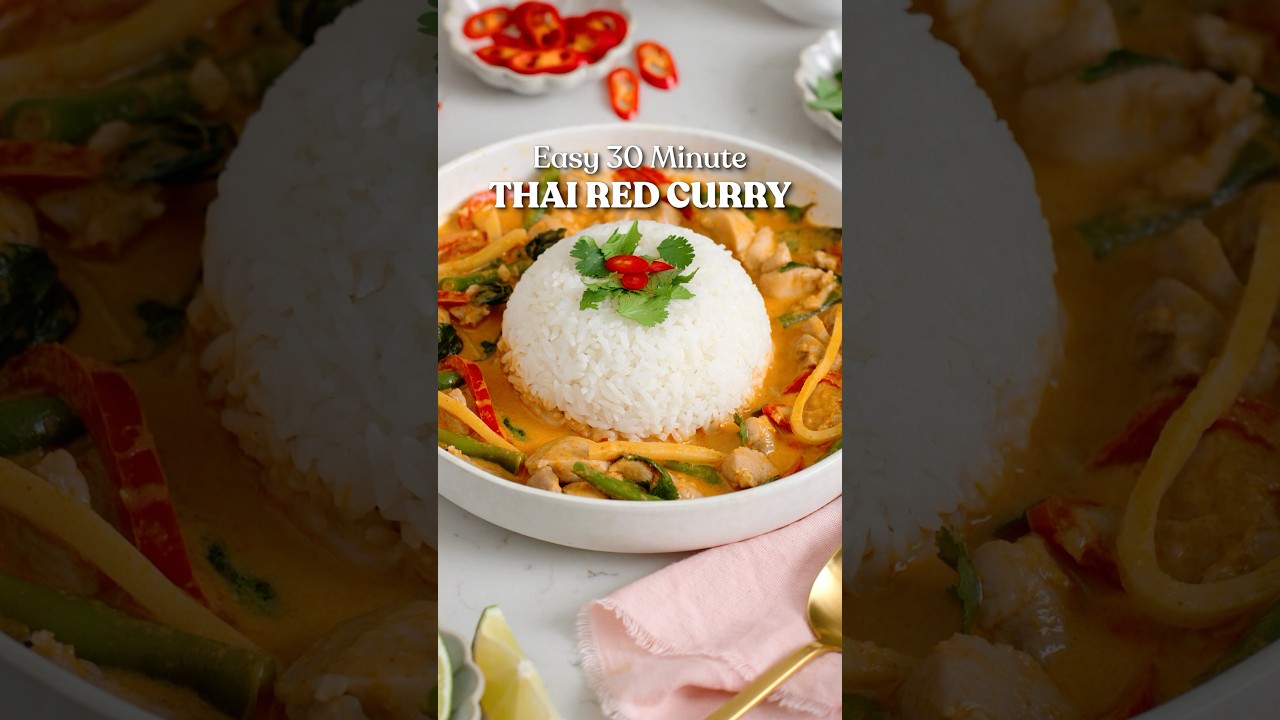
Easy Thai Red Curry (Better Than Takeout in 40 Minutes)
A vibrant, aromatic Southeast Asian classic with tender chicken, crisp vegetables, and a rich coconut-curry sauce built from scratch in one pan. We analyzed the most common home-cook failures to give you the technique that nails the balance of spicy, sweet, and savory every time.
“Most people order Thai red curry because they assume making it at home is complicated. It isn't. What it requires is understanding the three decisions that determine whether your curry has depth or tastes like spiced coconut water: how long you fry the paste, when you add the vegetables, and how you balance the final seasoning. Get those right and you will never order it again.”
Why This Recipe Works
Thai red curry is one of the most ordered takeout dishes in the world and one of the most underestimated home-cook projects. The assumption is that the depth of flavor requires either culinary school technique or a jar of pre-made paste doing all the heavy lifting. Neither is true. What it requires is understanding four minutes of chemistry that most recipes gloss over entirely.
The Paste Blooming Problem
Every serious curry starts with fried aromatics. In Thai cooking, the curry paste — a compressed block of dried chilies, lemongrass, galangal, kaffir lime zest, shrimp paste, and shallots — must be fried in fat before any liquid enters the pan. Two minutes minimum over medium-high heat, stirring constantly.
This is called blooming, and it is the entire foundation of your sauce. The heat drives off volatile acids that make raw paste taste sharp and jarring, while the fat-soluble flavor compounds in the chilies and aromatics dissolve into the coconut oil, creating a saturated base that will flavor every molecule of liquid you add afterward. Skip this step and pour the coconut milk straight in and you will taste exactly the difference: one sauce is deep and layered, the other tastes like the jar.
The visual cue is reliable. The paste will darken slightly and the oil in the pan will turn a vivid orange-red as the chili pigments disperse. When you see that color shift, the paste is ready.
Vegetable Timing Is Not Optional
The three vegetables in this curry — broccoli, bell pepper, snap peas — all need 6-8 minutes at a gentle simmer. They go in after the chicken has had its full 8 minutes. Not before. Not with.
Adding them at the start produces the waterlogged olive-green disaster familiar to anyone who's ordered bad curry at a lunch buffet. The vegetables leach their water into the sauce, diluting the coconut base, and cook so long they lose all structural integrity. What you want is tender-crisp: cooked through but with enough resistance that they register as a distinct texture against the sauce and chicken. Pull them off heat with a hair of firmness remaining — carryover heat closes the gap.
The Seasoning Architecture
Fish sauce, lime juice, and coconut sugar are added at the end of this recipe, and their order matters. Fish sauce first — stir it in and taste. You're looking for salt and umami depth, not fishiness; properly incorporated fish sauce doesn't taste like the ocean, it tastes like everything is more itself. Then lime juice, which cuts the fat richness of the coconut milk and brightens the whole pan. Then a small amount of coconut sugar, which rounds the sharp heat and integrates the sauce into a coherent whole.
This three-step calibration is what separates flat curry from the real thing. Thai cooking is built on the deliberate balance of four taste registers: hot, sour, salty, sweet. The paste handles hot. The lime handles sour. The fish sauce handles salty. The coconut sugar handles sweet. All four have to register simultaneously for the dish to work.
One Pan, Forty Minutes
The practical advantage of this recipe is its architecture. Everything happens in a single wok or deep skillet in a linear sequence with no parallel cooking, no special equipment, and no techniques that require practice to master. The blooming step sounds intimidating until you do it once and realize it's just stirring paste in a hot pan for two minutes.
What you end up with is a restaurant-quality curry that took forty minutes, costs a fraction of delivery, and can be adjusted precisely to your heat preference and dietary requirements. The jar of curry paste in your pantry isn't a shortcut — it's the ingredient. Use it correctly and it will do exactly what it promises.
Where Beginners Mess This Up
Before we start, read this. These are the 4 reasons your easy thai red curry (better than takeout in 40 minutes) will fail:
- 1
Rushing the curry paste: The paste must be fried in hot fat for at least 2 minutes before any liquid touches it. This step — called blooming — drives off the raw, sharp top notes and develops the deep red color. If you pour in the coconut milk immediately, you get a thin, one-dimensional sauce that tastes like the jar, not a curry.
- 2
Adding vegetables too early: Broccoli, bell pepper, and snap peas need 6-8 minutes, not 20. Put them in at the start and you end up with an olive-green, waterlogged mess. They go in after the chicken is mostly cooked, and you pull everything off the heat while there's still a slight bite left.
- 3
Over-reducing the sauce: Thai red curry is meant to be saucy — it's served over rice for a reason. High heat after adding the coconut milk splits the fat and tightens the sauce into a greasy paste. Keep it at a gentle simmer throughout and you'll preserve the emulsion and the creamy texture.
- 4
Underseasoning at the finish: Fish sauce, lime juice, and coconut sugar are not optional garnish — they are the final calibration step. Fish sauce adds umami and salt, lime adds brightness that cuts the coconut fat, and sugar rounds the heat. Taste after adding each one. The curry should hit every register: hot, sour, salty, sweet.
The Video Reference Library
Want to see it in action? Here are the exact videos we analyzed and combined to build this foolproof recipe translation:
The source video for this recipe's method. Watch specifically for how long the paste gets fried before liquid is added and the color change that signals it's ready.
🛠️ Core Equipment
- Large deep skillet or wokSurface area matters. A wide pan lets you sauté the aromatics without steaming them and gives the curry sauce room to simmer without splattering. A small saucepan forces you to crowd ingredients and traps steam.
- Microplane or fine graterFresh ginger grated on a microplane breaks down to a paste that dissolves into the sauce without fibrous threads. Pre-minced ginger or jarred paste will not give you the same clean heat.
- Instant-read thermometerChicken breast goes from perfectly cooked to rubbery in about 2 minutes. Checking for 165°F internally removes all guesswork and means you pull it the moment it's done, not a minute later.
Easy Thai Red Curry (Better Than Takeout in 40 Minutes)
🛒 Ingredients
- ✦2 tablespoons coconut oil
- ✦1 large red onion, thinly sliced
- ✦3 cloves garlic, minced
- ✦1 tablespoon fresh ginger, finely grated
- ✦3 tablespoons Thai red curry paste
- ✦1 can (14 ounces) light coconut milk
- ✦1 cup low-sodium vegetable broth
- ✦1 pound chicken breast, cut into bite-sized pieces
- ✦2 cups fresh broccoli florets
- ✦1 red bell pepper, sliced into strips
- ✦1 cup snap peas
- ✦2 tablespoons fish sauce
- ✦1 tablespoon lime juice, freshly squeezed
- ✦1 teaspoon coconut sugar
- ✦1/2 teaspoon sea salt
- ✦Fresh Thai basil or cilantro, chopped
- ✦1 Thai chili, thinly sliced (optional)
👨🍳 Instructions
01Step 1
Heat coconut oil in a large deep skillet or wok over medium-high heat until shimmering, about 1 minute.
02Step 2
Add the sliced red onion and sauté, stirring frequently, until softened and translucent, approximately 3 minutes.
03Step 3
Stir in the minced garlic and grated ginger, cooking until fragrant, about 1 minute more.
04Step 4
Add the Thai red curry paste to the aromatics and stir constantly for 2 minutes to bloom the paste, release its flavors, and deepen the color.
05Step 5
Pour in the light coconut milk and vegetable broth, stirring well to combine and break up any paste lumps.
06Step 6
Bring the mixture to a gentle simmer, then add the chicken pieces and stir to distribute evenly. Cook for 8 minutes.
07Step 7
Add the broccoli florets, bell pepper strips, and snap peas. Stir gently to combine.
08Step 8
Simmer for another 6 to 8 minutes until the vegetables are tender-crisp and the chicken reaches 165°F internally.
09Step 9
Stir in the fish sauce, freshly squeezed lime juice, coconut sugar, and sea salt. Taste as you go.
10Step 10
Adjust seasoning: more lime for brightness, more fish sauce for depth, a pinch more sugar if the heat is too sharp.
11Step 11
Remove from heat and transfer to a serving dish or individual bowls.
12Step 12
Garnish generously with freshly chopped cilantro or Thai basil and sliced Thai chilies if desired. Serve immediately over jasmine rice or cauliflower rice.
Nutrition Per Serving
Estimates based on standard preparation. Adjustments alter macros.
🔄 Substitutions
Instead of Chicken breast...
Use Extra firm tofu, pressed and cubed
Press the tofu for at least 20 minutes before cutting. Pat dry and sear in a separate pan until golden before adding to the curry — adding raw tofu directly produces waterlogged, texture-less results.
Instead of Regular coconut milk...
Use Light coconut milk or coconut cream mixed with vegetable broth
Reduces saturated fat while maintaining creaminess. Full-fat coconut cream mixed 1:1 with broth actually produces a richer result than standard light coconut milk.
Instead of Fish sauce...
Use Tamari or coconut aminos
Keeps the dish gluten-free and vegan-compatible. Coconut aminos is lower sodium and slightly sweeter — you may need to reduce the coconut sugar by half. The umami profile is similar but not identical.
Instead of Coconut sugar...
Use Monk fruit sweetener or omit entirely
Monk fruit has no glycemic impact and works well here. Without any sweetener, the curry leans sharper and hotter — acceptable if you prefer that profile, but the sugar genuinely does round the edges of the heat.
🧊 Storage & Reheating
In the Fridge
Store in an airtight container for up to 3 days. Keep the rice separate — storing them together turns the rice into a gluey paste.
In the Freezer
Freeze the curry (without rice) for up to 2 months. The vegetables will lose their texture on thawing — acceptable for a quick weeknight reheat, not ideal for serving to guests.
Reheating Rules
Reheat on the stovetop over low heat with a splash of coconut milk or broth, stirring gently. Microwave reheating causes the coconut milk to separate and the chicken to toughen.
❓ Frequently Asked Questions
Why does my Thai red curry taste watery and flat?
Two likely causes: you didn't fry the curry paste long enough before adding liquid, or you didn't season aggressively enough at the finish. The blooming step concentrates flavor — skipping it gives you spiced coconut water. At the end, fish sauce, lime, and sugar are not optional. They do real structural work on the flavor.
Can I make this vegetarian?
Yes. Replace the chicken with pressed, seared tofu or chickpeas. Replace the fish sauce with tamari or coconut aminos. Everything else stays the same. The curry is naturally gluten-free in either version.
What's the difference between red, green, and yellow Thai curry?
Color indicates the chilies used in the paste. Red uses dried red chilies — hot and bold. Green uses fresh green chilies — brighter and often hotter. Yellow gets its color from turmeric and dried yellow chilies — milder and more aromatic. The base technique is identical across all three.
My curry is too spicy. How do I fix it?
Add more coconut milk or a small amount of coconut cream to dilute the heat. A teaspoon of coconut sugar also blunts capsaicin perception. You cannot remove spice once it's in — only dilute or counterbalance it.
Can I use frozen vegetables?
You can, but add them directly from frozen and extend the simmer by 2-3 minutes. Thawing first introduces excess water that dilutes the sauce. Broccoli and bell pepper hold up reasonably well frozen; snap peas turn mushy — use fresh if you can get them.
How do I make the sauce thicker?
Simmer uncovered for an extra 3-5 minutes after adding the vegetables. Alternatively, use full-fat coconut milk instead of light. Adding a cornstarch slurry works but changes the texture from silky to glossy — a different result, not necessarily better.

The Science of
Easy Thai Red Curry (Better Than Takeout in 40 Minutes)
We turned everything on this page into a beautiful, flour-proof PDF cheat sheet. Print it out, stick it to your fridge, and never mess up your easy thai red curry (better than takeout in 40 minutes) again.
*We'll email you the high-res PDF instantly. No spam, just perfectly cooked meals.
AlmostChefs Editorial Team
We translate the internet's most popular cooking videos into foolproof, beginner-friendly written recipes. We analyze multiple methods, test them in our kitchen, and engineer a single "Master Recipe" that gives you the best possible result with the least possible stress.