Homemade Tamales (The Foolproof Masa Method)
Tender masa wrapped around savory poblano-chicken filling, steamed in corn husks until perfectly pillowy. We broke down the most common failure points in traditional tamale-making to give you one reliable method that works every time — no abuela required.
“Tamales have a reputation as a special-occasion dish — the kind that requires a kitchen full of family and an entire weekend. That reputation is partially deserved and mostly wrong. The technique is repetitive, not complicated. Once you understand what the masa should feel like, how tight to fold the husk, and what 'done' actually looks like, you can have a full batch on the table in under two hours. Here's the method that gets you there.”
Why This Recipe Works
Tamales are not complicated. They are repetitive, and repetition has been mistaken for complexity for generations. The technique is almost entirely physical — spreading masa to the right thickness, folding a husk without cracking it, reading the doneness by feel rather than a timer. Once you've made a dozen, the rest of the batch comes on autopilot.
The reason most first-time tamale batches fail has nothing to do with the filling or the seasoning. It has everything to do with the masa.
The Masa Problem
Masa is not dough. This is the misunderstanding that sends entire batches sideways. Bread dough is tight and elastic. Tamale masa should be loose, airy, and spreadable — the texture of thick hummus rather than anything you'd knead on a counter. Achieving that texture requires two things that most recipes mention but don't explain: fat fully beaten into the masa before liquid is added, and liquid added in stages.
The fat — lard, shortening, or a good neutral oil — needs to be beaten with the masa for 5-7 full minutes before a drop of broth goes in. This isn't optional preamble. The fat coats the masa starches and creates air pockets that give the finished tamale its pillowy interior. Add the broth too early and you're just making a wet lump. Beat the fat in properly and the masa transforms — it becomes visibly lighter in color and noticeably fluffier in texture.
The float test is the check: drop a small ball of the fat-beaten masa into cold water. If it floats, you're ready to add broth. If it sinks, keep the mixer running.
Broth goes in last, in three additions, folded gently between each. The baking powder in the broth provides additional lift during steaming. The finished masa should spread easily with the back of a spoon but hold its shape when scooped. If it tears when you spread it, add more broth. If it slides off the husk, beat in a small amount of dry masa to bring it back.
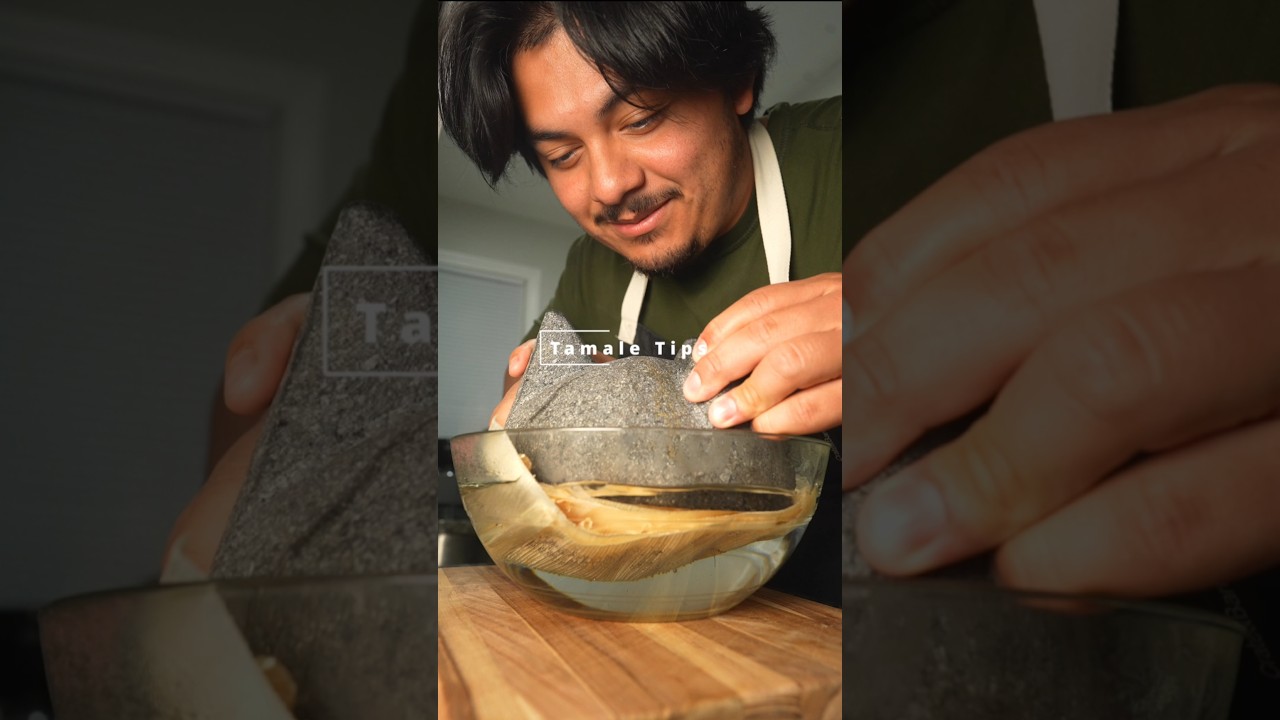
The Husk Situation
Dried corn husks need a full 20 minutes in hot water — not warm, not tap-temperature, hot. Husks that haven't fully softened crack at the fold line, and a cracked husk is a broken seal. Steam escapes through the crack during cooking, the masa dries out, and you get tamales with a leathery exterior and a dense, undercooked center.
The husks float. This is a problem because the ones on top soak unevenly while the ones underneath stay submerged. Weight them down with a plate and check at the 10-minute mark to redistribute. Every husk needs to be fully pliable before you start assembling.
The Fill Ratio
Two tablespoons of masa, one tablespoon of filling. Write it on your hand if you have to. Overfilling is the most common cause of blowouts — the masa splits at the seam during steaming and the filling leaks into the steamer liquid. Underfilling gives you a thick masa log with a suggestion of chicken somewhere in the middle.
The poblano-crema filling in this recipe is deliberately thick rather than saucy. Wet fillings introduce excess moisture into the masa during the steam phase, preventing it from setting properly. Blend the filling until smooth and thick. If it looks loose, strain it briefly or reduce it in a small pan before using.
The Steam Phase
Tamales cook entirely on indirect heat. They never touch the liquid — they stand upright above it, suspended in the steam that rises and circulates through the basket. The steamer pot needs enough depth to hold the tamales fully upright, enough liquid to generate steam for 50 minutes without running dry, and a tight-fitting lid to keep that steam inside.
The damp kitchen towel draped over the tamales before the lid goes on is a small detail that matters. The top layer of tamales is farthest from the steam source and most vulnerable to drying out. The towel provides insulation and holds moisture against the open ends. Skip it and the top tamales will be dry while the bottom ones are perfect.
The doneness test is tactile, not visual. After 45 minutes, pull back a husk. The masa should release cleanly — no sticking, no tearing, no smearing. If it clings, recover and add 10 more minutes. Trust the husk, not the clock.
Where Beginners Mess This Up
Before we start, read this. These are the 4 reasons your homemade tamales (the foolproof masa method) will fail:
- 1
Masa that's too dense or too wet: The masa should be spreadable like thick hummus — not a stiff dough ball, and not so loose it slides off the husk. Beat the fat into the masa vigorously before adding broth, and add broth in three additions, not all at once. Rushing this step produces dense, gummy tamales that never fully set.
- 2
Corn husks that aren't pliable enough: Husks soaked for less than 20 minutes crack when you fold them, breaking the seal that keeps the masa moist during steaming. If they crack, they leak steam, and the tamales dry out. Soak in hot water, not warm, and weigh them down with a plate if they float.
- 3
Underfilling or overfilling: Two tablespoons of masa and one tablespoon of filling per tamale is the ratio. Overfilling causes blowouts where the masa splits at the seam. Underfilling gives you a thick masa log with a whisper of filling at the center. Both are disappointing in different ways.
- 4
Opening the steamer too early: The only reliable doneness test for tamales is the clean-pull test: the masa should release cleanly from the husk without sticking. This takes 45-50 minutes of uninterrupted steam. Lifting the lid early drops the temperature and adds time. Wait the full duration.
The Video Reference Library
Want to see it in action? Here are the exact videos we analyzed and combined to build this foolproof recipe translation:
The source video for this recipe. Clear demonstration of the masa consistency test, husk-folding technique, and the clean-pull doneness test that tells you when the tamales are ready.
🛠️ Core Equipment
- Large steamer pot with trivetThe tamales stand upright in the basket over liquid, never touching the water. A deep pot with a fitted lid is essential — shallow pots don't generate enough sustained steam for the full cook time.
- Electric hand mixer or stand mixerYou need to beat air into the masa-fat mixture for 5-7 minutes. Doing this by hand is exhausting and produces inconsistent results. The mixer creates the light, fluffy texture that separates great masa from dense masa.
- Large mixing bowlYou're working with a full batch of masa plus liquid additions in three stages. A bowl that's too small turns this into a mess. Go bigger than you think you need.
- Damp kitchen towelDraped over the tamales inside the steamer, it helps maintain moisture and even heat distribution. Without it, the top layer of tamales can dry out while the bottom cooks in excess steam.
Homemade Tamales (The Foolproof Masa Method)
🛒 Ingredients
- ✦2 cups prepared masa for tamales
- ✦1 cup chicken or vegetable broth, warm
- ✦6 tablespoons lard or vegetable shortening, softened
- ✦1 teaspoon baking powder
- ✦1 pound shredded chicken breast, cooked
- ✦2 medium poblano peppers, roasted and sliced
- ✦1 cup Mexican crema or sour cream
- ✦2 cups chicken stock for steaming
- ✦24 dried corn husks, soaked
- ✦1 medium white onion, halved
- ✦3 cloves garlic, minced
- ✦2 teaspoons cumin
- ✦1 teaspoon sea salt
- ✦½ teaspoon black pepper
- ✦½ cup fresh cilantro, chopped
- ✦1 cup Oaxaca cheese or mozzarella, shredded
👨🍳 Instructions
01Step 1
Soak the corn husks in hot water for 20 minutes until pliable. Weigh them down with a plate if they float — every husk needs full contact with the water.
02Step 2
Beat the softened lard with the masa in a large mixing bowl using an electric mixer on medium-high for 5-7 minutes until the mixture is light and noticeably fluffy.
03Step 3
Whisk the warm broth with the baking powder. Add it to the masa in three additions, folding gently between each until fully incorporated. The finished masa should be spreadable but hold its shape — like thick hummus.
04Step 4
Blend the roasted poblano strips, crema, minced garlic, cilantro, cumin, salt, and pepper until smooth. Taste and adjust seasoning.
05Step 5
Lay a softened corn husk flat on your work surface, wide end toward you. Spread 2 tablespoons of masa in the center, leaving a 1-inch border on the sides and a 2-inch border at the pointed end.
06Step 6
Add 1 tablespoon of the poblano-cream filling and a small mound of shredded chicken onto the center of the masa. Top with a pinch of shredded cheese.
07Step 7
Fold the long sides of the husk over the center, overlapping to enclose the filling completely. Then fold the pointed bottom end up against the body of the tamale. The open top stays open.
08Step 8
Pour the chicken stock into the steamer pot until it reaches just below the trivet. Bring to a simmer over medium-high heat.
09Step 9
Stand the tamales upright in the steamer basket, open end up, packed snugly so they support each other and don't tip during cooking.
10Step 10
Cover the tamales with a layer of extra corn husks, then drape a damp kitchen towel over the top before placing the lid. This insulates the top layer and prevents moisture loss.
11Step 11
Steam over medium-high heat for 45-50 minutes, checking the water level at the 25-minute mark and adding more hot stock if needed. Do not lift the lid otherwise.
12Step 12
Test doneness by pulling back a husk. The masa should release cleanly without sticking. If it still clings, re-cover and steam for another 5-10 minutes.
13Step 13
Remove from heat and rest, covered, for 5 minutes before serving. The masa firms up as it cools slightly. Serve with extra crema, shredded cheese, and cilantro.
Nutrition Per Serving
Estimates based on standard preparation. Adjustments alter macros.
🔄 Substitutions
Instead of Lard or vegetable shortening...
Use Unsalted butter or avocado oil
Butter produces a slightly richer, cleaner flavor with good fluffiness. Avocado oil works but produces a denser masa — compensate by beating an extra minute or two.
Instead of Mexican crema...
Use Greek yogurt mixed with lime juice
Tangier and lighter with a similar creamy consistency. Use a 3:1 ratio of yogurt to lime juice. The filling will be slightly less rich but the flavor is clean and bright.
Instead of Oaxaca cheese or mozzarella...
Use Sharp cotija or feta
Harder cheeses with more pronounced flavor — use about half the quantity. They don't melt the same way, but the saltier punch means you need less.
Instead of Chicken breast...
Use Shredded jackfruit or mushroom blend
Young green jackfruit shredded after simmering in cumin-heavy broth mimics the texture of pulled meat convincingly. Mushrooms add earthiness but a different texture — use cremini or oyster.
🧊 Storage & Reheating
In the Fridge
Store cooled tamales in an airtight container or wrapped tightly in their husks for up to 4 days.
In the Freezer
Freeze individually wrapped tamales for up to 3 months. Freeze them in the husks — they protect the masa during freezing and reheating.
Reheating Rules
Steam refrigerated tamales for 15 minutes or frozen tamales for 25-30 minutes from frozen. Do not microwave — it turns the masa rubbery and uneven.
❓ Frequently Asked Questions
Why is my masa sticking to the corn husk?
The tamales need more time. The masa isn't fully cooked until it releases cleanly from the husk without any sticking. Add 10 more minutes of steaming and test again. If the problem persists, your masa was too wet going in — next batch, add broth more conservatively.
Can I make tamales without a steamer pot?
Yes. Use any deep pot with a lid and create a makeshift trivet from crumpled aluminum foil balls or an inverted heat-safe bowl. Stand the tamales upright in the pot above the liquid level. The method is identical — you just need the steam, not the specialized equipment.
How do I know the masa consistency is right before I start assembling?
It should spread like thick hummus — it holds a shape when scooped but smears easily with the back of a spoon. If it tears when you spread it, add a splash more broth. If it runs, beat in a little more dry masa. The float test (drop a small ball in cold water — it should float) confirms the fat is properly incorporated.
Can I make tamales ahead of time?
Yes, and they're often better the next day. Assemble and steam the full batch, cool completely, then refrigerate or freeze. Reheat in the steamer before serving. The masa sets further as it cools and reheats with a slightly firmer, more defined texture.
Why do my tamales keep unraveling in the steamer?
The corn husks aren't overlapping enough at the seam, or the bottom fold isn't tucked tightly. Pack the tamales tightly together upright in the steamer — they hold each other in position. For persistent unraveling, tie each tamale with a thin strip of torn corn husk around the middle.
What filling can I use instead of chicken and poblano?
Almost anything that's already cooked and relatively dry. Braised pork with red chile sauce is the most traditional alternative. Black beans and cheese is a classic vegetarian option. Avoid fillings with too much liquid — excess moisture prevents the masa from setting properly during steaming.

The Science of
Homemade Tamales (The Foolproof Masa Method)
We turned everything on this page into a beautiful, flour-proof PDF cheat sheet. Print it out, stick it to your fridge, and never mess up your homemade tamales (the foolproof masa method) again.
*We'll email you the high-res PDF instantly. No spam, just perfectly cooked meals.
AlmostChefs Editorial Team
We translate the internet's most popular cooking videos into foolproof, beginner-friendly written recipes. We analyze multiple methods, test them in our kitchen, and engineer a single "Master Recipe" that gives you the best possible result with the least possible stress.