Crispy Sweet and Sour Pork (No Greasy Takeout Required)
A Chinese-American classic rebuilt for home cooks — baked pork, glossy tangy sauce, and fresh pineapple delivering restaurant-quality results in 45 minutes. We analyzed the technique failures behind soggy sauce and rubbery pork to give you one method that works every time.
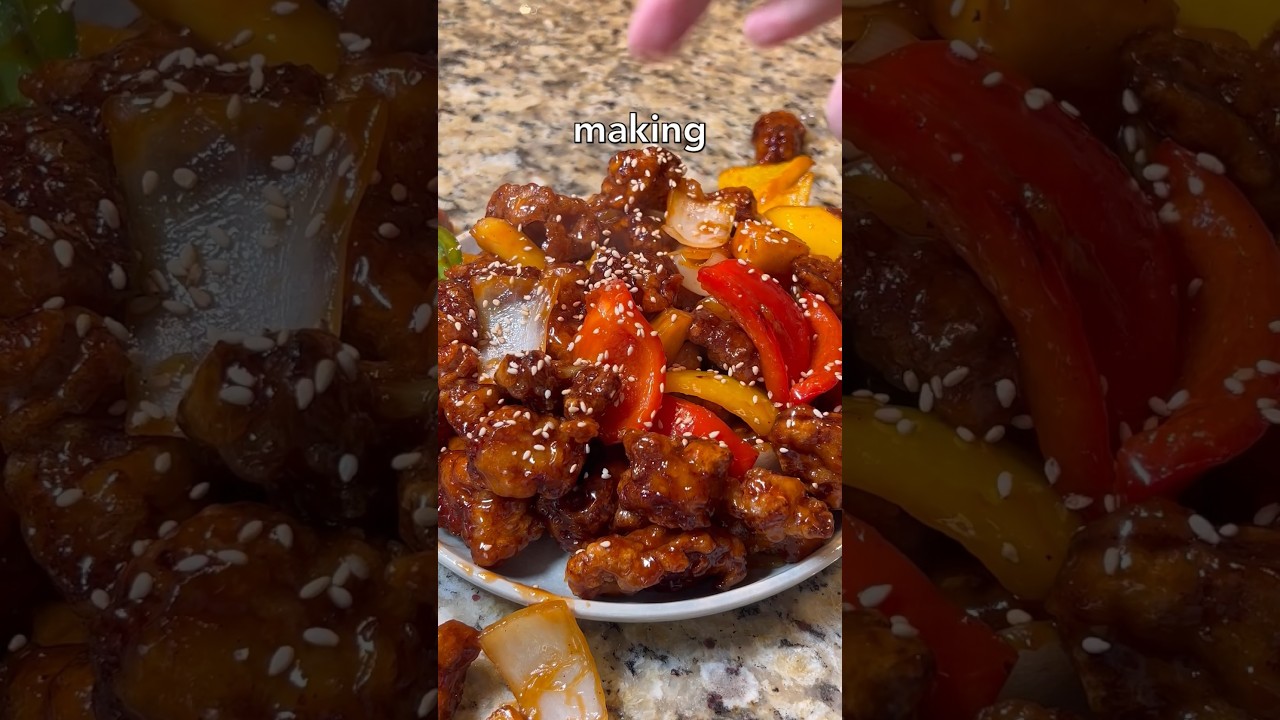
“Sweet and sour pork should be crispy pork coated in a glossy, balanced sauce with pops of pineapple sweetness. What most takeout delivers is soggy battered pork drowning in neon-orange corn syrup. The difference is technique — specifically how you handle the pork crust and how you build a sauce that clings without turning cloying. This version skips the deep-fryer, nails the gloss, and comes together in 45 minutes flat.”
Why This Recipe Works
Sweet and sour pork is one of those dishes that sounds simple and keeps failing anyway. The concept is obvious — crispy pork, glossy sauce, some vegetables, a hit of pineapple. The execution requires understanding why each component exists and what kills it.
The Pork Problem
Most versions of this dish fail at the pork stage. The sequence goes: battered pork, deep-fried, tossed in sauce, served immediately. By the time it reaches the table in a restaurant, the coating is already softening. By the time it sits in a takeout container for ten minutes, it's mush.
The solution is not a thicker batter. The solution is a different technique. Pork shoulder cubed to one inch, dried aggressively, coated in plain cornstarch, seared in a screaming hot pan, then finished in a 400°F oven. No batter. The cornstarch creates a thin, fused crust that adheres directly to the meat surface rather than forming a shell around it. That crust holds up in sauce for several minutes instead of several seconds.
The sear-then-bake approach also solves a logistics problem. Deep-frying requires full attention at the fryer. Baking lets you build the sauce simultaneously in the same pan you used to sear. You're not multitasking — you're sequencing.
The Sauce Architecture
Sweet and sour sauce is a balance problem. The formula is roughly two parts sweet to one part sour, but pineapple juice acidity varies by ripeness and brand, and soy sauce saltiness varies by manufacturer. Recipes that give you exact measurements and expect exact results are lying to you. You have to taste and adjust before the slurry goes in.
The glossy consistency that makes the sauce visually satisfying comes entirely from cornstarch gelatinizing at temperature. This only happens correctly when three conditions are met: the starch is dissolved in cold water first, the sauce is at a full simmer when the slurry is added, and it's stirred constantly for two full minutes afterward. Shortcut any of those steps and you get a lumpy, dull sauce that slides off the pork instead of clinging to it.
Sesame oil goes in at the sauce-building stage, not at the end. This is counterintuitive — sesame oil's delicate aromatic compounds can cook off at high heat. But the brief simmer here is gentle enough to preserve them while ensuring even distribution. Added as a finishing drizzle, sesame oil creates inconsistent flavor pockets rather than a unified sauce.
The Vegetable Strategy
Bell pepper and onion are not filler. They serve two structural purposes. The onion, cooked until translucent before anything else, provides an aromatic base that the sauce builds on. The bell pepper, added after the aromatics and cooked only until slightly softened, provides crunch contrast against the tender pork. Both accumulate the sauce gloss, so every bite contains multiple textures and temperatures.
Three-to-four minutes is the maximum for bell pepper. Beyond that, it releases its water content into the sauce — diluting the gloss and making the sauce watery. The slightly underdone bell pepper also continues softening from residual heat after the pork is added, so it arrives at perfect texture by the time the dish hits the table.
The Pineapple Timing
Fresh pineapple goes in after the sauce thickens, not before. Pineapple contains bromelain, a protease enzyme that breaks down protein. At simmering temperatures over several minutes, bromelain softens the pork from the outside in. That's useful in a marinade. It's disastrous in a sauce where you're trying to maintain the crust you spent time building.
Add the pineapple chunks last. Fold them gently. Two minutes of contact with the hot sauce is enough to warm them through without activating the enzyme at scale. The result is pineapple that tastes bright and fresh rather than mushy and medicinal.
A heavy-bottomed skillet does the heavy lifting here — even sear temperature, even sauce reduction, and enough thermal mass to recover quickly after cold pork goes in. A thin pan loses heat on contact and never quite recovers. That hesitation in the first 30 seconds of the sear is the difference between a crust and a coating.
Where Beginners Mess This Up
Before we start, read this. These are the 4 reasons your crispy sweet and sour pork (no greasy takeout required) will fail:
- 1
Crowding the pan during searing: Pork cubes need space. When you crowd the pan, the temperature drops and the meat steams instead of sears. You get pale, soft pork that won't hold up once it hits the sauce. Work in batches — every piece needs direct contact with the hot pan surface to develop a crust.
- 2
Skipping the paper towel dry: Surface moisture is the enemy of a crust. Wet pork steams in the pan regardless of how hot your oil is. Pat every cube aggressively dry before tossing in cornstarch. That dry surface plus cornstarch coating is what creates the crust that survives the sauce toss.
- 3
Adding cornstarch slurry to cold liquid: Cornstarch activates at heat. If you pour the slurry into the pan before the sauce reaches a simmer, it clumps instead of thickening evenly. Wait for a full simmer — small bubbles breaking the surface — then pour the slurry in slowly while stirring constantly.
- 4
Overcooking the bell pepper: Bell pepper goes in after the onion and garlic for a reason. It only needs 3-4 minutes to soften slightly while retaining crunch. Push it too long and you get a mushy, waterlogged vegetable that disappears into the sauce instead of providing textural contrast.
The Video Reference Library
Want to see it in action? Here are the exact videos we analyzed and combined to build this foolproof recipe translation:
The clearest visual guide to building the sauce gloss and managing the sear-then-bake method. Excellent close-ups of the slurry incorporation technique and correct sauce consistency.
🛠️ Core Equipment
- Large oven-safe skillet or cast iron panYou need a pan that holds high searing heat without warping. A thin non-stick pan drops temperature too fast when cold pork hits it, killing the crust before it forms.
- Rimmed baking sheet with parchmentFor finishing the pork in the oven without continuing to sear it. The parchment prevents sticking and makes cleanup effortless. Foil works but can transfer a metallic taste.
- Instant-read thermometerPork shoulder at 145°F internal temperature is the USDA safe minimum — and also exactly when it's juicy without being undercooked. Guessing by timing alone causes dry pork or food safety issues. Don't guess.
- Small bowl for slurry mixingMixing the cornstarch with cold water separately before adding it to the sauce ensures even distribution. Dumping raw cornstarch directly into a hot pan creates irreversible lumps.
Crispy Sweet and Sour Pork (No Greasy Takeout Required)
🛒 Ingredients
- ✦1.5 pounds pork shoulder, cut into 1-inch cubes
- ✦3 tablespoons cornstarch, divided
- ✦2 teaspoons kosher salt
- ✦1 teaspoon freshly ground black pepper
- ✦2 tablespoons vegetable oil
- ✦1 large red bell pepper, cut into 1-inch chunks
- ✦1 large yellow onion, diced into bite-sized pieces
- ✦3 cloves garlic, minced
- ✦1 tablespoon fresh ginger, grated
- ✦1 cup fresh pineapple chunks or unsweetened canned pineapple in juice
- ✦1/2 cup pineapple juice
- ✦3 tablespoons rice vinegar
- ✦2 tablespoons low-sodium soy sauce
- ✦1 tablespoon honey or maple syrup
- ✦1 teaspoon sesame oil
- ✦1/2 cup chicken broth
- ✦2 green onions, sliced on the bias for garnish
- ✦2 tablespoons sesame seeds for garnish
👨🍳 Instructions
01Step 1
Preheat your oven to 400°F and line a large baking sheet with parchment paper.
02Step 2
Pat the pork cubes thoroughly dry with paper towels, then toss in a bowl with 2 tablespoons cornstarch, kosher salt, and black pepper until every piece is evenly coated.
03Step 3
Heat vegetable oil in a large skillet over medium-high heat until shimmering, about 2 minutes.
04Step 4
Working in batches without crowding, sear the pork cubes for 2-3 minutes per side until golden brown. Transfer each batch to the prepared baking sheet.
05Step 5
Bake the seared pork for 12-15 minutes until it reaches an internal temperature of 145°F.
06Step 6
While the pork bakes, return the same skillet to medium-high heat. Sauté the diced yellow onion for 3-4 minutes until translucent.
07Step 7
Add the minced garlic and grated ginger and cook for 1 minute, stirring constantly, until fragrant.
08Step 8
Add the red bell pepper chunks and cook for 3-4 minutes until slightly softened but still crisp.
09Step 9
In a small bowl, whisk together the pineapple juice, rice vinegar, soy sauce, honey, sesame oil, and chicken broth until fully combined.
10Step 10
Pour the sauce mixture into the skillet and bring to a gentle simmer over medium heat.
11Step 11
Mix the remaining 1 tablespoon cornstarch with 2 tablespoons cold water in a small bowl until smooth. Once the sauce is simmering, slowly pour in the slurry while stirring constantly.
12Step 12
Cook the sauce for 2-3 minutes until it thickens and turns glossy, then fold in the fresh pineapple chunks.
13Step 13
Remove the pork from the oven and add it to the skillet. Gently toss to coat everything evenly in the sauce.
14Step 14
Simmer together for 2 minutes to meld the flavors. Taste and adjust seasoning.
15Step 15
Transfer to a serving platter, garnish with sliced green onions and sesame seeds, and serve immediately over steamed rice.
Nutrition Per Serving
Estimates based on standard preparation. Adjustments alter macros.
🔄 Substitutions
Instead of Pork shoulder...
Use Chicken breast or extra-firm tofu
Chicken breast cooks faster — reduce oven time to 8-10 minutes and check at 165°F internal. Tofu should be pressed for 30 minutes before cooking to remove moisture, then treat exactly like the pork.
Instead of Cornstarch...
Use Arrowroot powder or tapioca starch
Arrowroot creates a slightly clearer, glossier sauce. Use a 1:1 swap. Tapioca starch is slightly stickier — use 20% less than the cornstarch amount called for.
Instead of Regular soy sauce...
Use Tamari or coconut aminos
Tamari is gluten-free and nearly identical in flavor. Coconut aminos is lower-sodium with a subtle sweetness — reduce the honey by half if using it to avoid an overly sweet sauce.
Instead of Honey or maple syrup...
Use Date paste or monk fruit sweetener
Date paste adds caramel depth and fiber but will slightly cloud the sauce. Monk fruit sweetener keeps the sauce clear and has zero glycemic impact — use a liquid version for even distribution.
🧊 Storage & Reheating
In the Fridge
Store sauce and pork separately if possible. Combined, the pork crust softens overnight. Refrigerate in an airtight container for up to 3 days.
In the Freezer
Freeze the sauce alone for up to 2 months. The pork texture degrades significantly when frozen — cook fresh pork when reheating from frozen sauce.
Reheating Rules
Reheat sauce in a skillet over medium heat, adding a splash of chicken broth to loosen it. Sear fresh pork separately, then combine. Microwaving makes the pork rubbery and splits the sauce.
❓ Frequently Asked Questions
Why is my sweet and sour sauce not glossy?
Gloss comes from the cornstarch activating fully at a sustained simmer. If you added the slurry before the sauce reached temperature, or didn't cook it long enough afterward, the starch won't fully gelatinize. Bring the sauce to a proper simmer — small bubbles breaking the surface — and cook for at least 2 full minutes after adding the slurry.
Can I deep-fry the pork instead of baking it?
Yes, and it produces a superior crust. Heat 2 inches of oil to 350°F and fry the cornstarch-coated pork cubes for 3-4 minutes until golden. The baked method is used here to reduce oil and let you manage the sauce simultaneously, not because it produces better results.
Why does my sauce taste too sweet or too sour?
Balance is everything in this sauce. The formula is roughly 2 parts sweet to 1 part sour, but pineapple juice acidity varies by brand and ripeness. Taste the sauce before adding the slurry and adjust — a splash more rice vinegar sharpens it, a teaspoon more honey rounds it out.
Can I use canned pineapple?
Yes — use pineapple packed in juice, not syrup. Syrup-packed pineapple throws off the sweetness balance and makes the sauce sticky rather than glossy. Drain thoroughly and use the canning juice as your pineapple juice component.
My pork is tough and chewy. What happened?
Two possibilities: you overcooked it past 165°F, or the pieces were cut too small and dried out in the oven. Pork shoulder is most tender at 145°F internal. Larger cubes — a full inch — retain moisture better. Small uneven pieces overcook at the edges before the center finishes.
Can I make this ahead of time?
Make the sauce up to 2 days ahead and refrigerate. Sear and bake the pork fresh the day of serving. Combining them too early softens the crust. The sauce actually improves overnight as the flavors meld.

The Science of
Crispy Sweet and Sour Pork (No Greasy Takeout Required)
We turned everything on this page into a beautiful, flour-proof PDF cheat sheet. Print it out, stick it to your fridge, and never mess up your crispy sweet and sour pork (no greasy takeout required) again.
*We'll email you the high-res PDF instantly. No spam, just perfectly cooked meals.
AlmostChefs Editorial Team
We translate the internet's most popular cooking videos into foolproof, beginner-friendly written recipes. We analyze multiple methods, test them in our kitchen, and engineer a single "Master Recipe" that gives you the best possible result with the least possible stress.