Easy Stuffed Peppers (Cheesy, Saucy, No Undercooked Centers)
Five bell peppers loaded with seasoned ground beef, pre-cooked rice, and a two-cheese blend, baked in a tomato-broth steam bath. The par-cook step is the one most home cooks skip — it is also the reason most stuffed peppers arrive at the table with a raw, crunchy pepper wall.
“Stuffed peppers look finished when they come out of the oven. Bite into one that skipped the par-cook step and the pepper wall is still half-raw — firm, slightly bitter, and structurally out of sync with the tender filling inside. The solution is three minutes in boiling water before anything else. That single step is the entire gap between a recipe that works and one that disappoints.”
Why This Recipe Works
Stuffed peppers are a test of simultaneous doneness — getting a vegetable shell, a seasoned meat-and-grain filling, and a cheese topping to all finish at the same time, in the same dish, without the filling drying out or the pepper going to mush. Most versions fail at one of two points: the pepper is undercooked, or the filling is overcooked. This recipe fixes both problems at the source.
The Par-Cook Is the Whole Technique
Bell peppers are dense-walled vegetables with a relatively high water content. At 375°F in a covered baking dish, a raw bell pepper takes 45–55 minutes to fully soften. The filling — pre-cooked rice plus browned ground beef — needs approximately 35 minutes of covered baking to meld and heat through without drying. Those timelines do not align, and there is no easy way to extend the covered bake without overcooking the filling.
The par-cook solves this by manipulating the pepper's starting point. Three minutes in boiling water partially denatures the cell walls of the pepper, reducing the baking time needed for the vegetable to finish. Now the pepper reaches optimal tenderness in approximately the same window as the filling. They cross the finish line together.
The exact time matters. Two minutes and the par-cook is mostly theatrical — not enough heat penetration. Five minutes and the pepper begins to lose structural integrity, meaning it will not hold its cup shape under the weight of the filling. Three minutes is the working number, and it is supported by the physics of heat transfer through a vegetable wall of this thickness.
Why Pre-Cooked Rice Is Non-Negotiable
Rice inside a stuffed pepper operates in a moisture-limited environment. The filling has some liquid — tomato sauce and residual fat from the beef — but not enough to fully hydrate raw rice from the inside. Starch granules in raw rice need to absorb approximately their weight in water and sustain temperatures above 180°F for several minutes to gelatinize fully. The filling does not provide enough of either.
The result of raw rice in a stuffed pepper filling is predictable: swollen exterior, hard chalky center, uneven texture throughout. Pre-cooked rice, by contrast, has already completed its starch gelatinization. Inside the pepper, it is absorbing flavors — the Worcestershire, the smoked paprika, the residual beef fat — rather than trying to cook. Day-old rice is ideal here. It is drier than freshly cooked, which means it soaks up the tomato sauce more aggressively and contributes to a cohesive texture rather than a loose, wet one.
The Two-Phase Bake
The covered phase and the uncovered phase serve completely different functions, and both are necessary.
During the covered 35-minute phase, the foil creates a sealed steam environment. The tomato sauce and beef broth in the bottom of the dish vaporize and circulate around the pepper cups. This steam is what finishes softening the pepper walls from the outside while the internal filling heats through evenly from the inside. Remove the foil early and you lose that steam — the filling dries before the peppers are done.
The uncovered 10–13 minute phase is pure surface chemistry. Cheese needs dry radiant heat to melt, bubble, and begin to brown at the edges. Under foil, cheese just melts into a flat, pale layer. Exposed to the oven's convective heat, the milk proteins and fats in the cheddar and mozzarella undergo Maillard reactions at the surface, producing the golden, slightly caramelized patches that signal the dish is finished.
The ratio of the two cheeses is deliberate. Aged cheddar has a high concentration of glutamates — the compounds responsible for savory depth — but it melts into a greasy, separated layer when overheated. Mozzarella is high in moisture and casein proteins that produce the stretchy, brownable melt. Combined 2:1, you get the flavor of cheddar with the visual and textural behavior of mozzarella. Neither cheese alone does both jobs.
Browning the Beef Correctly
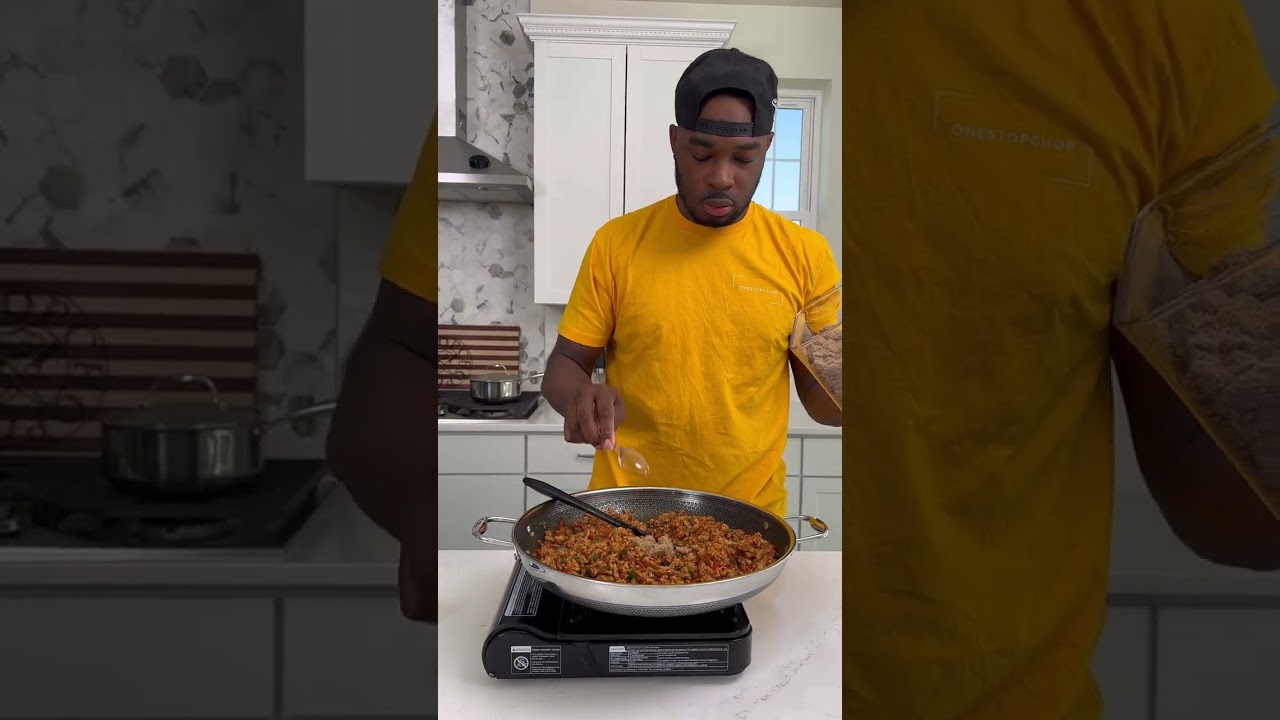
The filling's flavor is built in the skillet, not the oven. Ground beef at 80/20 fat content has enough fat to achieve a genuine Maillard reaction on the surface — but only if the pan is hot enough and not overcrowded. Steam is the enemy of browning. A wet, overcrowded pan drops below 212°F, and the meat steams gray instead of browning properly. A cast iron skillet provides wide surface area and thermal mass that hold temperature even when cold meat hits the pan. If the skillet is too small, brown the beef in two batches. It is worth the extra five minutes.
Drain the fat completely before adding the rice and sauce. The fat pooling in the filling serves no textural function in a stuffed pepper and will separate and float to the top of each cup during baking, producing an oily surface that affects both texture and cheese adhesion.
The Sauce-to-Broth Ratio in the Pan
Half the tomato sauce goes into the filling. The other half, combined with beef broth, goes into the bottom of the baking dish. This is not decorative. The pan liquid has two functions: it generates the steam for the covered phase, and it becomes the finishing sauce you spoon over each pepper when serving. The broth dilutes the tomato sauce slightly so it does not reduce into a thick, sticky paste during the 48 minutes of total baking time. It should emerge from the oven as a loose, slightly reduced tomato sauce — something with enough body to coat the pepper but thin enough to spoon freely.
Use tomato sauce, not diced tomatoes. Diced tomatoes do not provide enough liquid surface area for efficient steam generation, and the whole tomato chunks add textural randomness to the pan sauce without improving the dish. Sauce is the correct call here, and the reason the recipe specifies it by name rather than leaving the format open to interpretation.
The Rest Period
Five minutes off heat before serving is not a formality. The filling is genuinely molten straight from the oven — loose, soupy at the edges, and unstable. Five minutes of residual carryover heat lets the rice absorb the last of the liquid, the cheese sets from fluid to cohesive, and the whole structure firms up enough to serve cleanly. Cut into a stuffed pepper immediately out of the oven and the filling runs. Wait five minutes and it holds. This is the simplest step in the recipe and the one most often skipped. Do not skip it.
Where Beginners Mess This Up
Before we start, read this. These are the 4 reasons your easy stuffed peppers (cheesy, saucy, no undercooked centers) will fail:
- 1
Skipping the par-cook on the peppers: Raw peppers take significantly longer to soften than the filling takes to cook through. If you skip the 3-minute boil, the filling reaches optimal texture and the cheese hits golden brown while the pepper wall is still crunchy. Par-cooking brings the pepper's starting point in line with the filling's finishing point — they arrive at the same place at the same time.
- 2
Using raw rice in the filling: Raw rice will not fully cook inside a stuffed pepper, even with extended baking. It absorbs moisture from the filling and bloats unevenly, with hard centers and gummy exteriors. Use fully pre-cooked rice — day-old leftover rice works especially well because it is drier and absorbs the filling flavors more efficiently.
- 3
Using diced tomatoes instead of tomato sauce: Diced tomatoes do not provide the surrounding moisture that the peppers need during the covered baking stage. Sauce creates steam inside the foil tent, which simultaneously finishes the pepper walls and keeps the filling moist. Without that liquid environment, the filling dries out before the peppers are done.
- 4
Not draining the fat from the beef: Ground beef releases significant fat during browning. Leaving it in the pan means the filling sits in grease, which pools in the pepper cup during baking and produces an oily, heavy result at the bottom of each pepper. Drain thoroughly before adding rice and sauce.
The Video Reference Library
Want to see it in action? Here are the exact videos we analyzed and combined to build this foolproof recipe translation:
The reference video for this recipe. Demonstrates the par-cook step, filling assembly, and the two-phase bake that delivers golden cheese without dry filling.
🛠️ Core Equipment
- Large oven-safe baking dishNeeds to hold 5 standing pepper cups with room for the sauce and broth surrounding them. A tight fit causes uneven baking — peppers in the center receive more steam than those at the edges.
- Cast iron skillet or large heavy skilletFor browning the beef with onion and garlic. Wide surface area accelerates moisture evaporation, which means better browning and less steaming. A [cast iron skillet](/kitchen-gear/review/cast-iron-skillet) holds heat evenly and allows a genuine sear on the beef rather than gray steaming.
- Stockpot for par-cookingLarge enough to submerge the pepper cups standing upright. If the peppers tip or float sideways, they par-cook unevenly and will not stand straight in the baking dish.
- Aluminum foilThe covered bake is a steam environment. A tight foil seal keeps moisture in contact with the pepper walls for the full 35 minutes, which finishes the vegetable without drying the filling.
Easy Stuffed Peppers (Cheesy, Saucy, No Undercooked Centers)
🛒 Ingredients
- ✦5 medium bell peppers, any color, tops cut off and seeds removed
- ✦1.25 lbs ground beef (80/20)
- ✦2 tablespoons olive oil
- ✦1 medium yellow onion, diced
- ✦3 cloves garlic, minced
- ✦1.5 cups cooked rice (not raw)
- ✦1 can (15 oz) tomato sauce, divided
- ✦0.5 cup low-sodium beef broth
- ✦1.5 cups shredded cheddar cheese
- ✦0.75 cup shredded mozzarella cheese
- ✦1.5 tablespoons Worcestershire sauce
- ✦1 teaspoon ground cumin
- ✦1 teaspoon Italian seasoning
- ✦0.75 teaspoon smoked paprika
- ✦1 teaspoon salt
- ✦0.5 teaspoon black pepper
👨🍳 Instructions
01Step 1
Preheat oven to 375°F. Bring a large pot of salted water to a boil.
02Step 2
Slice the tops off the peppers and remove seeds and membranes. Place peppers upright in the boiling water and par-cook for exactly 3 minutes. Remove and invert on a paper towel to drain.
03Step 3
Heat olive oil in a large skillet over medium-high heat. Add diced onion and cook for 3–4 minutes until softened and translucent.
04Step 4
Add ground beef and minced garlic. Break the beef into small pieces and cook until browned and no pink remains, about 6–8 minutes. Drain excess fat thoroughly.
05Step 5
Reduce heat to medium. Add cooked rice, half the tomato sauce (about 7.5 oz), Worcestershire sauce, cumin, smoked paprika, Italian seasoning, salt, and black pepper. Stir to combine. Cook for 2 minutes until heated through.
06Step 6
Stand the par-cooked peppers upright in the baking dish. Divide the filling evenly among the pepper cups, packing firmly.
07Step 7
Pour the remaining tomato sauce and beef broth into the bottom of the baking dish surrounding the peppers.
08Step 8
Cover tightly with aluminum foil. Bake for 35 minutes.
09Step 9
Remove foil. Combine the cheddar and mozzarella and divide evenly over each pepper. Return to oven uncovered for 10–13 minutes until cheese is melted, bubbling, and beginning to brown at the edges.
10Step 10
Let rest 5 minutes before serving. Spoon some of the tomato-broth pan sauce over each pepper when plating.
Nutrition Per Serving
Estimates based on standard preparation. Adjustments alter macros.
🔄 Substitutions
Instead of Ground beef...
Use Ground turkey or ground chicken
Leaner with less fat to drain. Turkey and chicken brown faster and dry out sooner — do not overcook during the sauté stage. The flavor is milder, so lean into the Worcestershire and smoked paprika.
Instead of Cooked rice...
Use Cooked quinoa or cauliflower rice
Quinoa adds protein and a slightly nuttier flavor. Cauliflower rice reduces carbs significantly but adds more moisture — squeeze it dry before mixing into the filling.
Instead of Cheddar and mozzarella...
Use Pepper jack and Monterey Jack
Pepper jack adds heat that complements the smoked paprika and cumin. Monterey Jack melts very smoothly. Use the same 2:1 ratio.
Instead of Beef broth...
Use Chicken broth or water
The broth's primary function here is creating steam and adding moisture to the pan sauce. Chicken broth works identically. Water works if you are out of both.
🧊 Storage & Reheating
In the Fridge
Store stuffed peppers in an airtight container for up to 4 days. They hold shape well and the flavors deepen overnight as the filling absorbs the tomato and spices.
In the Freezer
Freeze fully cooled peppers individually wrapped in plastic, then placed in a freezer bag for up to 3 months. Freeze without the cheese topping — add fresh cheese when reheating.
Reheating Rules
Reheat covered in a 350°F oven for 20–25 minutes from refrigerated, or 45–50 minutes from frozen. Add a splash of broth to the dish before covering to prevent the filling from drying out. Microwave works in 3-minute bursts covered with a damp paper towel.
❓ Frequently Asked Questions
Why are my stuffed peppers always crunchy?
You skipped or shortened the par-cook step. Three minutes in boiling water before filling and baking brings the pepper to a head start that allows it to finish at the same rate as the filling. Without it, even an hour in the oven at 375°F leaves the pepper walls with noticeable resistance.
Can I use raw rice in the filling?
No. Raw rice will not cook fully inside a stuffed pepper. The available moisture is not enough and the bake time is not long enough. The rice will have hard, chalky centers. Always use fully pre-cooked rice.
Can I make stuffed peppers ahead?
Yes. Assemble the peppers up to 24 hours ahead and refrigerate them unbaked in the baking dish covered tightly with foil. When ready to cook, add 10 minutes to the covered baking time since they are starting cold. Add cheese and bake uncovered as directed.
My peppers keep falling over in the pan. What do I do?
Choose peppers with more lobes for better stability, or trim a thin slice off the bottom of the pepper to create a flat base. Make sure the cut does not go deep enough to create a hole. Peppers can also lean against each other in a tight-fitting baking dish.
Can I use a different color pepper?
Yes. Color affects flavor. Green peppers are slightly bitter and grassy. Red, orange, and yellow peppers are sweeter and more mild. Any color works in this recipe. The cooking time is identical regardless of color.
How do I know when they are done?
The pepper walls should be fully tender when pierced with a fork — no resistance. The cheese should be melted, bubbly, and lightly browned at the edges. The internal temperature of the filling should reach at least 165°F.

The Science of
Easy Stuffed Peppers (Cheesy, Saucy, No Undercooked Centers)
We turned everything on this page into a beautiful, flour-proof PDF cheat sheet. Print it out, stick it to your fridge, and never mess up your easy stuffed peppers (cheesy, saucy, no undercooked centers) again.
*We'll email you the high-res PDF instantly. No spam, just perfectly cooked meals.
AlmostChefs Editorial Team
We translate the internet's most popular cooking videos into foolproof, beginner-friendly written recipes. We analyze multiple methods, test them in our kitchen, and engineer a single "Master Recipe" that gives you the best possible result with the least possible stress.