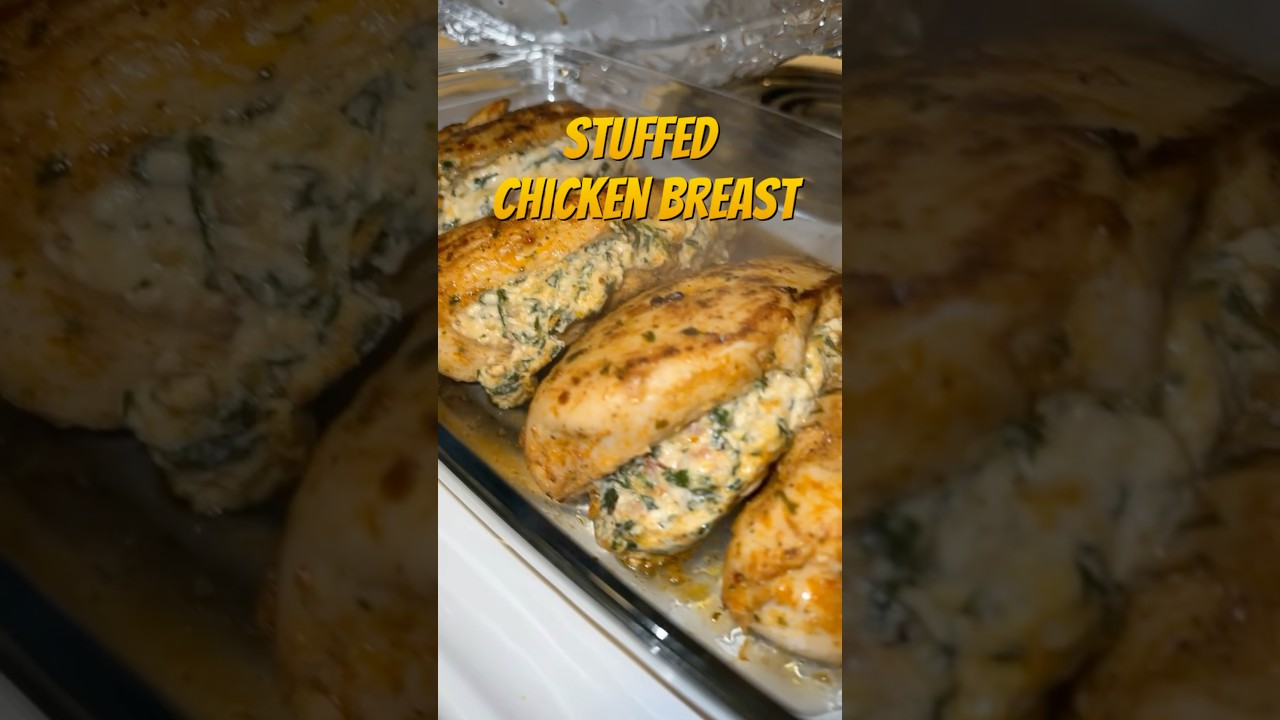
Crispy Stuffed Chicken Breast (The Filling Never Falls Out)
Tender chicken breasts packed with wilted spinach, melted mozzarella, and Parmesan, seared until golden and finished in the oven with a simple pan sauce. We broke down the technique so the pocket stays sealed, the filling stays inside, and the exterior actually browns instead of steaming.
“Stuffed chicken breast has a reputation problem. Most versions produce a soggy exterior, filling that leaks everywhere, and dry meat that needed another 10 minutes or should have come out 5 minutes earlier. The technique failures are predictable and fixable. Dry the chicken. Cook the moisture out of the filling before it goes in. Sear hot and fast. Finish in the oven. Four steps. Zero excuses.”
Why This Recipe Works
Stuffed chicken breast is deceptively simple on paper and consistently botched in practice. The gap between the idea and the result usually comes down to three decisions made before the chicken ever touches heat: how dry the filling is, how dry the exterior is, and how you manage the transition from sear to oven. Get those three things right and the rest of the recipe practically runs itself.
The Moisture Problem
Spinach is mostly water. Fresh spinach leaves are approximately 91% water by weight, which means a 2-cup loosely packed handful collapses to a few tablespoons of dense, concentrated leaf material once the water has cooked off. This is not a problem — it's the goal. The problem is stopping too early.
Most home cooks pull the spinach off heat when it looks wilted. Wilted and dry are not the same thing. Wilted spinach still carries significant water that will release the moment it enters a hot pocket surrounded by proteins that are contracting and squeezing. The result is a steamed interior, a soggy filling, and a breast that weeps liquid onto the baking dish instead of roasting. Cook the spinach past the point where you'd normally stop. The pan should look completely dry. The leaves should be dense, almost sticky. Then go one more minute.
The same logic applies to the onion. Translucent onion still contains water. Softened, slightly golden onion has lost most of it. The 4-minute sauté time is a minimum, not a target.
The Sear Problem
Chicken breast is white meat with almost no intramuscular fat. This means it browns slowly and steams easily. Moisture on the surface — whether from the package or from a wet filling that's started leaking — creates a steam barrier between the meat and the pan. Steam cannot generate the Maillard reaction. You get gray, slightly rubbery exterior instead of a golden crust.
Paper towels take 10 seconds. Use them. Pat every surface of every breast until the towels come away dry. Then season immediately before the surface has a chance to re-wet from the interior.
A cast iron skillet holds heat better than stainless steel and distributes it more evenly than thin aluminum. When cold chicken hits the pan, the pan temperature drops. A well-seasoned cast iron recovers faster, which means your sear continues rather than stalling into a steam. If you have one, use it. If you don't, a heavy stainless pan is the next best option.
The Pocket Architecture
The horizontal cut is where most people either under-commit or over-commit. Under-commit and you get a shallow slot that holds a tablespoon of filling and tears open immediately. Over-commit and you breach the other side, creating a through-hole that filling escapes from regardless of how many toothpicks you use.
The target: three-quarters of the way through the thickest part of the breast, angled slightly toward the thinner end, stopping well before the edges. The pocket should open to about 3 to 4 inches wide when you press the breast flat. Fill it, compress it gently so the filling is dense and even, and secure the opening with two toothpicks positioned diagonally — not parallel to the seam, where they slide out, but angled across it.
The Oven Finish
The sear-to-oven method exists because you cannot fully cook the interior of a stuffed breast by stovetop heat alone without destroying the crust. A closed oven at 375°F delivers even, ambient heat that penetrates to the center without continuing to drive color on the exterior. Twelve to fifteen minutes is typically enough, but breast size varies enough that a meat thermometer is the only reliable way to know when you're done. One hundred sixty-five degrees, measured in the thickest part of the meat, not the filling.
The broth poured around the chicken before it goes into the oven does two things: it prevents the pan drippings from burning onto the surface (which would make the eventual pan sauce bitter), and it creates a slightly humid oven environment that keeps the exposed surfaces from drying out. Pour it around the chicken, never over it — you want steam, not a braising liquid.
Rest for three minutes before plating. The internal temperature continues rising slightly after the oven, and the juices redistribute into the muscle fibers. Cut immediately and those juices end up on the cutting board. Wait three minutes and they stay where they belong.
Where Beginners Mess This Up
Before we start, read this. These are the 4 reasons your crispy stuffed chicken breast (the filling never falls out) will fail:
- 1
Wet filling going into the pocket: Spinach contains enormous amounts of water. If you don't cook it down completely — until the pan is dry and the leaves have collapsed to a quarter of their original volume — that water releases inside the chicken during baking, steaming the interior instead of roasting it. Cook the spinach until you'd call it overdone, then go one more minute.
- 2
Skipping the pat-dry step: Surface moisture is the enemy of browning. Chicken breasts pulled straight from the package carry significant surface liquid. A wet exterior creates steam in the pan, and steam prevents the Maillard reaction. You get gray, leathery skin instead of a golden crust. Two passes with paper towels takes 10 seconds and matters enormously.
- 3
Cutting the pocket too deep: Slice too far and you breach the opposite side of the breast. The filling has nowhere to go but out. The pocket should be a deep envelope — cut three-quarters of the way through the thickest part, angled slightly toward the thinner end. Test by pressing the breast flat: it should open like a book without tearing.
- 4
Skipping the toothpicks: The pocket opens during searing as the proteins contract. Without toothpicks securing the opening, the filling spills into the pan, burns, and the breast loses its structural integrity. Two toothpicks per breast, positioned diagonally across the opening. Remove them before serving — someone always forgets.
The Video Reference Library
Want to see it in action? Here are the exact videos we analyzed and combined to build this foolproof recipe translation:
Covers the pocket-cutting technique and the sear-to-oven method in clear detail. Particularly useful for visualizing how much spinach volume to expect after cooking down.
🛠️ Core Equipment
- Oven-safe skilletYou need to go from stovetop sear to oven finish without transferring the chicken — movement disturbs the toothpicks and risks losing the filling. A [cast iron skillet](/kitchen-gear/review/cast-iron-skillet) or stainless steel pan handles both phases without complaint.
- Instant-read meat thermometerChicken breast is unforgiving. Five degrees past 165°F and it starts drying out rapidly. An [instant-read thermometer](/kitchen-gear/review/meat-thermometer) takes the guesswork out completely — insert into the thickest part, away from the filling.
- ToothpicksNon-negotiable. The pocket must be secured before the chicken hits the hot pan. Standard flat toothpicks work; avoid round ones that roll and slip. Count them in, count them out.
- Paper towelsFor drying the chicken surface before seasoning and searing. This single step is responsible for at least 80% of the crust quality difference between home cooking and restaurant output.
Crispy Stuffed Chicken Breast (The Filling Never Falls Out)
🛒 Ingredients
- ✦4 boneless, skinless chicken breasts, about 6 to 8 ounces each
- ✦2 cups fresh spinach, roughly chopped
- ✦3/4 cup part-skim mozzarella cheese, shredded
- ✦1/4 cup grated Parmesan cheese
- ✦2 cloves garlic, minced
- ✦1/2 cup panko breadcrumbs
- ✦1/4 cup unsalted chicken broth
- ✦2 tablespoons extra virgin olive oil
- ✦1 medium yellow onion, finely diced
- ✦1/2 teaspoon dried Italian seasoning
- ✦1/4 teaspoon red pepper flakes
- ✦1 large egg white
- ✦Sea salt and freshly ground black pepper to taste
- ✦1 tablespoon fresh lemon juice
- ✦2 tablespoons fresh basil, finely chopped
- ✦1/2 cup low-sodium vegetable broth for pan sauce
👨🍳 Instructions
01Step 1
Preheat your oven to 375°F.
02Step 2
Warm 1 tablespoon olive oil in a large oven-safe skillet over medium-high heat. Add the diced onion and sauté until softened and translucent, about 4 minutes.
03Step 3
Add the minced garlic and cook until fragrant, about 1 minute.
04Step 4
Add the chopped spinach and cook, stirring frequently, until the moisture has completely evaporated and the spinach is fully wilted and dry, about 3 minutes.
05Step 5
Remove the spinach mixture from heat and cool for 5 minutes. Fold in the mozzarella, Parmesan, panko breadcrumbs, egg white, Italian seasoning, red pepper flakes, and lemon juice until fully combined.
06Step 6
Pat each chicken breast thoroughly dry with paper towels on both sides. Lay flat on a cutting board and slice horizontally through the thickest part, cutting three-quarters of the way through to create a deep pocket.
07Step 7
Spoon approximately 3 tablespoons of filling into each pocket, pressing gently to distribute evenly. Secure the opening with 2 toothpicks per breast, angled diagonally across the seam.
08Step 8
Season the exterior of each stuffed breast generously with sea salt and black pepper on both sides.
09Step 9
Heat the remaining 1 tablespoon olive oil in the same skillet over medium-high heat until shimmering. Carefully place the stuffed breasts into the pan and sear without moving for 4 to 5 minutes until a deep golden-brown crust forms on the bottom.
10Step 10
Flip each breast carefully and sear the other side for another 4 to 5 minutes until golden brown.
11Step 11
Pour the vegetable broth around (not over) the chicken, then transfer the entire skillet to the preheated oven.
12Step 12
Bake for 12 to 15 minutes until an instant-read thermometer inserted into the thickest part reads 165°F.
13Step 13
Remove from the oven and rest in the pan for 3 minutes. Remove toothpicks, transfer to plates, and spoon pan juices over the top. Finish with fresh basil.
Nutrition Per Serving
Estimates based on standard preparation. Adjustments alter macros.
🔄 Substitutions
Instead of Panko breadcrumbs...
Use Finely grated almonds or crushed walnuts
Makes the dish fully gluten-free. Adds a nuttier flavor and slightly crunchier texture. The binding is slightly weaker — add an extra egg white if the filling seems loose.
Instead of Part-skim mozzarella and Parmesan...
Use Ricotta mixed with grated Pecorino Romano
Creamier, tangier filling with lower saturated fat. Use a 3:1 ratio of ricotta to Pecorino. The filling will be softer — refrigerate it for 15 minutes before stuffing so it holds its shape.
Instead of Egg white...
Use 1 tablespoon Greek yogurt
Slightly tangier flavor, creamier texture. Works well as a binder. Full-fat yogurt provides the best cohesion.
Instead of Fresh spinach...
Use Chopped kale or Swiss chard
Earthier, more robust flavor. Kale needs an extra minute of cook time to fully wilt. Strip the stems before chopping — they stay tough even with extended cooking.
🧊 Storage & Reheating
In the Fridge
Store in an airtight container for up to 3 days. Reheat gently — aggressive heat dries the breast out fast.
In the Freezer
Freeze cooked and cooled breasts individually wrapped for up to 2 months. Thaw overnight in the fridge before reheating.
Reheating Rules
Add 2 tablespoons of water or broth to a covered skillet over low heat. Reheat for 8 to 10 minutes until warmed through. Microwave works in a pinch but sacrifices the crust.
❓ Frequently Asked Questions
Why does my filling keep leaking out during cooking?
Two causes: filling that was too wet going in, or toothpicks placed too far apart. Cook the spinach until the pan is completely dry before mixing the filling. Use two toothpicks per breast, angled diagonally and positioned close to the opening edge.
Can I prep these ahead of time?
Yes. Stuff and secure the breasts, then refrigerate uncovered on a rack for up to 4 hours before cooking. The surface dries out slightly in the fridge, which actually improves the sear. Season just before they hit the pan.
My chicken is golden on the outside but still raw inside after searing — what happened?
The pan was too hot. A very high sear browns the exterior rapidly while the interior stays cold. Medium-high — where the oil shimmers but doesn't smoke — is the target. The oven finish is what fully cooks the interior, so the sear is only about crust, not doneness.
Do I need an oven-safe skillet?
You need something that goes from stovetop to oven without transferring the chicken. Cast iron or stainless steel are ideal. If you only have a non-oven-safe pan, sear in that, then transfer to a baking dish with the broth — you'll lose some of the crust quality but the result is still solid.
Can I use frozen spinach?
Yes, but squeeze every drop of water out of it before cooking — frozen spinach holds significantly more water than fresh. Thaw, then press it in a clean kitchen towel until no more liquid comes out. Skip the stovetop wilting step; just sauté with the onion and garlic for 2 minutes to heat through.
How do I know the pocket is the right depth?
Press the breast flat and open it. It should open 3 to 4 inches wide and hold that shape without springing closed. If it snaps shut, cut slightly deeper. If it tears at the thin end, you've gone too far — use toothpicks aggressively on that breast and handle it gently.

The Science of
Crispy Stuffed Chicken Breast (The Filling Never Falls Out)
We turned everything on this page into a beautiful, flour-proof PDF cheat sheet. Print it out, stick it to your fridge, and never mess up your crispy stuffed chicken breast (the filling never falls out) again.
*We'll email you the high-res PDF instantly. No spam, just perfectly cooked meals.
AlmostChefs Editorial Team
We translate the internet's most popular cooking videos into foolproof, beginner-friendly written recipes. We analyze multiple methods, test them in our kitchen, and engineer a single "Master Recipe" that gives you the best possible result with the least possible stress.