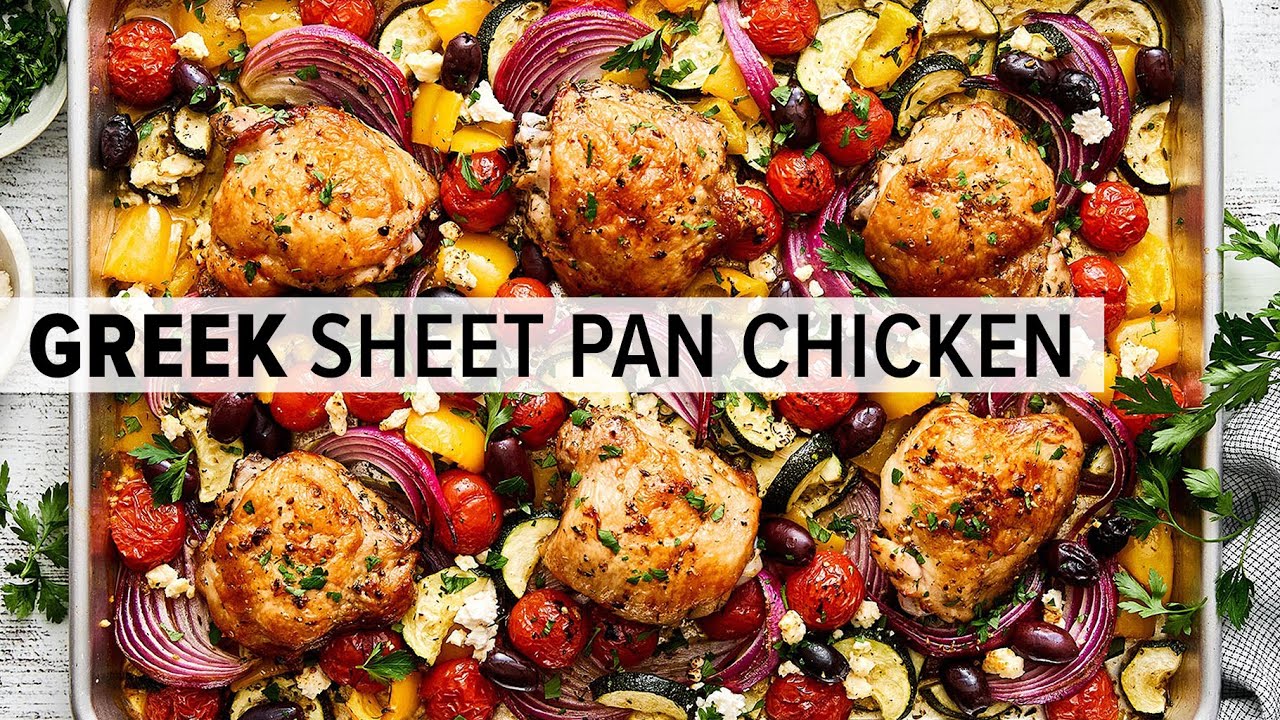
The Best Sheet Pan Chicken (One Pan, Zero Excuses)
Herb-marinated chicken breasts or thighs roasted alongside caramelized vegetables on a single pan, finished with a balsamic-honey glaze. We broke down the most common one-pan failures to give you the technique that produces crispy-edged vegetables and juicy chicken every single time.
“Sheet pan dinners get a bad reputation for producing soggy vegetables and rubbery chicken at the same time. The culprit is almost always the same: too much food on one pan, wrong temperature, or vegetables added all at once instead of in stages. Fix those three things and you have the easiest weeknight dinner in your rotation — crispy edges, juicy meat, and a single pan to clean.”
Why This Recipe Works
Sheet pan chicken is deceptively simple, which is exactly why most people get it wrong. The technique requires almost no skill — but it requires understanding three physical processes happening simultaneously in a 425-degree oven, and what happens when any one of them goes wrong.
The Overcrowding Problem
A standard 9x13 baking dish is inadequate for four servings of sheet pan chicken. The math is straightforward: 1.75 pounds of chicken plus a pound of potatoes plus three cups of vegetables in that footprint means everything is touching, and everything is touching means steam. At high oven temperatures, crowded vegetables release moisture faster than it can evaporate. The pan fills with liquid. Everything braises. You end up with soft, waterlogged vegetables and chicken that tastes like it was poached — technically cooked, fundamentally disappointing.
The solution is a proper half-sheet pan — 18 inches by 13 inches, rimmed to catch drippings. Everything gets an inch of space. Moisture evaporates as fast as it's released. The Maillard reaction proceeds normally and you get the caramelized edges that are the entire point of roasting.
The Staggered Addition
Not all vegetables are created equal, and a recipe that treats them as if they are will always produce a mixed result. Baby potatoes need 25-30 minutes to cook through at 425°F. Zucchini and bell peppers need 12-15. Asparagus needs 10. If you add them to the pan simultaneously, either the potatoes are still hard when everything else is done or the tender vegetables have collapsed into mush by the time the potatoes finish.
The fix is staging: dense vegetables go in first, delicate ones halfway through. This is not a complicated technique — it's a 30-second task at the 15-minute mark. The reward is every component finishing at the same time in the same window of ideal texture.
The Dry Chicken Rule
Raw chicken held in the refrigerator accumulates surface moisture. That moisture, if not removed before roasting, converts to steam on contact with hot air — and steam is the opposite of browning. The Maillard reaction requires dry surface proteins and temperatures above 280°F. Surface moisture drops the effective surface temperature significantly and prevents the reaction from starting until the moisture evaporates. By then, the exterior is often overcooked trying to compensate.
Paper towels and 30 seconds solve this entirely. Pat every surface. The result is golden, slightly crisp exterior instead of pale, leathery skin.
The Glaze Timing
Balsamic vinegar contains natural sugars that caramelize beautifully — but at 425°F, they carbonize. Added before roasting, the glaze burns black before the chicken is halfway cooked. Added halfway through, it still has too much direct heat exposure. The correct application is immediately after pulling from the oven: the residual heat of the pan (which holds temperature for several minutes after leaving the oven) caramelizes the glaze without burning it. A sheet pan with good thermal mass makes this work — thin, cheap pans cool too fast to finish the job.
The Rest
Five minutes of resting is not a suggestion. During high-heat roasting, the muscle fibers in the chicken contract and push moisture toward the center of the meat. Cutting immediately releases that pooled liquid onto the cutting board — not into your mouth. Resting allows the fibers to relax and reabsorb the juices evenly throughout the meat. The difference is measurable: rested chicken loses roughly half the juice of chicken cut immediately. This applies to every protein at every scale. Five minutes costs nothing.
Where Beginners Mess This Up
Before we start, read this. These are the 4 reasons your the best sheet pan chicken (one pan, zero excuses) will fail:
- 1
Overcrowding the pan: This is the number-one sheet pan failure. When vegetables are crammed together, they trap steam and braise instead of roast. You get limp, waterlogged zucchini and pale potatoes instead of caramelized edges. Everything needs an inch of breathing room. If your pan isn't large enough, use two.
- 2
Adding all vegetables at the same time: Potatoes take 25-30 minutes to roast through. Zucchini takes 12. Bell peppers take 15. If you add them simultaneously, something is always overcooked while something else is still raw. Stage the additions based on cook time — dense vegetables first, tender ones halfway through.
- 3
Skipping the pat dry on chicken: Surface moisture on chicken is the enemy of browning. It creates steam that prevents the Maillard reaction from happening — you get steamed chicken skin instead of the golden, slightly crisp exterior that locks in juices. Paper towels cost nothing. Use them.
- 4
Pulling the chicken at the wrong temperature: 165°F is the USDA minimum, but 160°F with a 5-minute rest carries over to safe temperature while keeping the meat noticeably juicier. An instant-read thermometer is the only reliable method. Cutting in to check is not — every cut bleeds juice you're not getting back.
The Video Reference Library
Want to see it in action? Here are the exact videos we analyzed and combined to build this foolproof recipe translation:
The source video for this recipe's method. Covers the staggered vegetable approach and explains the balsamic glaze timing in detail.
🛠️ Core Equipment
- Large rimmed sheet pan (18x13-inch half sheet)Surface area is everything. A standard 9x13 pan is too small for 4 servings and will cause overcrowding and steaming. The rim prevents pan juices from spilling in the oven.
- Instant-read thermometerThe only accurate way to pull chicken at exactly the right temperature. Guessing by color or timing costs you either safety or moisture — neither is acceptable.
- Parchment paperPrevents sticking and makes the glaze easy to manage. Foil works but can bond to the chicken skin during roasting if juices evaporate. Parchment doesn't.
- Two mixing bowlsYou need to season the chicken and the vegetables separately with different amounts of oil and seasoning. One bowl means uneven seasoning distribution.
The Best Sheet Pan Chicken (One Pan, Zero Excuses)
🛒 Ingredients
- ✦1.75 pounds boneless, skinless chicken breasts or thighs, patted dry
- ✦4 tablespoons extra virgin olive oil, divided
- ✦5 cloves garlic, minced
- ✦3 tablespoons fresh lemon juice
- ✦1.5 teaspoons kosher salt, divided
- ✦0.75 teaspoon freshly ground black pepper, divided
- ✦1.5 teaspoons dried Italian seasoning
- ✦0.75 teaspoon smoked paprika
- ✦1 pound baby potatoes, halved
- ✦1 medium yellow onion, thickly sliced
- ✦3 cups mixed vegetables (bell peppers, zucchini, broccoli florets, asparagus spears), cut into 1.5-inch pieces
- ✦1.5 tablespoons balsamic vinegar
- ✦1 tablespoon raw honey or pure maple syrup
- ✦Zest of 1 lemon, for garnish
👨🍳 Instructions
01Step 1
Preheat your oven to 425°F and line a large sheet pan with parchment paper.
02Step 2
Pat the chicken completely dry with paper towels on all surfaces.
03Step 3
Whisk together 3 tablespoons of olive oil, minced garlic, lemon juice, 1 teaspoon of salt, 0.5 teaspoon of pepper, Italian seasoning, and smoked paprika in a small bowl.
04Step 4
Place the chicken in the center of the prepared sheet pan and rub the herb-lemon marinade evenly over all surfaces.
05Step 5
In a separate bowl, toss the halved potatoes and sliced onions with the remaining 1 tablespoon of olive oil, 0.5 teaspoon of salt, and 0.25 teaspoon of pepper.
06Step 6
Arrange the potatoes and onions around the perimeter of the sheet pan with at least an inch of space between each piece. Do not pile them.
07Step 7
Roast for 15 minutes until the chicken begins to develop color and the potatoes start to soften.
08Step 8
Remove the pan and add the mixed vegetables, tossing them gently with the accumulated pan juices. Redistribute everything to maintain spacing.
09Step 9
Return to the oven and roast for another 12-15 minutes until the chicken registers 160°F on an instant-read thermometer at its thickest point.
10Step 10
While the pan finishes, whisk together the balsamic vinegar and honey in a small cup.
11Step 11
Remove the pan from the oven and immediately drizzle the balsamic-honey glaze over the entire pan.
12Step 12
Let the chicken rest directly on the pan for 5 minutes before serving.
13Step 13
Garnish with fresh lemon zest and serve directly from the pan.
Nutrition Per Serving
Estimates based on standard preparation. Adjustments alter macros.
🔄 Substitutions
Instead of Boneless, skinless chicken breasts...
Use Bone-in, skin-on chicken thighs
Increase total cook time by 5-8 minutes. The extra collagen and fat content makes thighs significantly more forgiving at high heat — harder to overcook, more flavor in the pan juices.
Instead of Baby potatoes...
Use Cauliflower florets or Brussels sprouts
Lower glycemic index, nuttier roasted flavor. Cauliflower takes about the same time as potatoes. Brussels sprouts cook faster — add them with the mixed vegetables in step 8, not at the start.
Instead of Dried Italian seasoning...
Use Fresh rosemary, thyme, and oregano sprigs
Use 3x the volume of fresh versus dried. Strip the leaves from woody stems before adding — the bare stems can be placed under the chicken to elevate it slightly and impart flavor.
Instead of Honey or maple syrup...
Use Balsamic reduction or omit entirely
The glaze becomes purely savory without the sweetener. The balsamic alone caramelizes beautifully from residual heat. Not a compromise — just a different flavor profile.
🧊 Storage & Reheating
In the Fridge
Store in an airtight container for up to 4 days. Keep the chicken and vegetables together — the accumulated juices continue to flavor everything overnight.
In the Freezer
Freeze chicken portions only for up to 2 months. Roasted vegetables do not freeze well — they turn waterlogged when thawed. Freeze the protein, roast fresh vegetables when reheating.
Reheating Rules
Spread on a sheet pan and reheat at 375°F for 10-12 minutes. Microwave reheating steams everything back to the soggy state you worked to avoid.
❓ Frequently Asked Questions
Why are my vegetables soggy instead of roasted?
One of three things: the pan is overcrowded (needs at least 1 inch of space between pieces), the oven temperature is too low (minimum 425°F), or you added tender vegetables too early. Dense vegetables like potatoes go in first; quick-cooking vegetables like zucchini and asparagus go in halfway through.
Can I prep this the night before?
Yes, with one caveat. You can marinate the chicken overnight in the refrigerator — the flavors deepen significantly. Cut the vegetables and store them separately. Do not assemble the pan until you're ready to roast, or the vegetables will release moisture and the chicken will steam.
Do I need to flip the chicken halfway through?
No. With the marinade coating and parchment paper, the bottom side self-bastes in the pooling pan juices. Flipping interrupts the crust formation on top. Leave it alone.
My chicken is done before the vegetables. What went wrong?
Either the chicken pieces were thin (breasts under 1 inch thick cook in 18-20 minutes at 425°F) or the potato pieces were cut too large. Slice potatoes no thicker than 3/4 inch and cut breasts to even thickness by butterflying if necessary.
Can I use frozen vegetables?
Technically yes, but thaw and pat them completely dry first. Frozen vegetables carry significant surface moisture that will steam everything on the pan. Even then, they tend to produce softer results than fresh. Fresh vegetables at high heat will always outperform frozen.
What temperature should I actually pull the chicken?
160°F at the thickest point with a 5-minute rest. The carryover cooking during rest brings it to the USDA-safe 165°F while keeping the meat noticeably juicier than if you pull it at 165°F directly. An instant-read thermometer is not optional — it's the only tool that answers this question accurately.

The Science of
The Best Sheet Pan Chicken (One Pan, Zero Excuses)
We turned everything on this page into a beautiful, flour-proof PDF cheat sheet. Print it out, stick it to your fridge, and never mess up your the best sheet pan chicken (one pan, zero excuses) again.
*We'll email you the high-res PDF instantly. No spam, just perfectly cooked meals.
AlmostChefs Editorial Team
We translate the internet's most popular cooking videos into foolproof, beginner-friendly written recipes. We analyze multiple methods, test them in our kitchen, and engineer a single "Master Recipe" that gives you the best possible result with the least possible stress.