Crispy Sautéed Green Beans (20-Minute Side Dish Masterclass)
Fresh green beans sautéed in olive oil with garlic, lemon, and toasted almonds — a restaurant-quality vegetable side that comes together in under 25 minutes. We broke down what actually makes green beans crisp-tender instead of soggy and built one foolproof technique around it.
“Green beans are the most underestimated vegetable in any kitchen. Done wrong, they're the limp, grey pile that nobody touches. Done right — snapping with that papery char on the edges, hit with garlic and lemon — they disappear before anything else on the table. The difference is not a better recipe. It's understanding two things: dry beans and a hot pan.”
Why This Recipe Works
Green beans do not need saving. They need to be left alone long enough to do what they're capable of — which is developing a papery, slightly blistered exterior while staying snappy at the core. The entire failure mode of this dish is cooks who are too helpful: too much stirring, too much liquid, too much heat management. Sautéed green beans reward restraint.
The Dry Bean Principle
This is the only thing that matters and it's the one step most people skip. After rinsing, every green bean carries a thin film of surface water. When those wet beans hit a 375-degree pan, the water flash-evaporates, the pan temperature drops 40-50 degrees in seconds, and you've accidentally built a steam environment inside your skillet. The beans cook — but they don't brown. They turn army green and soft within minutes, which is exactly what you didn't want.
A clean kitchen towel and 90 seconds of patting dry is the entire solution. Dry surface equals immediate Maillard reaction. The oil stays hot. The exterior of the bean chars lightly before the interior cooks through. That's the textural contrast that makes the dish worth eating.
The Pan Temperature Problem
A cold pan is the second-most common failure point. Oil takes time to reach sautéing temperature, and most home cooks add the aromatics before it's ready. You can test it without a thermometer: add a drop of water to the oil. If it sizzles aggressively and evaporates in under two seconds, the pan is ready. If it just sits there, wait.
A large stainless steel or cast iron skillet retains heat when cold beans hit the surface. Non-stick pans have lower heat ceilings and drop temperature more dramatically under load. This is a case where the right pan materially changes the result — stainless steel or cast iron gives you browning; non-stick gives you steaming with the illusion of sautéing.
The Garlic Timing Window
Garlic is volatile. Its pungent sulfur compounds — the ones responsible for its characteristic heat and depth — break down quickly at high temperature. At medium-high heat, raw minced garlic goes from raw and sharp to golden and nutty in about 90 seconds. At 2 minutes, it's bitter. At 3 minutes, it tastes burnt regardless of how it looks.
The sequence here is deliberate: onion first for 3-4 minutes until translucent, garlic for exactly one minute until fragrant, then beans immediately. The onion acts as a buffer — it absorbs heat and moderates the pan temperature so the garlic doesn't scorch on contact. Skip the onion and go straight to garlic, and you need to lower the heat, which costs you the browning on the beans. Every step in this recipe exists to solve a downstream problem.
The Acid-at-the-End Rule
Lemon juice goes in during the last two minutes of cooking, not the first. Acid added early breaks down the cell walls of vegetables faster, turning them soft and dull-colored before the browning can develop. Added at the end, it does what it's supposed to do: cut through the richness of the olive oil, brighten the garlic, and give the dish a clean finish that makes it feel lighter than it is.
The lemon zest goes on after the heat is off. Citrus zest contains aromatic essential oils that evaporate within seconds of hitting a hot surface. Cold zest on warm beans means you actually taste the lemon. Hot zest on hot beans means you taste nothing.
The Almond Question
Toasted almonds on green beans is a French bistro move — haricots verts amandine — and it works because the crunch and fat of the nut contrasts directly with the vegetal brightness of the bean. The key word is toasted. Raw almonds from the bag are bland and slightly chalky. Three minutes in a dry pan over medium heat with constant shaking turns them golden and aromatic. The flavor difference is not subtle.
This dish takes 22 minutes from the moment you pick up a knife. In that window, it produces something that outperforms 90% of restaurant vegetable sides. The technique is the recipe.
Where Beginners Mess This Up
Before we start, read this. These are the 4 reasons your crispy sautéed green beans (20-minute side dish masterclass) will fail:
- 1
Putting wet beans in the pan: Water is the enemy of browning. Any moisture clinging to the beans after washing converts immediately to steam in the pan, dropping the surface temperature below the Maillard threshold. The beans stew in their own liquid instead of developing a caramelized edge. Pat them completely dry before they go anywhere near heat.
- 2
Crowding the skillet: A 12-inch skillet holds exactly 1.5 pounds of green beans — if you try to fit more, you've built a steamer, not a sauté pan. Crowded beans trap moisture, lower the pan temperature, and cook unevenly. Use the largest skillet you own or cook in two batches.
- 3
Adding garlic too early: Garlic burns at high heat in under 60 seconds. Adding it before the onions have softened means it scorches before the beans hit the pan, turning bitter and acrid. Always soften the onion first, then add the garlic for exactly one minute before the beans go in.
- 4
Overcooking past tender-crisp: Six to eight minutes over medium-high is the window. The beans should snap when you bite them, with just enough give to signal they're cooked through. Another two minutes and they're soft. Another four and you've got the cafeteria side dish everyone pushes to the edge of the plate.
The Video Reference Library
Want to see it in action? Here are the exact videos we analyzed and combined to build this foolproof recipe translation:
The foundational walkthrough for this method — clear demonstration of the dry-bean technique, proper heat management, and the exact color you're looking for before the lemon goes in.
🛠️ Core Equipment
- Large stainless steel or cast iron skillet (12-inch minimum)Surface area is everything. A large pan keeps beans in a single layer so they sear instead of steam. Stainless steel and cast iron retain heat when cold beans hit the surface — a non-stick pan drops temperature too fast and you lose the browning window.
- Clean kitchen towel or paper towelsFor drying the beans completely after rinsing. This is not optional. Surface moisture is the single biggest reason home sautéed vegetables are disappointing.
- Microplane or fine zesterLemon zest contains the essential oils that lemon juice alone can't deliver. A Microplane removes only the yellow outer layer — avoid the white pith underneath, which is aggressively bitter.
Crispy Sautéed Green Beans (20-Minute Side Dish Masterclass)
🛒 Ingredients
- ✦1.5 pounds fresh green beans, trimmed and halved
- ✦3 tablespoons extra virgin olive oil
- ✦4 cloves garlic, minced
- ✦1 medium yellow onion, thinly sliced
- ✦1/2 teaspoon sea salt
- ✦1/4 teaspoon black pepper
- ✦1/4 teaspoon red pepper flakes
- ✦2 tablespoons fresh lemon juice
- ✦1 tablespoon fresh thyme leaves
- ✦2 tablespoons sliced almonds, toasted
- ✦1 tablespoon nutritional yeast
- ✦Zest of 1 lemon
👨🍳 Instructions
01Step 1
Trim the stem ends from the green beans and rinse them thoroughly under cold water. Pat completely dry with a clean kitchen towel.
02Step 2
Heat the olive oil in a large skillet over medium-high heat until it shimmers, about 2 minutes.
03Step 3
Add the thinly sliced onion and sauté for 3-4 minutes, stirring frequently, until translucent and just beginning to soften.
04Step 4
Stir in the minced garlic and red pepper flakes. Cook for exactly 1 minute until fragrant.
05Step 5
Add the dried green beans to the skillet and toss well to coat with the oil and aromatics.
06Step 6
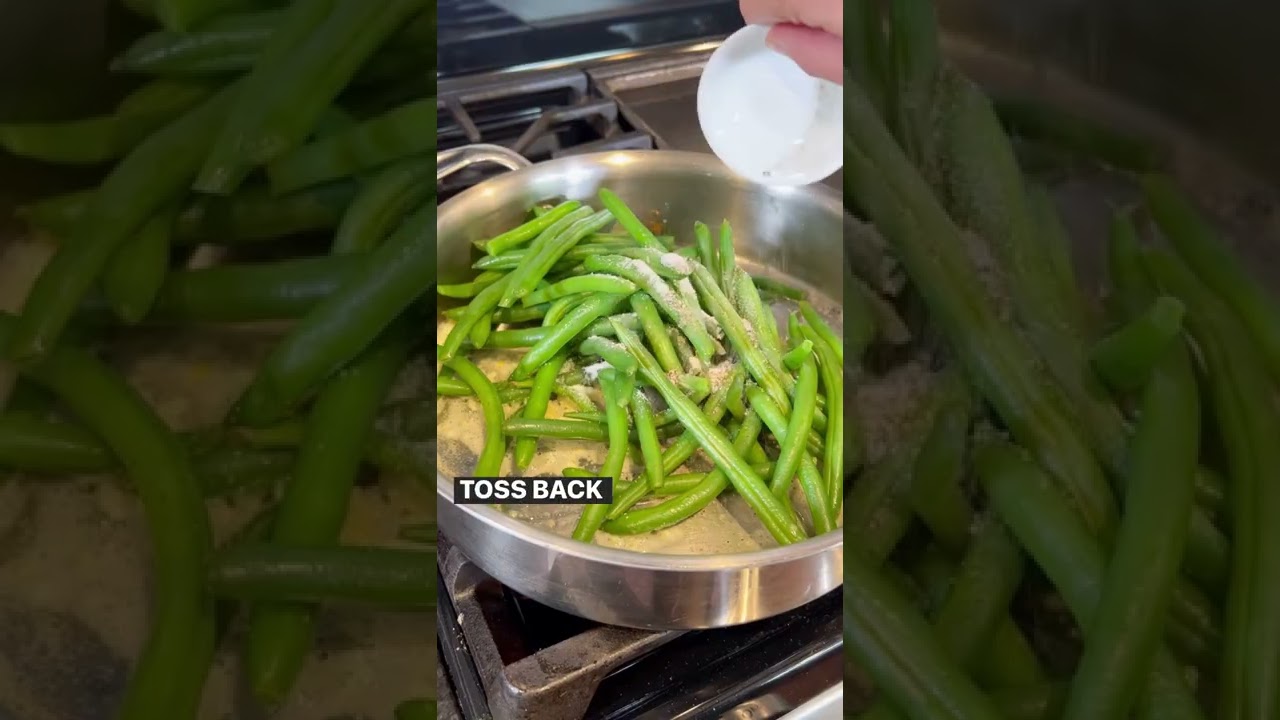
Season with sea salt and black pepper. Sauté over medium-high heat for 6-8 minutes, stirring occasionally, until the beans are tender-crisp with light browning on the edges.
07Step 7
Squeeze the fresh lemon juice over the beans and scatter the thyme leaves across the top.
08Step 8
Toss everything together and cook for 1 more minute to meld the flavors and warm the lemon through.
09Step 9
Transfer to a serving platter. Top with toasted sliced almonds and lemon zest.
10Step 10
Finish with a light sprinkle of nutritional yeast for umami depth and serve immediately.
Nutrition Per Serving
Estimates based on standard preparation. Adjustments alter macros.
🔄 Substitutions
Instead of Extra virgin olive oil...
Use Avocado oil or ghee
Avocado oil keeps it neutral with a higher smoke point. Ghee adds a nutty richness and is excellent if you're not keeping the dish vegan. Both brown the beans equally well.
Instead of Yellow onion...
Use Shallots, finely sliced
Shallots are milder and sweeter — they caramelize faster and add a more refined flavor. Use 3 medium shallots in place of 1 onion.
Instead of Sliced almonds...
Use Sunflower seeds or pumpkin seeds
Maintains the textural contrast. Seeds toast faster than almonds — watch them at 2 minutes in the dry pan. Pumpkin seeds add an earthy, slightly grassy note that works well with lemon.
Instead of Fresh thyme...
Use Fresh dill or Italian parsley
Dill pushes the flavor toward bright and Scandinavian — unusual but excellent. Flat-leaf parsley is the most neutral swap and keeps the dish firmly in the Italian-American register.
🧊 Storage & Reheating
In the Fridge
Store in an airtight container for up to 2 days. The beans will soften significantly as they sit — this is unavoidable. Good cold in a grain bowl, less good as a reheated side.
In the Freezer
Not recommended. Green beans lose their cell structure when frozen after cooking and become waterlogged on thaw.
Reheating Rules
If reheating is necessary, use a hot dry skillet for 2-3 minutes over high heat to drive off moisture and restore some texture. Microwave turns them to mush.
❓ Frequently Asked Questions
Why are my sautéed green beans soggy?
Two causes, usually combined: wet beans and a pan that wasn't hot enough. Dry the beans completely before cooking and make sure the oil is shimmering before anything goes in. A cold pan steams the vegetables instead of searing them.
Should I blanch green beans before sautéing?
Not for this recipe. Blanching sets the color and partially cooks the bean — useful for larger batches or if you want to cook ahead. For a 20-minute sauté, blanching adds a step without meaningful benefit and can push the beans past tender-crisp if you're not precise.
Can I use frozen green beans?
You can, but manage expectations. Frozen beans release significantly more water when they hit the pan and will steam before they brown. If using frozen, thaw them completely, pat dry aggressively, and increase the heat slightly. The texture will be softer than fresh.
What protein does this pair with?
Almost everything. The lemon and garlic profile works with roasted chicken, grilled fish, pan-seared salmon, lamb chops, or a simple fried egg. It's intentionally neutral enough to be a universal side.
How do I get more browning on the beans?
Three adjustments: use a cast iron or stainless steel pan instead of non-stick, make sure the beans are bone-dry before they go in, and resist stirring — let them sit in contact with the pan for 90-second intervals. Brown needs time and contact.
Is nutritional yeast necessary?
No, but it earns its place. It adds a subtle umami depth that rounds out the lemon and garlic without tasting like anything identifiable. If you don't have it, a small amount of white miso stirred into the oil at the end achieves a similar effect.

The Science of
Crispy Sautéed Green Beans (20-Minute Side Dish Masterclass)
We turned everything on this page into a beautiful, flour-proof PDF cheat sheet. Print it out, stick it to your fridge, and never mess up your crispy sautéed green beans (20-minute side dish masterclass) again.
*We'll email you the high-res PDF instantly. No spam, just perfectly cooked meals.
AlmostChefs Editorial Team
We translate the internet's most popular cooking videos into foolproof, beginner-friendly written recipes. We analyze multiple methods, test them in our kitchen, and engineer a single "Master Recipe" that gives you the best possible result with the least possible stress.