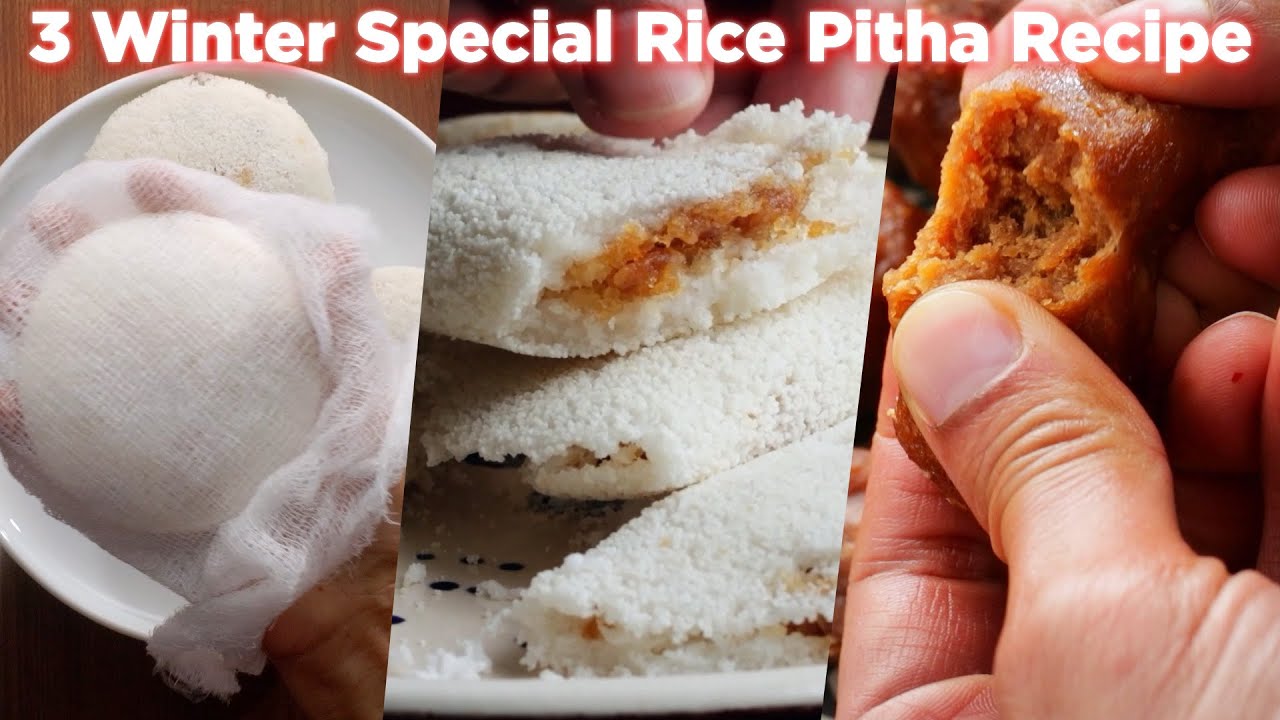
Authentic Rice Pitha (The Bengali Dumpling Secret You've Been Missing)
A traditional Bengali steamed rice cake filled with sweetened coconut and jaggery, wrapped in a delicate rice flour shell and cooked on a griddle or steamer. We broke down the technique to give you foolproof results every time — no cracks, no gummy centers, no wasted batter.
“Rice Pitha is one of those dishes that looks deceptively simple until you try to make it and the shell cracks, the filling leaks, or the center stays raw while the outside is done. The problem is almost never the recipe — it's the water temperature when you hydrate the rice flour, and whether you let the dough rest long enough to become pliable. Get those two things right and every other step falls into place.”
Why This Recipe Works
Rice Pitha is a test of patience disguised as a simple recipe. On the surface it looks like three ingredients and a hot pan — rice flour, coconut, jaggery, done. But the technique is deceptively precise, built around a set of physical principles that Bengali cooks have understood for centuries and that most modern recipe writers gloss over in the rush to keep things approachable. The result is a dish that rewards attention and punishes shortcuts in equal measure.
The Hot Water Problem
Every failed pitha starts with improperly hydrated dough. Rice flour contains no gluten — there is no protein network to provide stretch and flexibility the way wheat flour does. What you have instead is starch, and starch only becomes workable when it partially gelatinizes under heat. When you pour boiling water over rice flour and stir, you are triggering a controlled gelatinization process: the starch granules absorb the hot water and swell, creating a pliable, slightly tacky dough that can be shaped without cracking.
Use water that's merely warm, and this gelatinization doesn't occur. The result is crumbly, unworkable flour held together by surface moisture alone — it will crack the moment you try to fold it around the filling. The water must be at a full rolling boil when it hits the flour. No exceptions.
The hydration level is the second variable. Too much water and the dough is sticky and won't hold a shape. Too little and it stays crumbly. The right consistency is firm but yielding — like the softest possible modeling clay. You'll get a feel for it quickly, but the key is to add water gradually rather than all at once, giving the flour time to absorb between additions.
The Filling Architecture
The coconut-jaggery filling is cooked before it goes inside the pitha, which surprises some cooks who assume the filling will cook through during the final griddle step. It won't — not reliably. The rice flour shell insulates the interior, and by the time the shell is properly cooked, the raw coconut inside would still be carrying too much moisture. Cooking the filling first drives off that moisture, concentrates the jaggery into a binding syrup, and creates a cohesive mixture that holds its shape under the shell rather than collapsing into a wet pocket.
Date palm jaggery — patali gur — is the ingredient that separates authentic pitha from approximations. It carries a deep, slightly funky sweetness reminiscent of good molasses or dark rum, with a mineral undertone that cane jaggery simply doesn't have. If you are near a South Asian grocery, the search is worth it. The filling made with patali gur has a complexity that makes you understand why this recipe has survived unchanged for generations.
The Seal and the Steam
Pitha is cooked by two simultaneous mechanisms: dry surface heat from the tawa below and trapped steam from the lid above. The base gets direct contact, developing a thin, lightly golden crust. The top half gets no direct heat at all — it cooks entirely in the steam environment created when moisture from the dough and the filling evaporates into the confined space under the lid.
This is why a tight-fitting lid is non-negotiable. A loose lid lets steam escape continuously, and the top surface of the pitha dries out and becomes tough before it cooks through. A tight lid holds the steam in long enough to fully set the dough — producing that characteristic tender-yet-slightly-chewy texture that distinguishes well-made pitha from a dense, gummy disk.
The heat level is equally critical. You want a gentle, even surface temperature — low enough that the base develops color slowly over 5-6 minutes rather than scorching in two. A thin tawa with no insulation can run hotter than it seems, especially over a gas flame. If you hear aggressive sizzling, reduce the heat immediately. The correct sound is a barely audible whisper.
The Rest and the Patience
The dough rest period does real physical work. During those 10-15 minutes under the damp cloth, residual heat continues to hydrate the flour uniformly, and any pockets of dry flour that weren't immediately saturated by the boiling water have time to absorb the ambient moisture. The result is a dough that is significantly more homogeneous and pliable than it was right off the spoon. Skipping the rest and shaping immediately is the single fastest way to guarantee cracked edges.
Everything in this recipe is downstream of patience — the low heat, the proper rest, the fully cooled filling, the careful sealing. Pitha is a dish designed for winter mornings when no one is in a hurry, when the process is as much the point as the result. Approach it with that mindset and it delivers without fail.
Where Beginners Mess This Up
Before we start, read this. These are the 4 reasons your authentic rice pitha (the bengali dumpling secret you've been missing) will fail:
- 1
Using cold water to hydrate the rice flour: The rice flour shell only becomes pliable when hydrated with water that's at a rolling boil. Cold or warm water produces a crumbly dough that cracks the moment you try to fold it around the filling. The hot water partially gelatinizes the starch, creating the flexibility you need. This is not optional — it is the structural principle the entire recipe depends on.
- 2
Skipping the dough rest: After mixing the dough, it needs at least 10 minutes covered with a damp cloth. During this rest, residual heat continues to hydrate the flour evenly and the dough becomes significantly more workable. Shaping immediately after mixing produces cracked edges that split open during cooking, releasing the filling and ruining the texture.
- 3
Overfilling the pitha: The filling-to-shell ratio should be about 1:2 by volume. Too much filling and the shell can't seal properly — the coconut mixture pushes through the seam during cooking. Under-filling produces a dense, doughy center with no payoff. Press the filling into a compact disc before placing it on the dough.
- 4
Cooking on heat that's too high: Pitha needs low, patient heat. High heat scorches the outer shell before the interior steams through, leaving you with a burnt exterior and a raw, gummy center. A flat griddle on the lowest flame setting with a tight lid is the correct setup. Patience is the technique.
The Video Reference Library
Want to see it in action? Here are the exact videos we analyzed and combined to build this foolproof recipe translation:
The source video that breaks down dough hydration and filling ratios with clear close-ups of each stage. Essential watch for understanding the right dough consistency before shaping.
A broad overview of pitha varieties and the shared technique principles across different regional styles. Useful for understanding why the hot water hydration step matters across all pitha types.
Focuses specifically on cooking the coconut-jaggery filling to the right moisture level so it holds together inside the pitha without leaking during cooking.
🛠️ Core Equipment
- Flat non-stick griddle or tawaThe even, flat surface ensures uniform contact across the entire pitha base. A curved wok bottom creates hot spots that burn the center while leaving the edges undercooked. Non-stick prevents tearing when you flip.
- Tight-fitting lidThe lid traps steam that cooks the top half of the pitha while the base cooks on the surface below. Without the lid, the top stays raw and doughy. The steam environment is what makes pitha tender rather than brittle.
- Large mixing bowl with damp cloth coverThe damp cloth prevents the dough surface from drying out during the rest period. A dry surface forms a skin that creates uneven texture and makes the dough harder to shape without cracking.
- Small offset spatula or thin fish turnerPitha is fragile when hot. A thin, wide spatula slides under the entire base in one motion rather than the leverage point shifting and breaking the shell mid-flip.
Authentic Rice Pitha (The Bengali Dumpling Secret You've Been Missing)
🛒 Ingredients
- ✦2 cups rice flour (fine-milled)
- ✦1 cup hot boiling water (plus more as needed)
- ✦1/2 teaspoon salt
- ✦1.5 cups freshly grated coconut (or desiccated, rehydrated)
- ✦3/4 cup date palm jaggery (patali gur), grated or crumbled
- ✦1/2 teaspoon ground cardamom
- ✦1 tablespoon ghee (for greasing the griddle)
- ✦Pinch of salt for the filling
👨🍳 Instructions
01Step 1
Make the filling first: combine grated coconut, jaggery, cardamom, and a pinch of salt in a dry pan over medium-low heat. Stir continuously for 5-7 minutes until the jaggery melts and the mixture becomes sticky and cohesive but not wet. Remove from heat and cool completely before using.
02Step 2
Combine rice flour and salt in a large mixing bowl. Bring water to a full rolling boil. Pour the boiling water gradually over the flour, stirring constantly with a wooden spoon. Add water slowly — you want a dough that holds together without being sticky. Start with 3/4 cup and add more tablespoon by tablespoon.
03Step 3
Cover the dough with a damp kitchen cloth and rest for 10-15 minutes. This is non-negotiable — the rest makes the dough significantly more pliable and prevents cracking during shaping.
04Step 4
Divide the rested dough into equal balls roughly the size of a golf ball (about 40g each). You should get 8-10 portions.
05Step 5
Take one dough ball and flatten it on your palm into a round disc about 3.5 inches in diameter and 1/4 inch thick. Keep the edges slightly thicker than the center — this compensates for thinning that occurs during folding.
06Step 6
Place a heaped tablespoon of cooled filling in the center of the disc. Press the filling gently into a compact, flat mound. Bring the edges of the dough up around the filling and pinch firmly to seal, forming a half-moon or round parcel depending on your regional tradition. Press the seam flat.
07Step 7
Heat a flat [non-stick griddle or tawa](/kitchen-gear/review/tawa) over the lowest heat setting. Brush very lightly with ghee. Place the pitha seam-side down. Cover with a [tight-fitting lid](/kitchen-gear/review/pan-lid) immediately.
08Step 8
Cook for 5-6 minutes on the first side without lifting the lid. The base should be pale golden — not dark. Flip gently with a thin spatula. Cover and cook for another 4-5 minutes on the second side.
09Step 9
Remove from the griddle and rest for 2 minutes before serving. The shell firms up slightly as it cools, making it easier to handle and eat.
Nutrition Per Serving
Estimates based on standard preparation. Adjustments alter macros.
🔄 Substitutions
Instead of Date palm jaggery...
Use Dark muscovado sugar or coconut sugar
Coconut sugar is the closest flavor match — deep, caramel-forward, with slight bitterness. Muscovado works but is sweeter with less complexity. Use 20% less by volume.
Instead of Fresh grated coconut...
Use Desiccated unsweetened coconut, rehydrated
Soak in warm water for 20 minutes and squeeze out excess moisture before cooking the filling. Texture will be slightly coarser but flavor holds up.
Instead of Ghee...
Use Neutral coconut oil
Loses the nutty dairy undertone but maintains the non-stick properties and adds a faint tropical note that actually complements the coconut filling.
Instead of Rice flour...
Use Glutinous rice flour (used sparingly)
Produces a chewier, more elastic shell. Use 80% regular rice flour to 20% glutinous for a hybrid texture that's easier to seal without becoming overly sticky.
🧊 Storage & Reheating
In the Fridge
Store cooked pitha in an airtight container for up to 2 days. They firm up in the fridge — this is normal.
In the Freezer
Freeze uncooked shaped pitha on a parchment-lined tray until solid, then transfer to a freezer bag. Cook from frozen, adding 2-3 minutes per side. Do not freeze cooked pitha — the shell becomes mealy.
Reheating Rules
Re-crisp in a dry pan over low heat for 2-3 minutes per side with the lid on. Avoid the microwave entirely — it destroys the shell texture.
❓ Frequently Asked Questions
Why is my pitha shell cracking when I shape it?
The dough is either too dry or not rested long enough. Make sure you used truly boiling water, not just hot water. Let the dough rest covered for the full 10-15 minutes. If cracks appear during shaping, wet your fingertips and work the moisture into the dough as you press.
Can I steam pitha instead of cooking it on a griddle?
Yes. Line a steamer basket with banana leaf or parchment, place pitha with space between them, and steam for 12-15 minutes. Steamed pitha has a softer, more delicate shell compared to the slight crispness from the griddle. Both are traditional — the method depends on regional preference.
My filling is leaking out during cooking. What went wrong?
The seam wasn't pressed firmly enough, or the filling was too warm when you shaped the pitha. Warm filling releases moisture that softens the dough from inside, making sealing impossible. Always cool the filling completely and press the seam flat with your fingertip before cooking.
What's the right consistency for the filling before using it?
The cooled filling should hold together when pressed — like a slightly sticky dough. If it's runny, cook it for another 3-4 minutes to drive off more moisture. If it's dry and crumbly, add a tablespoon of water and stir over low heat for 1 minute.
Can I make the dough ahead of time?
The dough is best used within 30 minutes of making it. After that, it begins to dry out even under a damp cloth. If you must prep ahead, shape the pitha, place on a floured tray, cover tightly with plastic wrap, and refrigerate for up to 4 hours. Cook directly from the fridge.
Why does my pitha look pale and feel gummy even after the cooking time?
The heat is too low or the lid isn't sealing properly. The steam inside the lid is what cooks the top half — a loose lid lets it escape. Try pressing the lid down firmly and increasing heat slightly. Pale color combined with gummy texture almost always indicates insufficient steam rather than undercooking time.

The Science of
Authentic Rice Pitha (The Bengali Dumpling Secret You've Been Missing)
We turned everything on this page into a beautiful, flour-proof PDF cheat sheet. Print it out, stick it to your fridge, and never mess up your authentic rice pitha (the bengali dumpling secret you've been missing) again.
*We'll email you the high-res PDF instantly. No spam, just perfectly cooked meals.
AlmostChefs Editorial Team
We translate the internet's most popular cooking videos into foolproof, beginner-friendly written recipes. We analyze multiple methods, test them in our kitchen, and engineer a single "Master Recipe" that gives you the best possible result with the least possible stress.