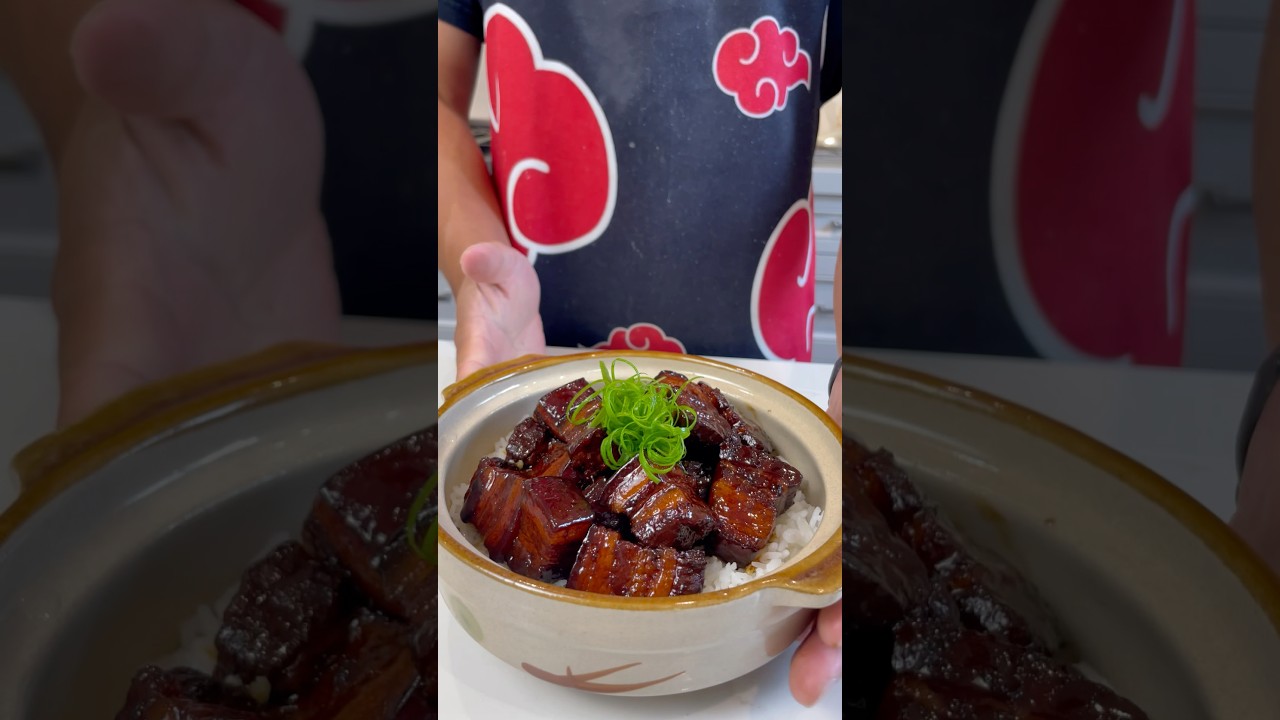
Crispy Braised Pork Belly (The Low-and-Slow Method That Actually Works)
Skin-on pork belly braised in soy, ginger, and star anise until the meat falls apart and the edges caramelize into something close to perfect. We stripped out the excess sodium and processed shortcuts — what's left is the real thing, done right.
“Pork belly has exactly one failure mode: impatience. Rush the braise and you get chewy, fatty cubes swimming in thin, salty liquid. Give it the time it demands — 90 minutes covered, another 30-45 uncovered — and something remarkable happens. The collagen dissolves into the braising liquid, the fat renders until it's silky rather than greasy, and the edges caramelize into a lacquered crust that tastes like it came out of a serious kitchen. This recipe drops the sodium by 40% and replaces processed shortcuts with whole aromatics. The result is cleaner, more complex, and takes the same amount of time.”
Why This Recipe Works
Pork belly is one of the most unforgiving cuts in the home kitchen — not because the technique is complicated, but because every shortcut is immediately visible in the final dish. Rush the sear and you get no crust. Boil instead of braise and you get chewy meat. Pull it early and the fat stays waxy instead of rendered. This recipe is built around the specific things that make each of those failure modes happen, and what to do instead.
The Case for Low Sodium
Standard pork belly braises run 1,200-1,400mg of sodium per serving. That's not a health complaint — it's a flavor one. At those concentrations, the soy sauce stops tasting like an ingredient and starts tasting like a substance. Everything underneath it — the ginger, the star anise, the caramelized pork — gets buried. Dropping to low-sodium soy sauce and using beef broth instead of salt as the primary liquid base brings the total down to 820mg and, more importantly, lets the aromatic complexity of the braise actually come through.
The Sear Is Non-Negotiable
Every braised protein recipe on the internet will tell you to sear the meat first. Most people read that and treat it as optional. For pork belly specifically, it is not. The Maillard reaction during searing creates hundreds of new flavor compounds that don't exist in raw pork — compounds that dissolve into the braising liquid over two hours and become the foundation of your sauce. Skip the sear and you have pork simmered in soy sauce. Do it properly and you have something categorically different.
The physics require dry meat and an uncrowded pan. Moisture on the surface of the pork converts to steam on contact with the hot oil, and steam prevents the surface temperature from reaching the 280°F threshold where browning begins. Crowding the pan traps that steam. Both mistakes produce the same result: gray, soft-edged pork belly with a fraction of the flavor it could have.
Star Anise and the Aromatic Architecture
The spice combination in this braise — star anise, cinnamon, ginger, garlic, bay — is not decorative. Each element has a specific role. Star anise provides the deep, slightly licorice base note that distinguishes Chinese-style braised pork from every other braised meat. Cinnamon adds warmth without sweetness. Fresh ginger provides brightness and a mild enzymatic tenderizing effect on the meat's surface. Garlic rounds the savory bottom end.
Two star anise pods is the correct amount. It sounds modest for a two-hour braise, but star anise is fat-soluble — its aromatic compounds concentrate in the rendered pork fat that circulates through the liquid the entire time. More than two pods and the anise note overtakes everything. The goal is balance, not dominance.
The Uncovered Reduction Phase
The last 30-45 minutes of this recipe — lid off, heat slightly raised — is where the sauce becomes the sauce. The braising liquid goes from a thin, slightly salty broth to a glossy, coat-the-back-of-a-spoon glaze. The collagen extracted from the pork belly skin and connective tissue (now fully dissolved into gelatin after 90 minutes of covered cooking) is responsible for that body. No arrowroot required unless you want extra thickness — the gelatin does most of the work naturally.
This is also the window where the exposed edges of the pork belly begin to lacquer. The reduction concentrates the maple syrup's sugars against the caramelized crust from the initial sear, and you start to see the color deepen around each piece. This is what you're cooking toward. Don't rush it and don't cover it back up.
A proper Dutch oven with an even heat base is the difference between a uniform braise and a scorched bottom with raw spots in the center. If you don't have one, use the heaviest pot you own and keep the heat slightly lower than you think you need.
Resting and the Overnight Upgrade
Five minutes of resting before serving is the minimum. Overnight in the refrigerator is the upgrade. The fat solidifies and can be skimmed, making the dish significantly less rich for reheating. More importantly, the meat spends 8-10 hours absorbing the reduced braising liquid from every direction, and the flavor integration that happens during that time is impossible to replicate with longer cooking. If you're making this for a dinner party, cook it the day before. Reheat low and slow, same as you braised it. It will be better.
Where Beginners Mess This Up
Before we start, read this. These are the 4 reasons your crispy braised pork belly (the low-and-slow method that actually works) will fail:
- 1
Not drying the pork before searing: Surface moisture is the enemy of caramelization. Wet pork belly steams in the pan instead of browning, and you lose the Maillard crust that provides half the dish's flavor. Pat each piece thoroughly dry with paper towels — more than you think is necessary.
- 2
Crowding the pan during browning: Pork belly releases significant moisture as it cooks. If the pieces are touching, that moisture can't escape, and again you get steaming instead of searing. Work in batches. The extra time is not optional.
- 3
Boiling the braise instead of simmering: A vigorous boil tightens the muscle fibers and turns your pork belly chewy and dry. The liquid should barely move — small bubbles breaking the surface, no more. If it's bubbling actively, drop the heat immediately.
- 4
Pulling it too early: At 60 minutes the pork is technically cooked. At 90 minutes it's tender. At 2 hours it's the dish this recipe is reaching for. Fork-tender means the meat collapses under light pressure. Don't shortcut the last 30-45 minutes uncovered — that's when the sauce reduces and the edges concentrate.
The Video Reference Library
Want to see it in action? Here are the exact videos we analyzed and combined to build this foolproof recipe translation:
The reference video for this recipe. Covers the searing sequence, braising liquid ratios, and how to read doneness without cutting into the meat.
🛠️ Core Equipment
- Heavy-bottomed Dutch oven or braising potEven heat distribution is non-negotiable during a two-hour braise. A thin pot creates scorched spots on the bottom while the center stays undercooked. A [Dutch oven](/kitchen-gear/review/dutch-oven) is the correct tool for this job.
- Paper towelsFor drying the pork before searing. Sounds trivial. It's not. This single step is the difference between a lacquered crust and a gray, steamed exterior.
- Slotted spoon or spider strainerFor moving the seared pork belly in and out of the pot without disturbing the braising liquid or breaking the pieces apart once they're tender.
- Small whiskFor incorporating the arrowroot slurry without lumps. Adding it unevenly produces pockets of gelled starch that ruin the sauce texture.
Crispy Braised Pork Belly (The Low-and-Slow Method That Actually Works)
🛒 Ingredients
- ✦2.5 pounds pork belly, skin-on, cut into 2-inch cubes
- ✦3 tablespoons avocado oil
- ✦4 medium scallions, white and light green parts separated
- ✦3 tablespoons fresh ginger, peeled and minced
- ✦5 garlic cloves, minced
- ✦1 cup low-sodium soy sauce
- ✦1/2 cup rice vinegar
- ✦3 tablespoons pure maple syrup
- ✦2 whole star anise pods
- ✦1 cinnamon stick
- ✦1 teaspoon sesame oil
- ✦3 cups beef broth
- ✦2 bay leaves
- ✦1 tablespoon red pepper flakes
- ✦2 teaspoons kosher salt
- ✦1 teaspoon cracked black pepper
- ✦2 cups water
- ✦1 tablespoon arrowroot powder mixed with 2 tablespoons water
👨🍳 Instructions
01Step 1
Pat the pork belly pieces thoroughly dry on all sides with paper towels.
02Step 2
Heat avocado oil in a large Dutch oven over medium-high heat until shimmering, about 2 minutes.
03Step 3
Working in batches, sear the pork belly on all sides until deeply golden brown, about 3-4 minutes per side. Transfer each batch to a plate.
04Step 4
Reduce heat to medium. Add the white parts of the scallions, minced ginger, and garlic to the pot. Stir constantly for about 1 minute until fragrant.
05Step 5
Pour in the soy sauce, rice vinegar, and maple syrup, scraping up all browned bits from the bottom of the pot with a wooden spoon.
06Step 6
Return the seared pork belly to the pot. Add the beef broth, bay leaves, star anise, cinnamon stick, sesame oil, and red pepper flakes.
07Step 7
Bring to a gentle boil, then immediately reduce heat to low. Partially cover with a lid and simmer for 90 minutes.
08Step 8
After 90 minutes, taste the braising liquid and adjust salt and pepper as needed.
09Step 9
Remove the lid and continue simmering uncovered for 30-45 minutes until the pork is fork-tender and the sauce has reduced by about one-third.
10Step 10
Whisk the arrowroot slurry and stir it into the pot. Simmer for 2-3 minutes until the sauce coats the back of a spoon.
11Step 11
Remove from heat. Stir in the reserved light green scallion tops. Rest for 5 minutes before serving.
12Step 12
Serve over cauliflower rice or steamed bok choy to balance the richness.
Nutrition Per Serving
Estimates based on standard preparation. Adjustments alter macros.
🔄 Substitutions
Instead of Low-sodium soy sauce...
Use Coconut aminos
Slightly sweeter and less salty. Maintains the umami depth. Good option if you're watching sodium further or need strict gluten-free compliance.
Instead of Pure maple syrup...
Use Monk fruit sweetener or stevia
Eliminates sugar entirely. The caramelization during searing will be slightly less pronounced without the maple sugars, but the braise still produces excellent results.
Instead of Avocado oil...
Use Ghee or grass-fed butter
Higher smoke point than most oils and a nuttier, more savory flavor. Enhances browning. A [quality ghee](/kitchen-gear/review/ghee) will noticeably upgrade the sear.
Instead of Rice vinegar...
Use Apple cider vinegar with the mother
More pungent and slightly apple-forward. Works well with the pork and ginger. Adds probiotic content if that's a priority.
🧊 Storage & Reheating
In the Fridge
Store in an airtight container submerged in the braising liquid for up to 4 days. The liquid keeps the meat from drying out.
In the Freezer
Freeze in portions with braising liquid for up to 2 months. The liquid protects texture during the freeze-thaw cycle.
Reheating Rules
Add to a covered pot with a splash of broth or water over low heat for 10-15 minutes. Avoid the microwave — the fat reheats unevenly and the texture suffers.
❓ Frequently Asked Questions
Why is my pork belly chewy instead of tender?
It didn't cook long enough, or the heat was too high. Pork belly needs sustained low heat to convert collagen to gelatin. A vigorous boil tightens the muscle fibers. Low and slow is not a suggestion — it's the mechanism that makes this dish work.
Do I have to use skin-on pork belly?
No, but the skin contributes collagen to the braising liquid, which is part of why the sauce gets that glossy, thick body. Skinless pork belly works, the sauce will just be slightly thinner.
Can I make this in a slow cooker?
Yes. Sear the pork belly in a separate pan first — do not skip this step in a slow cooker — then transfer everything to the slow cooker and cook on low for 7-8 hours. Reduce the sauce separately on the stovetop at the end.
What does arrowroot do that cornstarch doesn't?
Arrowroot produces a clearer, more neutral-tasting sauce with a silkier texture. Cornstarch can leave a slight chalky residue and turns opaque. Either works in a pinch, but arrowroot is the better choice for this application.
The fat layer looks huge — is that normal?
Yes. Pork belly is a high-fat cut by design. Much of that fat renders during the long braise and contributes to the braising liquid's richness. If you prefer less fat, refrigerate the finished dish overnight, skim the solidified fat cap from the liquid, and reheat.
Can I double this recipe?
Yes, but use a larger pot and expect to add 15-20 minutes to the uncovered reduction phase. The additional liquid volume takes longer to reduce to the right consistency.

The Science of
Crispy Braised Pork Belly (The Low-and-Slow Method That Actually Works)
We turned everything on this page into a beautiful, flour-proof PDF cheat sheet. Print it out, stick it to your fridge, and never mess up your crispy braised pork belly (the low-and-slow method that actually works) again.
*We'll email you the high-res PDF instantly. No spam, just perfectly cooked meals.
AlmostChefs Editorial Team
We translate the internet's most popular cooking videos into foolproof, beginner-friendly written recipes. We analyze multiple methods, test them in our kitchen, and engineer a single "Master Recipe" that gives you the best possible result with the least possible stress.