No-Bake Cheesecake (Creamy, Set-It-and-Forget-It Masterclass)
A buttery graham cracker crust loaded with a cloud-light filling of whipped cream cheese, cold-whipped heavy cream, and a hit of lemon. No oven. No water bath. No cracking. We synthesized the most-tested no-bake methods to produce one foolproof technique that sets clean, slices clean, and tastes like it came from a proper bakery.
“No-bake cheesecake has one job: be easier than baked cheesecake while still tasting like the real thing. Most recipes fail that assignment. They produce a filling that's grainy from under-beaten cream cheese, soupy from over-folded whipped cream, or so thick with gelatin it tastes like a dairy Jell-O mold. The fix is not a new ingredient list — it's understanding the three techniques that actually determine whether your cheesecake sets properly, slices cleanly, and tastes like something worth making again.”
Why This Recipe Works
No-bake cheesecake is the dessert that promises simplicity and then quietly fails the people who trust that promise. The recipe looks easy because there's no oven, no water bath, no cracking, no tempering eggs. What it doesn't tell you is that the absence of heat means the absence of a safety net — every technique decision matters more, not less, because you can't bake your way out of a bad mixing choice.
The Cream Cheese Problem
Room temperature is not a suggestion. It is a load-bearing instruction. Cream cheese is a water-in-fat emulsion, and at refrigerator temperature, the fat is in a semi-crystalline state that resists blending. You can run your mixer for ten minutes on cold cream cheese and still have lumps. Those lumps don't dissolve in the fridge — they set in place and give your finished cheesecake a grainy texture that no amount of toppings can hide.
Pull the cream cheese out of the fridge at least one hour before you start. If your kitchen runs cold, two hours. When you can press your thumb into the block and leave a clean impression without resistance, it's ready. Beat it alone — nothing else added yet — for a full 3-4 minutes until it looks like thick, glossy paste. That's your foundation. Everything else depends on it.
The Architecture of the Filling
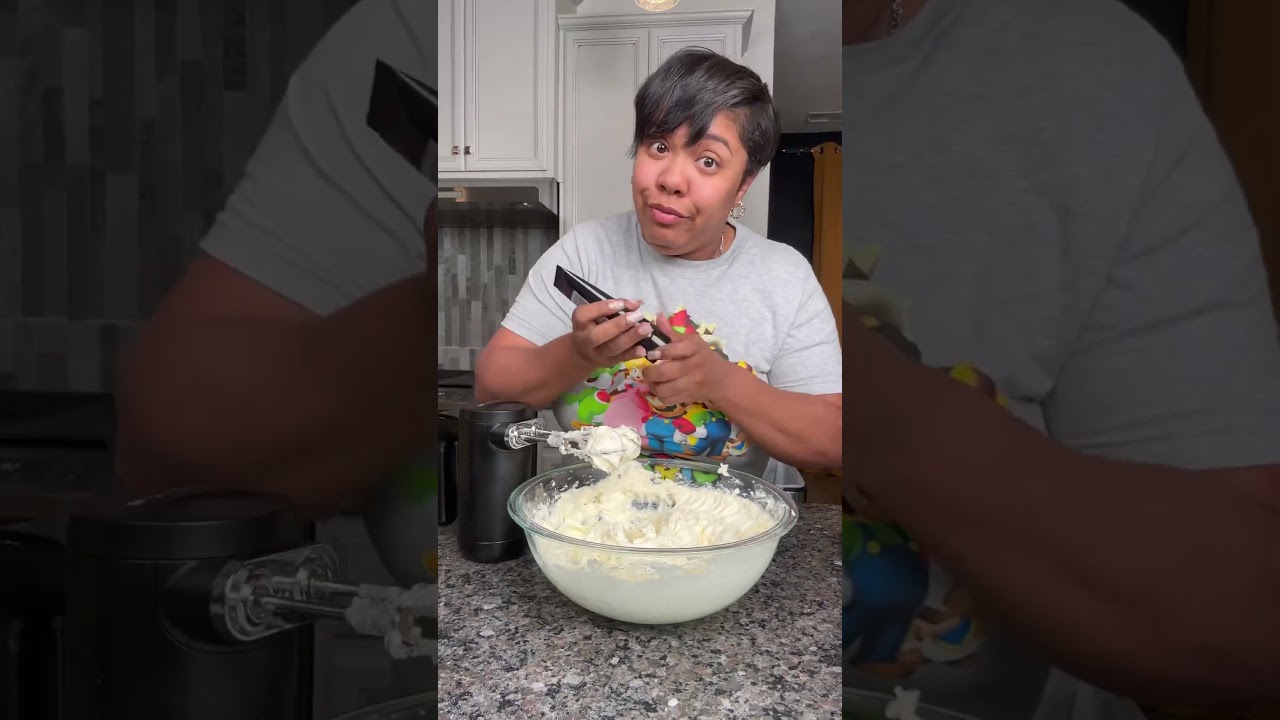
No-bake cheesecake filling is a foam held together by fat. The cream cheese provides body and flavor. The sour cream adds tang and a second fat source. The whipped cream is the structural element — it introduces millions of tiny air bubbles that expand the volume, lighten the texture, and, when the fat crystallizes in the refrigerator, lock the whole structure in place.
Folding is a skill. Two additions, wide sweeping strokes, minimum passes to eliminate white streaks. Over-fold and you've collapsed the bubbles — the filling will taste the same but have the dense, heavy texture of a cream cheese spread rather than a mousse. Under-fold and you get pockets of pure whipped cream that never integrate. The target is a uniform, pale, airy mass that holds a peak when you lift the spatula.
The optional gelatin is a stabilizer, not a crutch. In a well-made filling, the cold fat crystallization alone provides enough structure for clean slices. Gelatin gives you insurance — particularly useful in summer, if your kitchen runs warm, or if the cheesecake needs to travel. Bloom it fully, dissolve it completely, let it cool before it touches the filling. Hot gelatin melts the fat; inadequately dissolved gelatin creates rubbery streaks.
The Crust
A springform pan is the only viable vessel. The sides release cleanly. The cheesecake comes out intact. Everything else is improvisation.
The crust is two ingredients doing one job: the graham cracker crumbs provide structure and flavor, the butter is the binder. Too little butter and the crumbs have no reason to stay together. Too much and the crust becomes greasy and soft. Five tablespoons to 1.5 cups of crumbs is the ratio — memorize it and stop measuring every time.
Press hard. Use the flat base of a measuring cup and put your body weight behind it. The crumbs should compact into a dense, smooth layer that doesn't shift when you press your finger into it. Then refrigerate immediately. The butter needs to re-solidify before the filling goes on top — a warm, soft crust absorbs the filling moisture and turns gummy.
Time Is the Technique
Four hours is the technical minimum. Overnight is the actual answer. The filling sets in stages: first the gelatin network forms (if using), then the fat begins to crystallize as the temperature drops, then the whole structure consolidates into a sliceable, self-supporting mass. At four hours, you're at maybe 80% set. At eight hours, you're at full structural integrity.
Pull it early and the filling slides. Wait the full time and a warm knife glides through it in a single clean motion. There is no technique that compensates for shortened chill time. Make it the night before and stop thinking about it.
Where Beginners Mess This Up
Before we start, read this. These are the 4 reasons your no-bake cheesecake (creamy, set-it-and-forget-it masterclass) will fail:
- 1
Using cold cream cheese: Cold cream cheese never fully smooths out. No matter how long you beat it, microscopic lumps survive and create a grainy, curdled-looking filling. Room temperature cream cheese — genuinely room temperature, not 10 minutes out of the fridge — blends into a silky paste that holds the whipped cream without fighting it.
- 2
Under-whipping or over-folding the cream: The whipped cream is the structural backbone of no-bake cheesecake. Under-whip it and you get a soft filling that never sets. Over-fold it into the cream cheese base and you collapse the air bubbles that create the mousse-like texture. Whip to stiff peaks, then fold in two additions with a spatula — never a mixer.
- 3
Cutting the chill time short: Four hours is the minimum. Overnight is the standard. The filling sets through a combination of cold temperature, fat crystallization, and (if you use gelatin) hydrocolloid network formation. Pull it before the structure has fully developed and you get a filling that slides off the fork rather than holding its shape.
- 4
Skipping the crust compaction step: A crust that crumbles when sliced means it wasn't pressed firmly enough. Use the flat base of a measuring cup and apply real pressure — the crumbs need to lock together. Refrigerating the pressed crust before adding filling lets the butter solidify and create a stable, sliceable base.
The Video Reference Library
Want to see it in action? Here are the exact videos we analyzed and combined to build this foolproof recipe translation:
The foundational walkthrough for this recipe. Covers the cream cheese beating technique, two-addition folding method, and exactly what stiff peaks should look like before you stop the mixer.
🛠️ Core Equipment
- 9-inch springform panThe removable sides are non-negotiable. You cannot unmold a no-bake cheesecake from a regular cake pan without destroying it. The springform release creates clean, vertical sides that look professional.
- Stand mixer or hand mixerBeating cream cheese by hand is ineffective — you need sustained, high-speed action to eliminate lumps and incorporate air. A stand mixer frees both hands for the folding steps.
- Offset spatulaGetting the top of the filling level and smooth is nearly impossible with a regular spoon. An offset spatula lets you pull across the surface with a single controlled motion.
- Chilled mixing bowlFor whipping the heavy cream. Cold equipment keeps the fat cold and dramatically speeds up the time to stiff peaks. Put your bowl in the freezer for 10 minutes before whipping.
No-Bake Cheesecake (Creamy, Set-It-and-Forget-It Masterclass)
🛒 Ingredients
- ✦1.5 cups graham cracker crumbs
- ✦5 tablespoons unsalted butter, melted
- ✦1/4 teaspoon fine sea salt
- ✦16 ounces cream cheese, room temperature
- ✦1 cup powdered sugar, sifted
- ✦2 teaspoons vanilla extract
- ✦1.5 tablespoons fresh lemon juice
- ✦1 cup heavy whipping cream, cold
- ✦3/4 cup sour cream, room temperature
- ✦1 packet unflavored gelatin (optional)
- ✦3 tablespoons cold water (for gelatin)
👨🍳 Instructions
01Step 1
Combine graham cracker crumbs, melted butter, and salt in a medium bowl. Stir until the mixture resembles damp sand with no dry crumbs remaining.
02Step 2
Press the crumb mixture firmly and evenly into the bottom of a 9-inch springform pan using the flat base of a measuring cup. Apply real downward pressure to lock the crumbs together.
03Step 3
Refrigerate the pressed crust for at least 15 minutes while you prepare the filling.
04Step 4
Beat the room-temperature cream cheese with an electric mixer on medium speed for 3-4 minutes, scraping down the bowl twice, until completely smooth with zero lumps.
05Step 5
Add the sifted powdered sugar and vanilla extract to the cream cheese. Beat on medium for 2 minutes until light and well combined.
06Step 6
Add the lemon juice and sour cream. Stir gently with a spatula until just incorporated — do not over-mix at this stage.
07Step 7
Pour the cold heavy cream into a chilled bowl and whip with an electric mixer on medium-high speed for 3-4 minutes until stiff peaks form.
08Step 8
If using gelatin: sprinkle it over 3 tablespoons of cold water in a small bowl. Let bloom for 2 minutes, then microwave for 15 seconds until fully dissolved. Let cool for 1 minute, then fold into the cream cheese mixture before adding the whipped cream.
09Step 9
Add half the whipped cream to the cream cheese base. Fold gently with a spatula using wide, sweeping under-and-over motions — about 8 strokes. Add the remaining whipped cream and fold until no white streaks remain.
10Step 10
Pour the filling over the chilled crust. Smooth the top with an offset spatula using long, even strokes until level.
11Step 11
Cover loosely with plastic wrap and refrigerate for a minimum of 4 hours. Overnight produces measurably better texture and flavor.
12Step 12
To unmold: run a warm knife around the inside edge of the springform pan to release any stuck sections. Unlatch and lift the ring straight up.
13Step 13
Slice with a sharp knife dipped in hot water and wiped clean between each cut for bakery-clean slices.
Nutrition Per Serving
Estimates based on standard preparation. Adjustments alter macros.
🔄 Substitutions
Instead of Graham cracker crust...
Use 1.5 cups almond flour plus 5 tablespoons melted coconut oil
Lower carbohydrate, nuttier flavor. Press and refrigerate the same way. The crust will be slightly more crumbly — expect it.
Instead of Powdered sugar...
Use Coconut sugar or monk fruit sweetener
Slightly less sweet. Use the same volume for monk fruit; add an extra tablespoon if using coconut sugar. Neither dissolves quite as smoothly — sifting becomes even more important.
Instead of Heavy whipping cream...
Use 3/4 cup Greek yogurt plus 1/4 cup heavy cream
Tangier, firmer filling with more protein. Does not whip the same way — combine the two and whip together to soft peaks, then fold in. Don't expect the same mousse-like airiness.
Instead of Sour cream...
Use Plain full-fat Greek yogurt
More pronounced tang, slightly thicker consistency. Reduces fat by roughly 50 percent. Flavor profile shifts toward a New York-style cheesecake.
🧊 Storage & Reheating
In the Fridge
Store covered in the springform pan or transferred to an airtight container for up to 5 days. The texture peaks at day 2 and holds well through day 4.
In the Freezer
Freeze the whole cheesecake or individual slices for up to 2 months. Wrap tightly in plastic then foil. Thaw overnight in the refrigerator — never at room temperature, which creates condensation and softens the crust.
Reheating Rules
This is a cold dessert. Do not apply heat. If slices have been frozen, transfer to the fridge the night before serving.
❓ Frequently Asked Questions
Why is my no-bake cheesecake not setting?
Almost always a cream issue — either the cream was under-whipped before folding, or it was over-worked after folding and lost its structure. Whip to firm stiff peaks, fold in exactly two additions, and give it the full overnight chill. If you cut it at 4 hours and it's still soft, cover it and wait.
Do I need gelatin?
No, but it helps in warm kitchens or if you need to transport the cheesecake. Without gelatin, the filling relies entirely on cold fat and air for structure — it works, but it's less stable above 65°F. With gelatin, you get a slightly firmer, more restaurant-style set.
Can I use low-fat cream cheese?
Technically yes, but the filling will be noticeably softer and may not hold its shape when sliced. Full-fat cream cheese contains more fat solids that crystallize in the fridge and create structural rigidity. Low-fat versions have a higher water content that works against you.
Why does my crust crumble when I slice it?
Either the crust wasn't pressed firmly enough or the butter-to-crumb ratio was off. Press hard with a flat-bottomed measuring cup — you should feel resistance. Make sure all the crumbs are evenly coated with butter before pressing. Refrigerating for at least 15 minutes before filling also helps the butter solidify into a stable matrix.
Can I make this ahead of time?
Yes — and you should. This cheesecake is explicitly better the next day. Make it the night before, refrigerate overnight covered with plastic wrap, and unmold right before serving. The crust softens to the perfect texture and the filling firms into a cleaner slice.
How do I get clean slices?
Dip your knife in very hot water, wipe it dry with a clean towel, then cut. Repeat the dip and wipe between every single slice. A cold, dry knife drags through the filling and creates ragged edges. A warm, clean knife glides through without resistance.

The Science of
No-Bake Cheesecake (Creamy, Set-It-and-Forget-It Masterclass)
We turned everything on this page into a beautiful, flour-proof PDF cheat sheet. Print it out, stick it to your fridge, and never mess up your no-bake cheesecake (creamy, set-it-and-forget-it masterclass) again.
*We'll email you the high-res PDF instantly. No spam, just perfectly cooked meals.
AlmostChefs Editorial Team
We translate the internet's most popular cooking videos into foolproof, beginner-friendly written recipes. We analyze multiple methods, test them in our kitchen, and engineer a single "Master Recipe" that gives you the best possible result with the least possible stress.