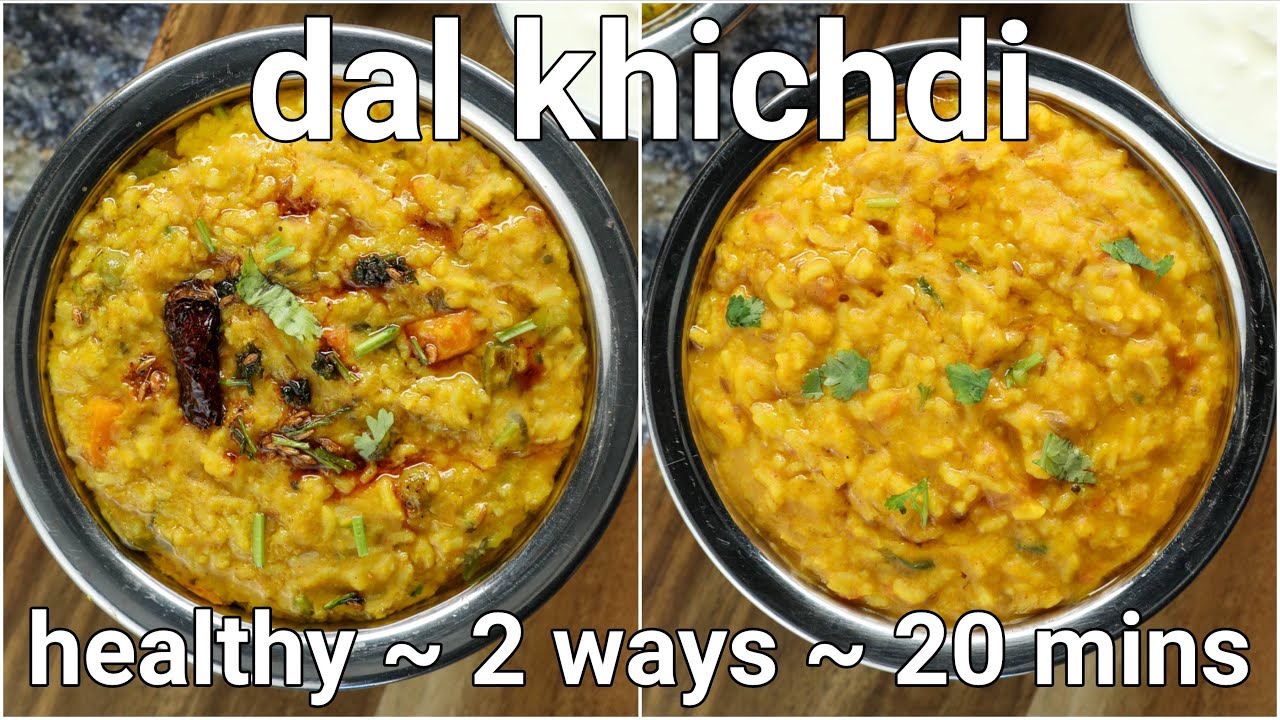
Masala Khichdi Done Right (The One-Pot Comfort Meal You've Been Missing)
A deeply spiced, vegetable-loaded one-pot meal of moong dal and rice tempered with whole spices, ghee, and a masala base that transforms India's most humble dish into something worth craving. We broke down the technique to show you exactly why most home versions taste flat — and how to fix every single one of those mistakes.
“Khichdi has a reputation problem. People call it sick food, baby food, the dish you make when nothing else is available. That reputation exists entirely because most people have only ever eaten khichdi that was undertempered, under-spiced, and cooked into an undifferentiated beige paste. Masala khichdi is the version that proves every single one of those critics wrong — a one-pot meal with layered spice, distinct texture, and enough vegetable complexity to hold its own against anything else on the table.”
Why This Recipe Works
Khichdi is the oldest continuously eaten dish in South Asian cuisine — archaeologists found evidence of dal and rice cooked together at the Indus Valley site of Lothal, roughly 2000 BCE. It has been feeding the subcontinent for four thousand years. The fact that most people consider it boring is not a reflection of the dish. It is a reflection of how badly the technique has been diluted.
Masala khichdi is the corrective. Where plain khichdi is intentionally austere — a functional, restorative meal — masala khichdi is a full culinary statement with a layered spice architecture, vegetable complexity, and the kind of cohesive, deeply satisfying texture that makes a bowl feel like a complete meal rather than a placeholder.
The Tempering Architecture
Every serious Indian dish starts with a tadka, and masala khichdi is no exception. The purpose of tempering is not seasoning — it is flavor extraction. When whole spices hit hot ghee at the correct temperature, their volatile aromatic compounds dissolve into the fat and distribute evenly throughout everything that follows. This is the physics of why bloomed spices taste so much more present than ground spices stirred in at the end.
The sequencing matters. Cumin and mustard seeds go in first because they need the most time — 30-45 seconds to swell, sizzle, and release their compounds. The dried red chilies go in at the same time for similar reasons. Curry leaves go in last among the whole aromatics because their volatile oils are more delicate and dissipate quickly at high heat. Dropping everything in simultaneously means some spices bloom correctly while others burn or sit raw in oil. A heavy-bottomed kadai is the right vessel here because its thermal mass holds temperature steady when you add the aromatics, preventing the sharp temperature drop that causes spices to absorb fat rather than bloom in it.
The Bhuno Imperative
After the whole spices, the masala base — onion, ginger, garlic, tomato, ground spices — must be cooked until the oil separates. In Hindi, this is called bhuno: to roast or fry intensely. You will know it is happening when the tomatoes break down completely, the color deepens to a brownish-red, and you can see ghee glistening around the perimeter of the masala, free-running and bright. This takes patience. It takes 8-10 minutes of active cooking over medium-high heat, and it cannot be rushed without consequence.
The reason: the Maillard reaction requires high heat and low moisture. In the early stages of cooking the masala base, the onion and tomato are releasing water, keeping the temperature below 212°F regardless of your burner setting. The masala is essentially braising itself. Only when that moisture evaporates does the temperature climb into the range where the Maillard reaction begins converting raw spice compounds into complex, layered flavor. Raw masala — masala that was pulled before the oil separated — tastes acidic, pungent, and flat. Properly bhuno'd masala tastes round, deep, and savory. The 8 minutes is not negotiable.
The Soak-and-Ratio System
Khichdi has two variables that home cooks consistently mismanage: soak time and water ratio. Moong dal and rice that go into the cooker dry absorb water at different rates, producing a dish where some components are slightly underdone and others are dissolving. A 20-minute shared soak equalizes the moisture content of both ingredients so they enter the cooker at the same starting point and finish simultaneously.
The water ratio is equally critical. Standard rice ratios (1:2) produce dry, clumped khichdi that has to be forced down. Khichdi is a flowing dish — it should pour slowly from a spoon, not sit rigid in a bowl. The correct ratio is 1:3 (combined dal and rice to water) for a pourable consistency. For a thicker, more textured result, use 1:2.5. The pressure cooker is the right tool here because it locks in all that moisture during cooking, preventing the evaporation losses that make stovetop khichdi difficult to calibrate.
Vegetable Staging
The vegetable sequencing in this recipe is deliberate and cannot be rearranged. Dense root vegetables — carrot and potato — go in before pressure cooking because they need the full cook time and pressure to soften. Delicate vegetables — peas and green beans — go in after the cooker opens, using only the residual heat from the just-cooked khichdi. This approach keeps the peas bright green and the beans with a slight bite that provides textural contrast against the soft dal-rice base. Both would turn gray and mushy under pressure. Using a fine-mesh sieve for draining the soaked dal and rice ensures clean separation before they enter the pot, so no excess soaking water dilutes the masala you just spent 10 minutes building.
The finishing ghee drizzle is the final step that ties everything together. Warm fat redistributes the aromatic compounds one last time immediately before serving, acting as a flavor delivery mechanism that carries the spice profile across every component of the dish. Skip it, and the khichdi tastes functional. Add it, and the khichdi tastes intentional.
Where Beginners Mess This Up
Before we start, read this. These are the 4 reasons your masala khichdi done right (the one-pot comfort meal you've been missing) will fail:
- 1
Skipping the tempering step: Khichdi without a proper tadka is just boiled lentils and rice. The tempering — whole spices bloomed in hot ghee until they pop and crackle — is where 60% of the dish's flavor is built. Dumping everything into a pressure cooker simultaneously produces edible food, not good food. The tadka must happen first, in its own fat, at high heat.
- 2
Not soaking the dal and rice: Unsoaked moong dal takes 25-30% longer to cook and absorbs water unevenly, producing a grainy, bitty texture instead of the smooth, cohesive consistency that makes masala khichdi satisfying. A 20-minute soak is non-negotiable. It also reduces the pressure cooking time, which means less chance of the vegetables turning to mush.
- 3
Adding the vegetables at the wrong time: Delicate vegetables — peas, spinach, green beans — cannot survive a full pressure cook cycle. They need to go in after the dal and rice are mostly done, or they disintegrate. Dense vegetables like carrot and potato go in early. Everything else goes in at the end. Ignoring this distinction is why so many khichdis look gray.
- 4
Using too little water: The correct ratio for masala khichdi is 1:3 (dal+rice to water) when you want a pourable consistency, or 1:2.5 for a thicker, more risotto-like result. Most people use rice ratios out of habit and end up with dry, clumped khichdi that has to be choked down. Khichdi is supposed to flow gently from a spoon.
The Video Reference Library
Want to see it in action? Here are the exact videos we analyzed and combined to build this foolproof recipe translation:
The source video demonstrating the full masala khichdi technique, including tempering order, vegetable staging, and final consistency checks. Essential watch before your first attempt.
A deep dive into the tadka process — spice sequencing, oil temperature, and how to tell when each whole spice is properly bloomed before adding the next. Applies directly to the masala base here.
Covers water ratios, whistle counts, and consistency control for dal-rice combinations in both stovetop pressure cookers and the Instant Pot. Useful reference for dialing in your preferred texture.
🛠️ Core Equipment
- Pressure cooker or Instant PotA pressure cooker cuts cook time in half and produces the cohesive, fully integrated texture that defines khichdi. Stovetop cooking works, but requires 40+ minutes of active monitoring and constant stirring. The pressure cooker is the traditional tool for a reason.
- Heavy-bottomed kadai or deep sauté panUsed for the tempering and masala base before everything gets combined. You need a wide, heavy surface so the onions caramelize rather than steam. A thin pan causes moisture buildup and you lose the Maillard browning that creates depth.
- Fine-mesh sieveFor rinsing and draining the soaked dal and rice. Moong dal is small enough to fall through a standard colander. A fine-mesh sieve keeps everything where it belongs and lets you control the drain speed.
- Ladle or wooden spoonFor the final fold after cooking. Khichdi needs to be stirred gently from the bottom up to integrate the layers without breaking the rice grains. A rigid spoon gives you control over pressure.
Masala Khichdi Done Right (The One-Pot Comfort Meal You've Been Missing)
🛒 Ingredients
- ✦3/4 cup split yellow moong dal, rinsed and soaked 20 minutes
- ✦1/2 cup short-grain or medium-grain white rice, rinsed and soaked 20 minutes
- ✦1 medium carrot, peeled and diced small
- ✦1 medium potato, peeled and diced small
- ✦1/2 cup green peas (fresh or frozen)
- ✦1/2 cup green beans, trimmed and cut into 1-inch pieces
- ✦1 medium yellow onion, finely diced
- ✦2 medium tomatoes, finely chopped
- ✦1 tablespoon fresh ginger, grated
- ✦4 garlic cloves, minced
- ✦2 green Thai chilies, slit lengthwise
- ✦2 tablespoons ghee, divided
- ✦1 teaspoon cumin seeds
- ✦1/2 teaspoon mustard seeds
- ✦2 dried red chilies
- ✦1 sprig fresh curry leaves (10-12 leaves)
- ✦1/2 teaspoon turmeric powder
- ✦1 teaspoon coriander powder
- ✦1/2 teaspoon cumin powder
- ✦1/2 teaspoon garam masala
- ✦1/4 teaspoon red chili powder
- ✦3.5 cups water
- ✦Salt to taste
- ✦2 tablespoons fresh cilantro leaves, chopped, for garnish
- ✦1 teaspoon fresh lemon juice
👨🍳 Instructions
01Step 1
Rinse the moong dal and rice separately under cold water until the water runs mostly clear, then soak them together in a bowl of cold water for 20 minutes. Drain through a fine-mesh sieve.
02Step 2
Heat 1.5 tablespoons ghee in a [pressure cooker](/kitchen-gear/review/pressure-cooker) or Instant Pot set to sauté mode over medium-high heat. Once shimmering, add the cumin seeds, mustard seeds, and dried red chilies.
03Step 3
When the mustard seeds begin to pop and the cumin turns a shade darker (about 30-45 seconds), add the curry leaves and stand back — they will spatter aggressively. Stir for 10 seconds.
04Step 4
Add the diced onion and sauté over medium-high heat for 6-8 minutes until deep golden brown. Do not rush this step.
05Step 5
Add the minced garlic, grated ginger, and green chilies. Stir constantly for 1-2 minutes until the raw garlic smell disappears and the mixture is fragrant.
06Step 6
Add the chopped tomatoes, turmeric, coriander powder, cumin powder, and red chili powder. Cook, stirring frequently, for 4-5 minutes until the tomatoes break down completely and the masala turns deep red and begins pulling away from the sides of the pot.
07Step 7
Add the diced carrot and potato. Stir to coat in the masala and cook for 2 minutes.
08Step 8
Add the drained moong dal and rice. Stir thoroughly to coat every grain and lentil in the masala, cooking for 1 minute.
09Step 9
Add 3.5 cups water and salt to taste. Stir to combine, scraping up any masala stuck to the bottom of the pot.
10Step 10
Seal the pressure cooker and cook on high pressure for 3 whistles (stovetop) or 8 minutes (Instant Pot). Allow natural pressure release for 5 minutes, then carefully release any remaining pressure.
11Step 11
Open the lid and add the green peas and green beans directly into the hot khichdi. Stir gently and replace the lid (off heat) for 3-4 minutes to let the residual heat cook the delicate vegetables through without turning them gray.
12Step 12
Stir the khichdi gently from the bottom up. Adjust consistency with a splash of hot water if needed — it should flow slowly from a spoon, not sit in a solid mass.
13Step 13
Heat the remaining 0.5 tablespoon ghee in a small pan. Drizzle the finishing ghee over the khichdi, add lemon juice, sprinkle with fresh cilantro, and stir once to combine. Serve immediately.
Nutrition Per Serving
Estimates based on standard preparation. Adjustments alter macros.
🔄 Substitutions
Instead of Ghee...
Use Coconut oil or neutral vegetable oil
Loses the distinctive nutty dairy flavor but maintains the cooking function. Coconut oil adds a subtle sweetness that pairs well with the spices. Not a perfect substitute, but workable.
Instead of Moong dal...
Use Red lentils (masoor dal)
Red lentils cook even faster and produce a slightly creamier, earthier result. The texture will be less distinct — more porridge-like — but the flavor profile is compatible with all the same spices.
Instead of Short-grain rice...
Use Broken basmati or any medium-grain white rice
Broken basmati is actually traditional in many regional khichdi recipes and integrates beautifully with the dal. Avoid long-grain basmati — it stays too separate and fights the cohesive texture khichdi requires.
Instead of Fresh curry leaves...
Use Dried curry leaves (double the quantity)
Fresh curry leaves have a bright, citrusy aroma that dried leaves approximate but never fully replicate. If using dried, crush them between your fingers before adding to release more volatile oils.
🧊 Storage & Reheating
In the Fridge
Store in an airtight container for up to 3 days. The khichdi will thicken significantly in the refrigerator — this is normal.
In the Freezer
Freeze in individual portions for up to 1 month. Thaw overnight in the refrigerator before reheating.
Reheating Rules
Add 2-3 tablespoons of water per serving and reheat in a covered pot over low heat, stirring gently. Microwave works but dries the exterior while leaving the center cold — use 50% power in 90-second intervals if microwaving.
❓ Frequently Asked Questions
Can I make khichdi without a pressure cooker?
Yes. Use a heavy-bottomed pot with a lid, add an extra cup of water, and simmer over low heat for 35-40 minutes, stirring every 5-6 minutes to prevent sticking. The result will be slightly less cohesive but equally delicious. Add the delicate vegetables in the last 8 minutes.
Why is my khichdi too thick or too dry?
Khichdi continues to absorb water as it sits, so it will always thicken after cooking. Add hot water in small increments while reheating and stir gently. If it's dry straight out of the cooker, you likely used too little water — next time increase to 4 cups for a softer result.
Can I use other vegetables in this recipe?
Khichdi is highly adaptable. Cauliflower, broccoli, zucchini, bell peppers, and corn all work well. The rule is the same: dense vegetables go in before pressure cooking, delicate vegetables go in after. Raw corn can go in before. Zucchini and bell peppers go in after.
Is masala khichdi healthy?
Very. Moong dal is high in protein and easy to digest, rice provides sustained energy, and the mixed vegetables contribute fiber, vitamins, and antioxidants. The ghee is saturated fat but the quantity per serving is small (2-3 grams) and contributes significantly to nutrient absorption from the spices.
What's the difference between plain khichdi and masala khichdi?
Plain khichdi is minimally seasoned — salt, turmeric, and sometimes a simple cumin tadka. It's intentionally bland and easy on the digestive system, which is why it's associated with illness and recovery. Masala khichdi builds a full onion-tomato base, uses multiple ground spices, and adds vegetables. Same technique, completely different dish.
How do I get the 'bhuno' right if I'm a beginner?
Watch for three visual cues: the tomatoes should fully break down with no visible raw chunks, the masala color should deepen from bright orange-red to a deeper brownish-red, and you should see oil or ghee visibly separating around the edges of the masala. If all three are present, it's ready. If in doubt, cook for two more minutes.

The Science of
Masala Khichdi Done Right (The One-Pot Comfort Meal You've Been Missing)
We turned everything on this page into a beautiful, flour-proof PDF cheat sheet. Print it out, stick it to your fridge, and never mess up your masala khichdi done right (the one-pot comfort meal you've been missing) again.
*We'll email you the high-res PDF instantly. No spam, just perfectly cooked meals.
AlmostChefs Editorial Team
We translate the internet's most popular cooking videos into foolproof, beginner-friendly written recipes. We analyze multiple methods, test them in our kitchen, and engineer a single "Master Recipe" that gives you the best possible result with the least possible stress.