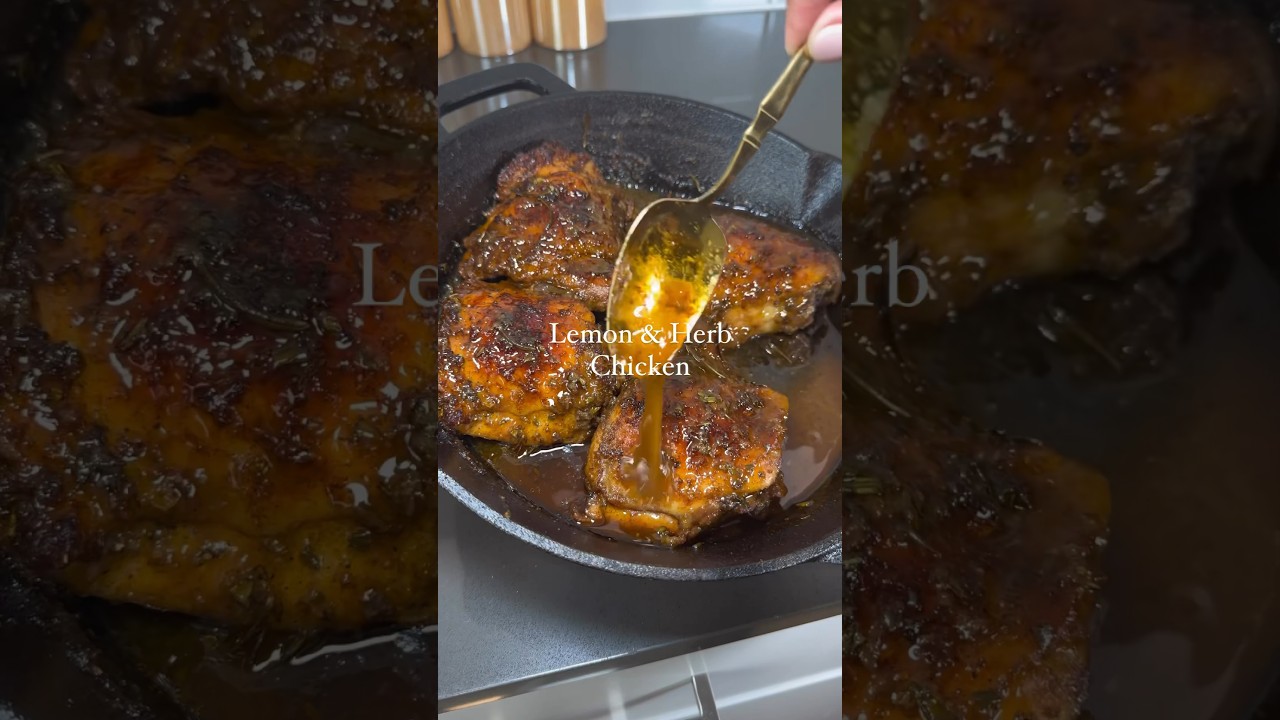
Weeknight Lemon Herb Chicken (Restaurant Pan Sauce at Home)
Tender pan-seared chicken breasts finished in a silky garlic, lemon, and fresh herb pan sauce. We broke down the technique behind a proper restaurant-quality sear and mounted butter sauce so you can nail it in 40 minutes on a Tuesday.
“Most people ruin chicken breast before it hits the pan. They skip the dry pat, they move the meat too early, and they add cold butter at the wrong moment. The result is pale, steamed chicken drowning in a greasy sauce. This recipe fixes every one of those errors with simple technique changes — no special equipment, no hard-to-find ingredients, no extra time.”
Why This Recipe Works
Pan-seared chicken with lemon herb sauce is on every bistro menu in America for a reason: it is technically simple, endlessly repeatable, and the gap between a mediocre version and an exceptional one comes down entirely to understanding three moments. The dry pat. The undisturbed sear. The cold butter finish. Get those right and everything else follows automatically.
The Case Against Moisture
Chicken breast contains roughly 75% water by weight. That water wants to escape at every opportunity, and your job as the cook is to manage where it goes. When surface moisture hits a hot pan, it vaporizes — instantly dropping the pan temperature and surrounding the meat in a cloud of steam. Steamed chicken is gray and textureless. Seared chicken is golden and develops a crust with genuine structural integrity.
The fix is mechanical: paper towels, aggressively applied, on both sides. This is not a suggestion. It is the foundational step on which everything else depends. A properly dried chicken breast, placed in properly preheated oil, makes a sound — a sharp, immediate sizzle that tells you the Maillard reaction has started. That sound is the difference between restaurant results and home cook disappointment.
The same logic applies to the pound-to-even-thickness step. Chicken breasts are architecturally ridiculous — thick at the lobe, paper-thin at the tail. If you cook them as-is, the thin end reaches 165°F roughly four minutes before the thick end. By the time the thick end is safe to eat, the thin end is rubber. A meat mallet solves this in sixty seconds by creating a uniform slab that cooks edge to edge at the same rate.
What Fond Actually Is
When properly dried chicken sears in oil over high heat, proteins and sugars on the surface caramelize and stick to the pan in a thin brown layer. This is fond, and it is the most concentrated source of flavor in this entire recipe — more than the garlic, more than the herbs, more than the lemon. It represents hundreds of new flavor compounds formed by the Maillard reaction, compressed into a paper-thin layer of caramelized protein.
When you pour wine or broth into the hot pan after removing the chicken, the liquid dissolves the fond and lifts it from the surface. This is deglazing, and the resulting liquid is your sauce base. A pale fond produces a delicate, lightly savory sauce. A deep amber fond — not burnt, but genuinely dark — produces something that tastes like it simmered for an hour. The scraping step with a wooden spoon is not optional cleanup; it is the primary flavoring act of the entire dish.
Butter Science
The sauce finishes with cold butter, and the temperature of that butter matters more than most recipes acknowledge. Cold butter is an emulsion — fat globules suspended in a water-based milk serum. When you whisk cold butter into a hot (but not boiling) sauce, the heat melts the fat slowly while the agitation keeps the fat and water particles separated and distributed. The result is a glossy, silk-textured sauce that coats the back of a spoon.
Room temperature butter fails because the emulsion has already partially broken — the fat and water have begun separating. Add it to a hot pan and it splits immediately into a greasy puddle. Keep your butter in the fridge. Pull it at the last possible moment. Add it off heat, one tablespoon at a time, whisking constantly. This technique — called mounting — is the single skill that most elevates home cooking toward professional results, and it requires no special tools, no expensive ingredients, and no talent. Just cold butter and patience.
The 5-Minute Rest
Resting chicken is not a formality. Muscle fibers contract during cooking and squeeze moisture toward the center of the meat. If you cut immediately after pulling from heat, that moisture — concentrated at the core — rushes out onto the board and is gone. Five minutes of rest allows the fibers to relax and the moisture to redistribute through the entire piece. The chicken you cut at the 5-minute mark is measurably juicier than the chicken you cut the moment it comes off the pan.
The thermometer call at 165°F is non-negotiable for food safety, but the rest is where the quality difference lives. This dish is 40 minutes total. Allocating 5 of them to doing nothing is the highest-leverage decision you make in the entire recipe.
Where Beginners Mess This Up
Before we start, read this. These are the 4 reasons your weeknight lemon herb chicken (restaurant pan sauce at home) will fail:
- 1
Not drying the chicken before searing: Surface moisture is the enemy of browning. When a wet piece of chicken hits hot oil, the water vaporizes immediately and drops the pan temperature, triggering steam instead of the Maillard reaction. Pat every piece bone dry with paper towels before it touches the pan. The difference in crust color and texture is not subtle.
- 2
Moving the chicken too early: The chicken will release naturally from the pan when the crust has fully formed. If you're pulling and tearing to flip it, it's not ready. Set it down, leave it alone for the full 6-7 minutes, and let the crust develop. Impatience here costs you the entire reason you're pan-searing instead of baking.
- 3
Using cold butter to mount the sauce: The butter must be cold when it goes into the sauce. Cold butter emulsifies — its milk solids and fat disperse into the sauce as separate particles, creating that glossy, silky texture. Warm or room-temperature butter breaks immediately into an oily slick. Keep the butter in the fridge until the moment you need it.
- 4
Skipping the pound-to-even-thickness step: Chicken breasts are thick on one end and thin on the other. If you cook them as-is, the thin end overcooks and dries out before the thick end reaches 165°F. Pounding to three-quarters of an inch creates a uniform slab that cooks evenly edge to edge.
The Video Reference Library
Want to see it in action? Here are the exact videos we analyzed and combined to build this foolproof recipe translation:
The source video for this recipe. Clear demonstration of the sear, the deglaze, and the butter-mounting technique with good close-ups on fond color and sauce consistency.
🛠️ Core Equipment
- Large stainless steel or cast iron skilletNon-stick pans don't develop fond — the browned bits left on the pan that become the backbone of the sauce. Stainless steel or cast iron builds the best fond and handles the high heat required for a proper sear without warping.
- Meat malletFor pounding chicken to even thickness. Without this, you're fighting uneven cooking for the entire recipe. A rolling pin or heavy-bottomed pan works as a substitute, but a dedicated mallet does it faster and more evenly.
- Instant-read thermometerThe difference between 155°F and 165°F is the difference between juicy chicken and cardboard. Don't guess. The five seconds it takes to check will save the entire meal.
- Wooden spoon or flat spatulaFor deglazing — scraping the fond from the bottom of the pan when the liquid hits. This is where most of the sauce flavor lives. Metal utensils work but can scratch stainless finishes over time.
Weeknight Lemon Herb Chicken (Restaurant Pan Sauce at Home)
🛒 Ingredients
- ✦1.5 pounds boneless, skinless chicken breasts (4 pieces)
- ✦3 tablespoons extra virgin olive oil
- ✦4 cloves garlic, minced
- ✦3 tablespoons fresh lemon juice
- ✦2 teaspoons lemon zest
- ✦2 teaspoons fresh rosemary, finely chopped
- ✦2 teaspoons fresh thyme leaves
- ✦1 teaspoon dried oregano
- ✦1 teaspoon kosher salt
- ✦1/2 teaspoon freshly ground black pepper
- ✦1/2 cup low-sodium chicken broth
- ✦2 tablespoons unsalted butter, cold
- ✦1/4 cup dry white wine or additional chicken broth
- ✦2 tablespoons fresh parsley, chopped for garnish
👨🍳 Instructions
01Step 1
Pat the chicken breasts completely dry with paper towels on both sides.
02Step 2
Place each chicken breast on a cutting board and pound to an even thickness of about three-quarters of an inch using a meat mallet.
03Step 3
Season both sides generously with kosher salt and freshly ground black pepper.
04Step 4
Heat the olive oil in a large stainless steel or cast iron skillet over medium-high heat until it shimmers, about 2 minutes.
05Step 5
Place the chicken breasts in the skillet and sear without moving them for 6-7 minutes until the undersides develop a deep golden-brown crust.
06Step 6
Flip the chicken and sear the other side for 5-6 minutes until golden brown and cooked through to an internal temperature of 165°F.
07Step 7
Transfer the chicken to a plate and rest for 5 minutes. Do not cover it — covering traps steam and softens the crust you just built.
08Step 8
Reduce heat to medium. Add the minced garlic to the same skillet and stir constantly for about 1 minute until fragrant but not browned.
09Step 9
Pour in the white wine or additional broth and scrape up all the fond from the bottom of the pan with a wooden spoon. This is the flavor base of your sauce.
10Step 10
Add the chicken broth, lemon juice, lemon zest, rosemary, thyme, and oregano. Stir to combine and simmer for 3-4 minutes until slightly reduced.
11Step 11
Remove the pan from heat. Add the cold butter one tablespoon at a time, whisking constantly after each addition until the sauce is glossy and emulsified.
12Step 12
Return the rested chicken to the skillet and warm through for 1-2 minutes, spooning sauce over the top.
13Step 13
Taste and adjust seasoning. Divide among plates, spoon sauce generously over each piece, and finish with fresh parsley.
Nutrition Per Serving
Estimates based on standard preparation. Adjustments alter macros.
🔄 Substitutions
Instead of Chicken breasts...
Use Bone-in, skin-on chicken thighs
Richer flavor and more forgiving on timing. Increase cook time by 5-7 minutes and verify 165°F at the thickest point near the bone. The skin renders into the fond and makes the sauce noticeably deeper.
Instead of Unsalted butter...
Use Ghee or avocado oil
Ghee behaves similarly to butter in the sauce with a slightly nuttier flavor. Avocado oil won't emulsify the same way — the sauce will be thinner and less silky, but still clean and flavorful.
Instead of Dry white wine...
Use Fresh lemon juice or apple cider vinegar
Use half the volume — both are more acidic than wine. Lemon juice keeps the flavor profile consistent. Apple cider vinegar adds subtle complexity. Neither provides the same aromatic base as wine, but both work.
Instead of Fresh herbs (rosemary, thyme)...
Use 50% dried rosemary and thyme
Dried herbs have roughly three times the potency of fresh by volume. Use two-thirds of a teaspoon each instead of two teaspoons. Add them earlier — with the broth — so they have time to rehydrate and bloom in the liquid.
🧊 Storage & Reheating
In the Fridge
Store chicken and sauce together in an airtight container for up to 3 days. The sauce thickens in the fridge — this is normal.
In the Freezer
Freeze for up to 2 months. The butter sauce will break on thawing but re-emulsifies when reheated gently with a splash of broth and constant stirring.
Reheating Rules
Reheat in a covered skillet over low heat with 2 tablespoons of chicken broth. Microwave dries the chicken unevenly and breaks the sauce — use the stovetop if you want to preserve the texture.
❓ Frequently Asked Questions
Why is my chicken crust pale instead of golden brown?
One of three things: the chicken was wet when it hit the pan, the pan wasn't hot enough, or you moved the chicken before the crust formed. Pat dry, preheat to shimmering, and leave it alone for the full 6-7 minutes.
My sauce looks greasy and oily. What happened?
The butter broke because it went in over active heat or the pieces were too large. Add a tablespoon of cold water to the pan, take it off heat, and whisk hard. Small, cold butter pieces added off heat is the fix going forward.
Can I use chicken thighs instead of breasts?
Yes, and many cooks prefer them. Thighs are more forgiving — the higher fat content means they stay juicy even if you go slightly over temperature. Add 5-7 minutes to the cook time and verify 165°F near the bone.
Do I need to use wine? I don't drink.
No. Substitute equal parts chicken broth plus a teaspoon of lemon juice. The wine adds aromatic complexity during deglazing, but the broth-and-acid combination produces a clean, completely respectable sauce.
What should I serve this with?
Anything that can absorb the sauce: roasted potatoes, steamed rice, crusty bread, or pasta. Simple sides let the sauce be the centerpiece. Avoid anything strongly flavored that competes with the lemon and herbs.
How do I know the fond isn't burnt?
Fond should be amber to dark brown — it looks like caramel stuck to the pan. If it's black and smells acrid, it's burnt and will make the sauce bitter. Deglaze immediately when it reaches a deep amber stage, or start over if it's crossed into black.

The Science of
Weeknight Lemon Herb Chicken (Restaurant Pan Sauce at Home)
We turned everything on this page into a beautiful, flour-proof PDF cheat sheet. Print it out, stick it to your fridge, and never mess up your weeknight lemon herb chicken (restaurant pan sauce at home) again.
*We'll email you the high-res PDF instantly. No spam, just perfectly cooked meals.
AlmostChefs Editorial Team
We translate the internet's most popular cooking videos into foolproof, beginner-friendly written recipes. We analyze multiple methods, test them in our kitchen, and engineer a single "Master Recipe" that gives you the best possible result with the least possible stress.