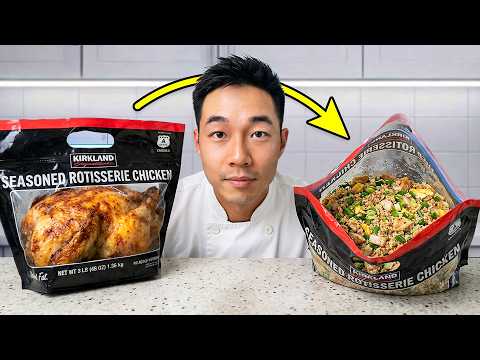
Costco Rotisserie Chicken at Home (Finally Cracked the Code)
A foolproof homemade rotisserie-style chicken that replicates the legendary Costco bird — crackling golden skin, deeply seasoned meat, and impossibly juicy thighs. We reverse-engineered the seasoning blend and high-heat technique so you can pull this off on a Tuesday night with pantry staples.

“The Costco rotisserie chicken is genuinely one of the great achievements of American food retail. Five dollars, six pounds, crackling skin, perfect seasoning. The mystery isn't that people buy it — it's that so few people realize how close the home version can get. The secret isn't a secret at all: it's dry skin, a hot oven, and a seasoning blend you already have in your pantry. We broke it down so you get the same result every single time.”
Why This Recipe Works
There's a reason the Costco rotisserie chicken has its own Reddit threads, its own fan accounts, and its own corner of the American food psyche. It is not complicated chicken. It is correctly executed chicken — and that distinction matters enormously when you're trying to replicate it at home.
The Temperature Architecture
Most people roast chicken at one temperature from start to finish. Costco's commercial rotisserie doesn't work that way, and neither does this recipe. You open at 450°F — hot enough to immediately trigger the Maillard reaction on the skin surface — then drop to 375°F to finish the interior without burning the exterior. The high-heat blast creates the structural foundation of the crust in the first 15 minutes. The lower heat gives you a 35-50 minute window to bring the thigh meat to 165°F without overcooking the breast.
This two-stage method is the core technique. Everything else supports it.
The Dry Skin Principle
Rotisserie chicken skin has that specific crackle — the kind that shatters when you bite it. Home cooks rarely achieve this because home ovens create a humid environment. The fix is aggressive moisture removal before the chicken ever touches the oven. Pat the bird completely dry with paper towels, inside and out. Any surface moisture will steam in the oven's initial blast, converting the skin surface into a light gray flabby layer instead of the mahogany crust you're after.
If you have the time to dry-brine overnight in the refrigerator, the skin improvement is dramatic. Uncovered on a rack, the cold dry air of the fridge finishes the job your paper towels started, creating a surface so dry it almost feels papery. That papery surface goes into a 450°F oven and comes out looking like it came off a commercial spit.
The Seasoning Logic
The rub here is simple for a reason. Garlic powder, smoked paprika, onion powder, oregano, salt, pepper — these are all low-moisture, high-flavor compounds that adhere to the buttered skin and brown rather than steam. Fresh herbs on the exterior would contribute moisture and risk burning. That's why they go inside the cavity, where they release aromatic steam throughout the cook without direct exposure to the high oven heat.
The butter is the delivery vehicle. Fat carries fat-soluble flavor compounds — the garlic, paprika, and oregano — and distributes them evenly across the skin surface. Butter also browns beautifully at roasting temperatures, contributing its own Maillard compounds to the final crust. Don't substitute cooking spray.
The Cavity Aromatics
The lemon, garlic, thyme, and onion inside the cavity are not decorative. They generate aromatic steam throughout the roasting period that perfumes the meat from the inside out. The lemon in particular — slightly squeezed before insertion — drips juice onto the interior cavity walls, which evaporates and recondenses onto the meat as the chicken cooks. It's a slow, passive baste that no amount of exterior basting can replicate.
The roasting pan with broth below the rack contributes a similar function from outside. As the broth heats, it adds humidity to the oven environment that keeps the breast meat from drying out while the skin above crisps. The rack keeps the bird lifted out of the liquid — crucial, because contact with liquid ruins the bottom skin.
The Rest Is Non-Negotiable
Muscle fibers contract violently under heat, squeezing moisture toward the center of the meat. Pull the chicken from the oven and cut immediately, and that moisture ejects onto the cutting board. A 15-20 minute rest allows the fibers to relax and reabsorb the juices. The internal temperature also continues rising 3-5°F after the chicken leaves the oven — a phenomenon called carryover cooking — which means if you pull at 165°F and rest properly, you're actually serving chicken that finished at 168-170°F throughout.
Tent loosely with foil. Not tightly sealed — that traps too much steam and softens the skin you worked for. Just a gentle drape to hold some warmth while the physics resolve themselves.
The Costco chicken is not magic. It's execution. And now you have the execution.
Where Beginners Mess This Up
Before we start, read this. These are the 4 reasons your costco rotisserie chicken at home (finally cracked the code) will fail:
- 1
Skipping the dry pat: Moisture on the skin surface turns into steam in the oven, and steam is the enemy of crispy skin. Paper towels are not optional — get the cavity, the underside, and every fold of skin. Any surface moisture left behind will prevent browning and you'll pull a pale, rubbery bird out of the oven wondering what went wrong.
- 2
Starting with a cold chicken: A refrigerator-cold bird put straight into a 450°F oven cooks unevenly — the outside overcooks while the thermal center lags behind. Thirty minutes at room temperature before it goes in isn't a preference; it's physics. The meat cooks more evenly, the thermometer reads true, and the resting juices distribute correctly.
- 3
Not using a roasting rack: Placing the chicken directly in the pan traps steam under the bird and braises the bottom instead of roasting it. The rack lifts the chicken so hot air circulates underneath and the skin crisps all the way around. The pan drippings collect below without turning the underside soggy.
- 4
Skipping the rest: Cutting into a chicken immediately after pulling it from the oven sends all the juices onto the cutting board instead of into the meat. A 15-20 minute rest isn't suggestion copy. It's the difference between succulent and dry. Tent loosely with foil and walk away.
The Video Reference Library
Want to see it in action? Here are the exact videos we analyzed and combined to build this foolproof recipe translation:
The original viral video that sparked this recipe. Strong close-ups of the seasoning rub technique and the two-temperature roasting method that produces the signature crackling skin.
2. How to Roast a Perfect Chicken
A thorough breakdown of the high-heat start method, rack positioning, and how to read a meat thermometer correctly. Good reference for understanding the science behind the technique.
3. Juicy Roast Chicken Every TimeCovers the dry-brine technique and explains why patting the chicken dry before seasoning is more effective than wet brining for home cooks without the time or fridge space.
🛠️ Core Equipment
- Roasting pan with rack ↗The rack is the entire point. Without it, the bottom skin steams and goes soft while the top crisps. A [roasting pan](/kitchen-gear/review/roasting-pan) with a fitted rack is the single most important piece of equipment for this recipe.
- Instant-read meat thermometer ↗Timing is unreliable because chicken varies in size, starting temperature, and oven accuracy. A [meat thermometer](/kitchen-gear/review/meat-thermometer) removes all guesswork — 165°F in the thigh is the only number that matters.
- Heavy-duty aluminum foil ↗For tenting the chicken during the rest. Traps just enough steam to keep the skin from going leathery while the juices redistribute. Loose tent, not tight wrap.
- Large cutting board ↗You need enough surface area to carve a 5-6 pound bird properly without chasing it across the counter. A [large wooden cutting board](/kitchen-gear/review/cutting-board) with a juice groove prevents the pan drippings from running off the edge.
Costco Rotisserie Chicken at Home (Finally Cracked the Code)
🛒 Ingredients
- ✦1 whole chicken, 5 to 6 pounds
- ✦3 tablespoons kosher salt
- ✦2 teaspoons freshly ground black pepper
- ✦2 teaspoons garlic powder
- ✦1 teaspoon smoked paprika
- ✦1 teaspoon onion powder
- ✦1 teaspoon dried oregano
- ✦3 tablespoons unsalted butter, softened
- ✦1 whole lemon, halved
- ✦6 garlic cloves, crushed
- ✦1 cup low-sodium chicken broth
- ✦2 sprigs fresh thyme
- ✦1 small yellow onion, quartered
👨🍳 Instructions
01Step 1
Remove the chicken from the refrigerator 30 minutes before cooking to bring it to room temperature.
02Step 2
Pat the entire chicken thoroughly dry with paper towels — exterior, cavity, and every fold of skin.
03Step 3
Combine the kosher salt, black pepper, garlic powder, smoked paprika, onion powder, and dried oregano in a small bowl.
04Step 4
Rub the softened butter all over the chicken's exterior, then firmly massage the seasoning blend into the skin and inside the cavity.
05Step 5
Stuff the cavity with the lemon halves, crushed garlic cloves, thyme sprigs, and quartered onion.
06Step 6
Set a roasting rack inside a large roasting pan. Place the chicken breast-side up on the rack.
07Step 7
Pour the chicken broth into the bottom of the pan. It should sit below the rack and not touch the bird.
08Step 8
Preheat the oven to 450°F. Roast the chicken at this temperature for 15 minutes to initiate deep browning.
09Step 9
Reduce oven temperature to 375°F and continue roasting for 35-50 minutes depending on the bird's size.
10Step 10
Insert a meat thermometer into the thickest part of the thigh, avoiding the bone. Pull the chicken when it reads 165°F.
11Step 11
Remove from the oven and let rest on a cutting board, loosely tented with foil, for 15-20 minutes.
12Step 12
Carve and serve with pan drippings drizzled over the meat, or reserve the drippings for gravy.
Nutrition Per Serving
Estimates based on standard preparation. Adjustments alter macros.
🔄 Substitutions
Instead of Unsalted butter...
Use Extra virgin olive oil
Reduces saturated fat and adds a subtle Mediterranean character. Still produces a properly crispy skin. Brush it on generously — you need the fat to carry the seasoning and promote browning.
Instead of Kosher salt...
Use Sea salt (use 2 tablespoons instead of 3) with fresh rosemary and thyme added to the rub
Lower sodium with a more herbaceous flavor profile. Fresh herbs in the rub also provide more aromatic complexity than dried alone.
Instead of Low-sodium chicken broth...
Use Homemade bone broth or vegetable broth
Bone broth adds deeper umami to the pan drippings. Vegetable broth works well for a lighter result. Avoid salted broth — the seasoning rub already has plenty of sodium.
Instead of Whole chicken...
Use Chicken thighs or bone-in breast halves
Cuts the cook time to 25-35 minutes. Thighs are more forgiving and stay juicy at higher internal temperatures. A great option for weeknights when you need dinner faster.
🧊 Storage & Reheating
In the Fridge
Store carved chicken in an airtight container for up to 4 days. The meat holds well and is excellent cold in sandwiches or salads.
In the Freezer
Freeze shredded or carved portions for up to 3 months. Store in freezer bags with as much air removed as possible.
Reheating Rules
Reheat covered in a 325°F oven with a splash of chicken broth for 10-15 minutes. Microwave works in a pinch but dries out the breast meat — cover with a damp paper towel and use 60% power.
❓ Frequently Asked Questions
Why does my skin come out pale instead of golden brown?
Two culprits. First: moisture. If you didn't pat the chicken completely dry, the surface steams before it can brown. Second: temperature. If your oven wasn't fully preheated to 450°F before the chicken went in, you missed the critical browning window. Fix both and the color problem disappears.
Can I season the chicken the night before?
Yes, and you should if you have the time. Apply the seasoning rub and leave the chicken uncovered on a rack in the refrigerator overnight. The salt draws out surface moisture, which then reabsorbs back into the meat — a dry brine. The skin dries out further in the cold air, which means even more aggressive browning in the oven.
Do I need to truss the chicken?
Not strictly. Trussing keeps the legs close to the body so they cook at the same rate as the breast, which is useful for larger birds. For a 5-6 pound bird with the two-temperature method, it makes a marginal difference. If you have kitchen twine and 60 seconds to spare, do it. If not, proceed.
How do I know if the chicken is done without a thermometer?
Pierce the thickest part of the thigh and check the juices — they should run clear, not pink. You can also wiggle the leg; if it moves freely in the joint, the chicken is likely done. That said, a meat thermometer is worth owning. Guessing with a $40 bird is an unnecessary risk.
What do I do with the leftover carcass?
Make stock. Put the carcass in a pot with the cavity aromatics, cover with cold water, and simmer for 2-3 hours. You'll have 4-6 cups of rich homemade chicken stock that makes everything from soup to risotto taste significantly better. Freeze it in 1-cup portions.
Why does the Costco chicken taste different from every other rotisserie chicken?
A few factors: Costco uses a proprietary seasoning blend with higher salt content than most home recipes, the birds are cooked on a commercial rotisserie that bastes continuously as they rotate, and the volume means the chickens are almost always fresh off the spit. The home version can match the flavor but not the continuous self-basting — which is why the butter rub and the broth in the pan are both important.

The Science of
Costco Rotisserie Chicken at Home (Finally Cracked the Code)
We turned everything on this page into a beautiful, flour-proof PDF cheat sheet. Print it out, stick it to your fridge, and never mess up your costco rotisserie chicken at home (finally cracked the code) again.
*We'll email you the high-res PDF instantly. No spam, just perfectly cooked meals.
AlmostChefs Editorial Team
We translate the internet's most popular cooking videos into foolproof, beginner-friendly written recipes. We analyze multiple methods, test them in our kitchen, and engineer a single "Master Recipe" that gives you the best possible result with the least possible stress.