Honey Sesame Chicken (Better Than Takeout in 30 Minutes)
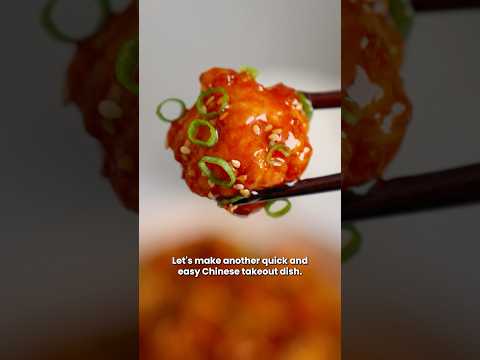
Tender chicken in a glossy honey-soy glaze with toasted sesame and fresh ginger — restaurant-quality flavor built in one pan, done in half an hour. We analyzed the technique failures that turn this dish from sticky-perfect to sad-soggy and engineered the fix.

“Most homemade sesame chicken fails for one of two reasons: the chicken is steamed instead of seared because the pan was overcrowded, or the sauce never gets glossy because the cornstarch slurry was added wrong. Fix those two things and every other step takes care of itself. This recipe is engineered around both failures.”
Why This Recipe Works
Honey sesame chicken belongs to the category of dishes that seems deceptively simple until you make it at home and produce something that tastes like a wet, sweet disappointment. The recipe has three ingredients that most kitchens already own. The technique takes thirty minutes. And yet the gap between takeout-quality and mediocre home execution is enormous. The failures are almost always mechanical, not ingredient-based.
The Sear Is Everything
The glossy glaze gets all the attention, but the foundation of this dish is the sear — and most home cooks blow it before the sauce even enters the pan. The two most common mistakes happen in sequence: adding wet chicken to an insufficiently hot pan, then overcrowding it.
Chicken breast is roughly 75% water by weight. When that moisture hits a pan that isn't hot enough, it evacuates immediately as steam, cools the surface, and converts your sear to a braise. The chicken doesn't brown — it turns gray and releases liquid that makes the eventual glaze watery. The fix is almost offensively simple: pat every piece completely dry with paper towels, heat the oil until it's visibly shimmering, and work in two batches. The extra five minutes is the difference between restaurant-quality and disappointing.
A 12-inch skillet is the right tool for this. Cast iron holds temperature better than stainless when cold protein hits it, which means less temperature drop between the first piece of chicken and the last.
Glaze Architecture
The four-ingredient glaze — tamari, honey, sesame oil, rice vinegar — is a precision balance of four flavor forces: umami, sweetness, fat, and acid. Remove any one of them and the dish collapses into a single note. The rice vinegar is the most commonly skipped ingredient, and it's the one that separates a glaze that tastes complex from one that tastes like sweetened soy sauce. Acid cuts through fat and sugar, extending the flavor on the palate rather than letting it land and disappear.
The cornstarch slurry is not a convenience — it's structural. Without it, the glaze stays thin and slides off the chicken instead of coating it. The critical detail: the slurry must enter a bubbling sauce. Cornstarch gelatinizes at just above 200°F. Add it to a sauce that's dropped below a simmer and you get chalky lumps rather than a glossy coat. Stir the slurry right before you add it (the starch settles fast), pour slowly while stirring, and give it two full minutes to activate and thicken.
Garlic and Ginger: The 45-Second Window
Garlic and ginger are not background flavors here — they're the aromatic backbone of the entire dish. They're also the easiest thing to ruin. Both cook extremely fast at medium heat, and both turn acrid and bitter when they cross from golden to brown. Forty-five seconds of constant stirring is the absolute maximum before the glaze goes in to drop the temperature.
This is why mise en place matters in a recipe that takes thirty minutes. If the glaze isn't pre-mixed and sitting next to the stove before the garlic hits the pan, you're going to burn it while you're measuring honey.
Why Low-Sodium Tamari
Standard soy sauce contains around 900mg of sodium per tablespoon. This recipe uses 3 tablespoons. That's 2,700mg in the glaze alone — before you season the chicken. Low-sodium tamari brings that down to roughly 540mg total for the dish without changing the flavor profile at all. The umami compounds in fermented soy are intact; it's only the salt that's reduced. This is not a health concession — it's just better-tasting food that doesn't overwhelm every other flavor in the dish with salinity.
The result, when every step is executed correctly, is exactly what it should be: deeply savory, gently sweet, faintly acidic, with that specific nutty toasted-sesame aroma that makes you eat faster than you intended.
Where Beginners Mess This Up
Before we start, read this. These are the 4 reasons your honey sesame chicken (better than takeout in 30 minutes) will fail:
- 1
Wet chicken that steams instead of sears: If the chicken goes into the pan without being thoroughly patted dry, surface moisture turns immediately to steam and prevents the Maillard reaction from forming a crust. No crust means no caramelization, which means pale, rubbery chicken that releases liquid into your glaze. Pat every piece completely dry before it touches the pan.
- 2
Overcrowding the skillet: Adding all the chicken at once drops the pan temperature dramatically. Instead of searing at 375°F+, you're now braising at 250°F in accumulated moisture. Work in two batches even if it feels unnecessary. The extra 4 minutes is not optional.
- 3
Adding the cornstarch slurry to cold or low-heat sauce: Cornstarch gelatinizes between 203°F and 212°F. If you pour the slurry into a sauce that's not actively simmering, you get lumpy, undercooked starch that stays chalky instead of becoming a glossy coating. The sauce must be bubbling when the slurry goes in.
- 4
Overcooking garlic and ginger: Garlic burns in under 60 seconds at medium-high heat. This step happens off the main sear heat for a reason — you're building aroma, not color. Forty-five seconds of constant stirring is the ceiling. Bitter, acrid garlic ruins the entire glaze.
The Video Reference Library
Want to see it in action? Here are the exact videos we analyzed and combined to build this foolproof recipe translation:
The source video this recipe draws from. Clear technique on the two-batch sear and the cornstarch slurry timing that most home cooks miss.
2. How to Make Sesame Chicken at Home
A solid breakdown of glaze ratios and why toasted sesame oil is added off-heat to preserve its aroma rather than cooking it away.
3. One-Pan Asian Chicken TechniquesCovers the broader principles of high-heat Chinese-American stir-fry technique, including why a cold pan is the enemy of every takeout-style dish.
🛠️ Core Equipment
- Large heavy-bottomed skillet or wok ↗A 12-inch skillet gives you enough surface area to sear in two batches without the pieces touching. [Cast iron](/kitchen-gear/review/cast-iron-skillet) or stainless steel both work — avoid nonstick, which can't handle the high heat needed for a proper sear.
- Instant-read thermometer ↗Chicken breasts go from perfectly cooked to dry and tight in about 90 seconds. Pulling at exactly 165°F is the difference between juicy and chalky. Don't guess.
- Two small bowls ↗One for the glaze, one for the cornstarch slurry. Pre-mixing both before the pan gets hot is the only way to move fast enough to prevent garlic from burning between steps.
Honey Sesame Chicken (Better Than Takeout in 30 Minutes)
🛒 Ingredients
- ✦1.5 pounds boneless, skinless chicken breasts, cut into 1-inch cubes
- ✦3 tablespoons low-sodium tamari or soy sauce
- ✦3 tablespoons pure raw honey
- ✦2 tablespoons toasted sesame oil
- ✦2 tablespoons rice vinegar
- ✦2 tablespoons olive oil
- ✦4 cloves garlic, minced
- ✦1 tablespoon fresh ginger, grated
- ✦2 medium green onions, thinly sliced
- ✦2 teaspoons cornstarch
- ✦2 tablespoons water
- ✦1 teaspoon white sesame seeds
- ✦1 teaspoon black sesame seeds
- ✦1/4 teaspoon red pepper flakes
- ✦2 cups cooked jasmine or brown rice, for serving
- ✦Salt and freshly ground black pepper to taste
👨🍳 Instructions
01Step 1
Pat the chicken cubes completely dry with paper towels. Season generously with salt and black pepper on all sides.
02Step 2
Whisk together tamari, honey, sesame oil, and rice vinegar in a small bowl. Set the glaze aside.
03Step 3
Combine cornstarch and water in a separate small bowl to form a slurry. Stir until completely smooth with no lumps.
04Step 4
Heat olive oil in a large skillet over medium-high heat until shimmering, about 1 minute.
05Step 5
Working in two batches, add chicken pieces in a single layer. Sear until golden brown on all sides, about 6-8 minutes per batch. Transfer to a clean plate.
06Step 6
Reduce heat to medium. Add minced garlic and grated ginger to the same skillet. Stir constantly for 45 seconds until fragrant.
07Step 7
Pour the honey-sesame glaze into the pan. Bring to a gentle simmer, stirring to pick up any browned bits from the bottom.
08Step 8
Return all chicken to the skillet and stir to coat evenly in the glaze.
09Step 9
Simmer for 4-5 minutes, stirring occasionally, until the chicken is cooked through and registers 165°F internally.
10Step 10
Give the cornstarch slurry a quick stir, then slowly pour it into the actively simmering sauce while stirring constantly.
11Step 11
Cook for 1-2 more minutes until the sauce thickens to a glossy consistency that coats the back of a spoon.
12Step 12
Remove from heat. Taste and adjust salt and pepper as needed.
13Step 13
Sprinkle white and black sesame seeds and red pepper flakes over the chicken. Scatter sliced green onions on top.
14Step 14
Serve immediately over jasmine or brown rice.
Nutrition Per Serving
Estimates based on standard preparation. Adjustments alter macros.
🔄 Substitutions
Instead of Boneless, skinless chicken breasts...
Use Bone-in, skin-on thighs
Richer flavor and significantly more forgiving cooking method. Thighs tolerate higher internal temps without drying out. Adds 3-4g fat per serving but improves texture.
Instead of Pure raw honey...
Use Pure maple syrup or coconut sugar dissolved in 1 tablespoon warm water
Maple syrup gives a slightly earthier sweetness. Coconut sugar produces a deeper, more caramel-adjacent glaze. Both have a lower glycemic index than honey.
Instead of Low-sodium tamari...
Use Coconut aminos
Reduces sodium by approximately 50% and makes the dish soy-free and paleo-friendly. Slightly sweeter and less intense than tamari — adjust honey quantity down by half a tablespoon.
Instead of Cornstarch...
Use Arrowroot powder or tapioca starch
Use a 1:1 ratio. Tapioca produces a glossier finish. Arrowroot feels slightly lighter. Both thicken at similar temperatures to cornstarch with no flavor difference.
🧊 Storage & Reheating
In the Fridge
Store in an airtight container for up to 3 days. The glaze firms up when cold — this is normal. It loosens again when reheated.
In the Freezer
Freeze portions for up to 2 months. The sauce may separate slightly upon thawing — stir over medium-low heat while reheating to re-emulsify.
Reheating Rules
Add a tablespoon of water, cover the pan, and reheat on medium-low for 5-6 minutes. Microwaving works in a pinch but dries the chicken out faster.
❓ Frequently Asked Questions
Why is my sauce not getting glossy?
Two possible causes: the cornstarch slurry went into a sauce that wasn't actively simmering, or the ratio was off. The sauce must be bubbling when the slurry is added — that heat is what activates the starch. If it's still thin after 2 minutes of simmering, mix another teaspoon of cornstarch with a teaspoon of cold water and add it gradually.
Can I use chicken thighs instead of breasts?
Yes, and it's arguably the better choice. Boneless, skinless thighs are more forgiving — they stay juicy past 165°F, which matters when you're simmering in sauce. Cut them to the same 1-inch size and follow the same instructions.
Is this dish gluten-free?
It is if you use tamari instead of regular soy sauce. Traditional soy sauce contains wheat. Tamari is brewed without it. Coconut aminos are also gluten-free and soy-free if you need both.
Why do I need to cook the chicken in two batches?
Overcrowding drops the pan temperature and turns a sear into a braise. The chicken releases moisture, that moisture can't evaporate fast enough, and you end up with pale, steamed chicken in a watery sauce. Two batches give each piece enough surface contact with the hot pan to actually develop color.
Can I make this ahead of time?
The chicken and sauce both hold well refrigerated for up to 3 days. The texture is best day-of, but the flavors actually deepen overnight. If meal prepping, store rice separately to prevent it from absorbing all the sauce.
How do I keep the chicken from getting rubbery?
Two things: don't skip the pat-dry step, and pull the chicken off heat the moment it hits 165°F. Chicken breast turns rubbery when overcooked — the proteins tighten and squeeze out moisture. An instant-read thermometer eliminates the guesswork entirely.

The Science of
Honey Sesame Chicken (Better Than Takeout in 30 Minutes)
We turned everything on this page into a beautiful, flour-proof PDF cheat sheet. Print it out, stick it to your fridge, and never mess up your honey sesame chicken (better than takeout in 30 minutes) again.
*We'll email you the high-res PDF instantly. No spam, just perfectly cooked meals.
AlmostChefs Editorial Team
We translate the internet's most popular cooking videos into foolproof, beginner-friendly written recipes. We analyze multiple methods, test them in our kitchen, and engineer a single "Master Recipe" that gives you the best possible result with the least possible stress.