Sticky Honey Garlic Chicken Thighs (38g Protein, Zero Compromise)
Juicy bone-in chicken thighs seared to a crispy golden crust, simmered in a sticky honey-garlic glaze, and finished with a creamy Greek yogurt pan sauce. We engineered this for 38g protein per serving without sacrificing the caramelized, garlicky payoff that makes this dish a weeknight staple.
“Most honey garlic chicken recipes produce either dry, overcooked meat or a thin glaze that slides right off. The fix is bone-in thighs — they stay moist through a long simmer — and a Greek yogurt finish that thickens the pan sauce into something clingy and rich. You get 38g of protein per serving and a plate that looks like it took twice as long.”
Why This Recipe Works
Honey garlic chicken is one of those dishes that sounds simple until you make a bad version of it. And most home cooks have made a bad version of it: pale skin that won't crisp, a glaze so thin it pools on the plate instead of coating the meat, or chicken that's technically done but dry in a way that no amount of sauce can fix. The problems are predictable. The solutions are mechanical.
The Skin Problem
Crispy skin requires two things: dry surface and sustained heat contact. Most recipes skip the first one. Wet chicken skin creates steam when it hits the pan, and steam is the enemy of the Maillard reaction — the high-heat browning process that builds flavor and texture simultaneously. You can't Maillard your way through a steam cloud.
Dry the thighs completely before they touch the pan. If you have the fridge space, season them uncovered for an hour beforehand and let cold air do more of the work. And when they go into the cast iron skillet, leave them alone. Six to seven minutes, skin-side down, no shifting. The skin will initially stick to the pan — that's fine. It releases naturally once the fat renders and the crust sets. If you force it early, you tear the skin and lose everything you were building.
The Glaze Architecture
Honey garlic glaze works on a simple principle: reduction. Every time you baste the chicken and let the liquid hit the hot pan surface, it evaporates slightly and the remaining sugars concentrate. One round of basting produces a thin, sweet coating. Four rounds produces lacquer.
The soy sauce balances the honey's sweetness with salt and umami. The rice vinegar cuts through both with acid, keeping the glaze from reading as dessert. The sesame oil adds depth and a faint nuttiness that rounds the whole thing out. These aren't interchangeable flavor additions — each one is load-bearing. Skip the vinegar and the glaze tastes flat and cloying. Skip the soy and you lose the savory backbone that makes it work as dinner.
Scraping up the fond when you deglaze is not optional. Those browned bits stuck to the pan are the Maillard byproducts from your sear — caramelized proteins and sugars that dissolve into the sauce and add complexity you cannot replicate any other way. Every lazy cook who skips the deglazing step wonders why their sauce tastes one-dimensional. Now you know.
The Yogurt Engineering
Adding Greek yogurt to a hot pan sauce is a technique that makes most cooks nervous, and rightfully so — dairy curdles. The solution is sequencing. Remove the pan from heat first. Stir in the yogurt mixture off-heat. Then return to low heat and warm gently, never letting the sauce boil.
The cornstarch is your safety net. Mixed into the yogurt before it enters the pan, it coats the protein molecules and raises their curdling threshold by several degrees. It also thickens the sauce independently of reduction, giving you a creamy, clingy consistency that coats the back of a spoon. This is how restaurant sauces stay smooth under service conditions — starch stabilization is a professional technique with a forty-cent ingredient cost.
The protein math is straightforward: bone-in thighs deliver more protein per pound than boneless cuts because there's more total muscle mass. Adding a half-cup of Greek yogurt to the sauce splits roughly evenly across four servings, contributing an additional 5-6g protein per plate. That's how you get to 38g without adding a separate protein side.
The Basting Discipline
Twelve to fifteen minutes of simmering with basting every three to four minutes sounds tedious. It's actually the most important active step in the recipe. Each basting round accomplishes three things: it coats the chicken with concentrated glaze, it re-moistens the top surface of the meat, and it tells you exactly how your sauce is progressing. If the glaze is thickening faster than the chicken is cooking, the heat is too high. If it's barely reducing after ten minutes, the heat is too low. Basting is your feedback loop.
Use an instant-read thermometer for the final check. Chicken thighs are forgiving, but the bone creates uneven heat distribution — the meat nearest the joint always takes longer than the thickest muscle above it. Pull it at 165°F measured away from the bone, not at whatever the top of the thigh reads.
This is a one-pan dinner that produces a genuinely complex result. The discipline is in the details, and the details here are simple.
Where Beginners Mess This Up
Before we start, read this. These are the 4 reasons your sticky honey garlic chicken thighs (38g protein, zero compromise) will fail:
- 1
Not drying the chicken before searing: Surface moisture is the enemy of the Maillard reaction. If the skin is wet when it hits the pan, you steam instead of sear and end up with pale, flabby skin that never crisps up no matter how long you cook it. Pat each thigh completely dry with paper towels before seasoning.
- 2
Moving the chicken during the sear: The skin needs uninterrupted contact with the hot pan to render its fat and develop color. Lifting or shifting the thighs before that crust forms tears the skin and loses the browning you're building. Six to seven minutes, skin-side down, no touching.
- 3
Boiling the yogurt sauce: Greek yogurt curdles above 185°F. Once you stir it into the pan sauce, reduce the heat to low and warm gently — never let it bubble. A tablespoon of cornstarch in the yogurt mixture gives you insurance: it stabilizes the proteins and keeps the sauce smooth even if the heat spikes slightly.
- 4
Skipping the basting step: The glaze only becomes sticky through repeated reduction. Spooning it over the chicken every 3-4 minutes during the simmer builds up thin, concentrated lacquer layers. One pour at the start produces thin, watery sauce. Four rounds of basting produces the glossy, clinging glaze you're after.
The Video Reference Library
Want to see it in action? Here are the exact videos we analyzed and combined to build this foolproof recipe translation:
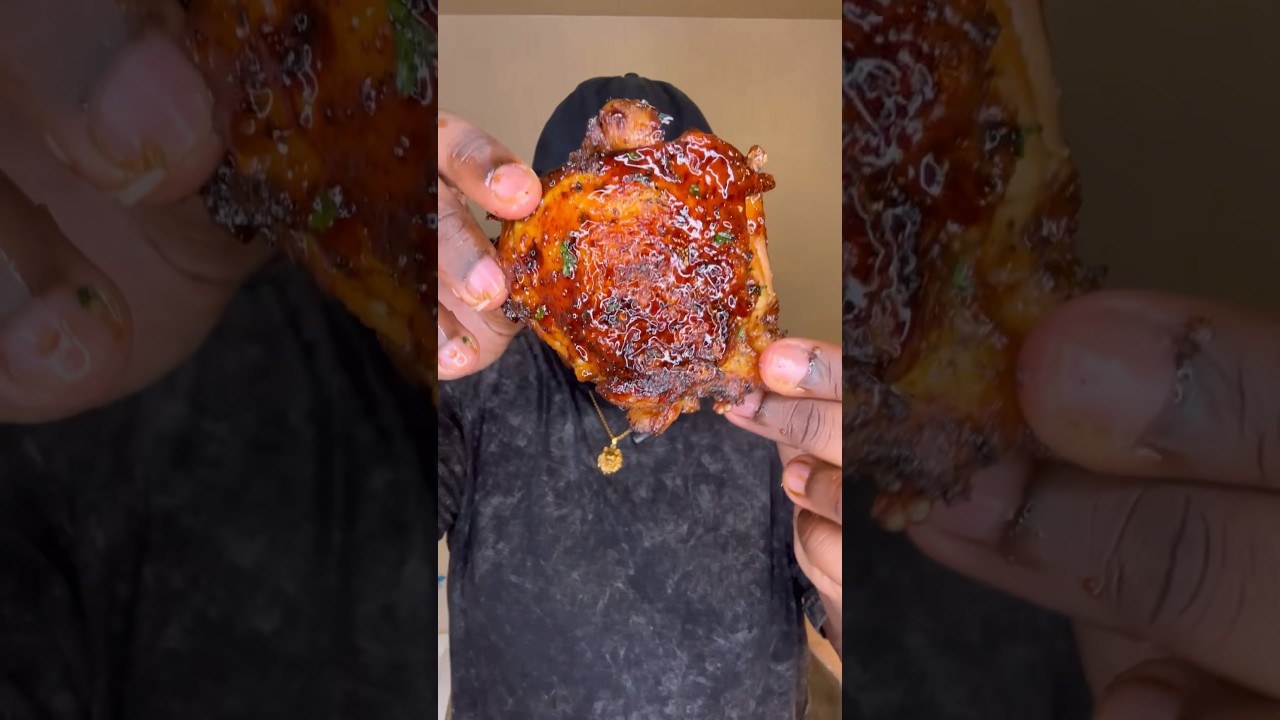
The source video behind this recipe. Clear demonstration of the searing technique and glaze reduction timing that produces the sticky, caramelized result.
🛠️ Core Equipment
- Large heavy-bottomed skillet (12-inch)You need enough surface area to sear all six thighs skin-side down without crowding. Crowded chicken steams rather than sears. A [cast iron skillet](/kitchen-gear/review/cast-iron-skillet) or stainless steel pan retains heat through the temperature drop when cold chicken hits the surface.
- Instant-read thermometerBone-in thighs are forgiving, but the target is 165°F at the thickest point away from the bone. Guessing by time alone risks underdone meat near the joint — the thickest part always takes longer than the thinner edges.
- Small whiskFor fully emulsifying the yogurt, water, and cornstarch before it goes into the pan. Lumpy cornstarch clumps in the sauce and won't dissolve evenly once it hits heat. Thirty seconds of whisking in a bowl eliminates the problem entirely.
Sticky Honey Garlic Chicken Thighs (38g Protein, Zero Compromise)
🛒 Ingredients
- ✦6 bone-in, skin-on chicken thighs (about 2 lbs)
- ✦1/4 cup raw honey
- ✦8 cloves garlic, minced
- ✦1/4 cup low-sodium soy sauce
- ✦2 tablespoons rice vinegar
- ✦1 tablespoon sesame oil
- ✦1 teaspoon fresh ginger, grated
- ✦2 tablespoons olive oil
- ✦1/2 cup plain Greek yogurt
- ✦2 tablespoons water
- ✦1 teaspoon cornstarch
- ✦1/4 teaspoon red pepper flakes
- ✦3 green onions, thinly sliced
- ✦1 tablespoon sesame seeds
- ✦Salt and black pepper to taste
👨🍳 Instructions
01Step 1
Pat the chicken thighs completely dry with paper towels and season generously with salt and black pepper on both sides.
02Step 2
Heat olive oil in a large skillet over medium-high heat until shimmering, about 2 minutes.
03Step 3
Place chicken thighs skin-side down in the hot skillet. Sear for 6-7 minutes without moving them until the skin is deep golden brown and releases naturally from the pan.
04Step 4
Flip the thighs and sear the other side for 3-4 minutes until lightly browned. Transfer to a plate and set aside.
05Step 5
Reduce heat to medium. Add minced garlic and grated ginger to the same skillet and stir constantly for about 1 minute until fragrant.
06Step 6
Pour in the honey, soy sauce, rice vinegar, and sesame oil. Stir to combine and scrape up any browned bits from the bottom of the pan.
07Step 7
Return the chicken thighs skin-side up to the skillet, nestling them into the glaze.
08Step 8
Simmer uncovered for 12-15 minutes, basting the chicken with the glaze every 3-4 minutes, until the internal temperature reaches 165°F at the thickest part away from the bone.
09Step 9
Whisk together the Greek yogurt, water, and cornstarch in a small bowl until completely smooth.
10Step 10
Remove the skillet from heat. Stir the yogurt mixture into the pan sauce, folding gently to incorporate.
11Step 11
Return to low heat and warm through for 1-2 minutes, stirring occasionally. Do not let it boil.
12Step 12
Taste and adjust seasoning with salt, pepper, and red pepper flakes.
13Step 13
Transfer the chicken to serving plates, spoon the creamy garlic sauce generously over each thigh, and garnish with sliced green onions and sesame seeds.
Nutrition Per Serving
Estimates based on standard preparation. Adjustments alter macros.
🔄 Substitutions
Instead of Bone-in, skin-on chicken thighs...
Use Boneless, skinless chicken thighs or chicken breast
Boneless thighs still deliver 35g protein per serving with less fat. If using breast, reduce the simmer time to 8-10 minutes — breast overcooks quickly and turns chalky.
Instead of Honey...
Use Monk fruit sweetener or allulose (1:1 ratio)
Reduces sugar from 18g to near-zero per serving while maintaining the same sweetness and caramelization behavior. Better option for blood sugar management.
Instead of Plain Greek yogurt...
Use Nonfat Greek yogurt or smooth-blended cottage cheese
Nonfat yogurt cuts 30 calories per serving while keeping 20g protein. Cottage cheese adds creaminess and an extra 5g protein — blend it completely smooth before adding or the sauce texture will be uneven.
Instead of Sesame oil...
Use Avocado oil or extra virgin olive oil
Loses the nutty, toasted sesame flavor but maintains the cooking temperature. Olive oil adds a subtle earthiness that works fine in the glaze.
🧊 Storage & Reheating
In the Fridge
Store in an airtight container with the sauce spooned over the chicken for up to 4 days. The sauce continues to reduce and concentrate in the fridge — the day-two flavor is noticeably better.
In the Freezer
Freeze in individual portions for up to 2 months. The yogurt sauce may separate slightly on thawing — stir vigorously while reheating to re-emulsify.
Reheating Rules
Add 2-3 tablespoons of water to the container before reheating covered on low heat for 8-10 minutes. The water re-loosens the sauce as it heats. Microwave works but the skin loses its texture — stovetop is better.
❓ Frequently Asked Questions
Why did my yogurt sauce curdle?
The sauce got too hot. Greek yogurt proteins seize and separate above roughly 185°F. Always remove the skillet from heat before stirring in the yogurt mixture, return to low heat only, and never let it boil. The cornstarch in the mixture adds stability but isn't foolproof against high heat.
Can I make this without the Greek yogurt sauce?
Yes. The honey garlic glaze stands completely on its own — it's a classic for a reason. The yogurt sauce is the protein-boosting modification. Skip it and you have a straightforward 32g protein honey garlic chicken that's slightly simpler to execute.
My glaze burned before the chicken cooked through. What happened?
The heat was too high during the simmer phase. Honey caramelizes and scorches quickly. After returning the chicken to the pan, reduce to a steady medium-low simmer. If the glaze reduces faster than the chicken cooks, add water two tablespoons at a time to maintain consistency.
Is this actually good for meal prep?
It's one of the better meal prep proteins. The sauce absorbs into the chicken overnight, the fat from the skin keeps the meat moist, and it reheats cleanly with a splash of water. It holds well for four days and the flavor genuinely improves on days two and three.
Why bone-in over boneless?
Three reasons: the bone conducts heat evenly to the center of the thigh, the collagen around the joint breaks down during the simmer and thickens the sauce, and the skin-on presentation gives you the crispy sear that the dish is built around. Boneless works but you lose all three advantages.
Can I bake this instead of using a skillet?
You can, but you'll sacrifice the fond — the browned bits that form on a skillet and deglaze into the sauce. Baked honey garlic chicken produces a thinner, less complex glaze. If you must bake, sear the skin first on the stovetop, then transfer to a 400°F oven for 20-25 minutes to finish.

The Science of
Sticky Honey Garlic Chicken Thighs (38g Protein, Zero Compromise)
We turned everything on this page into a beautiful, flour-proof PDF cheat sheet. Print it out, stick it to your fridge, and never mess up your sticky honey garlic chicken thighs (38g protein, zero compromise) again.
*We'll email you the high-res PDF instantly. No spam, just perfectly cooked meals.
AlmostChefs Editorial Team
We translate the internet's most popular cooking videos into foolproof, beginner-friendly written recipes. We analyze multiple methods, test them in our kitchen, and engineer a single "Master Recipe" that gives you the best possible result with the least possible stress.