Easy Hasselback Potatoes (Crispy Layers, Herb Butter, No Fail Method)
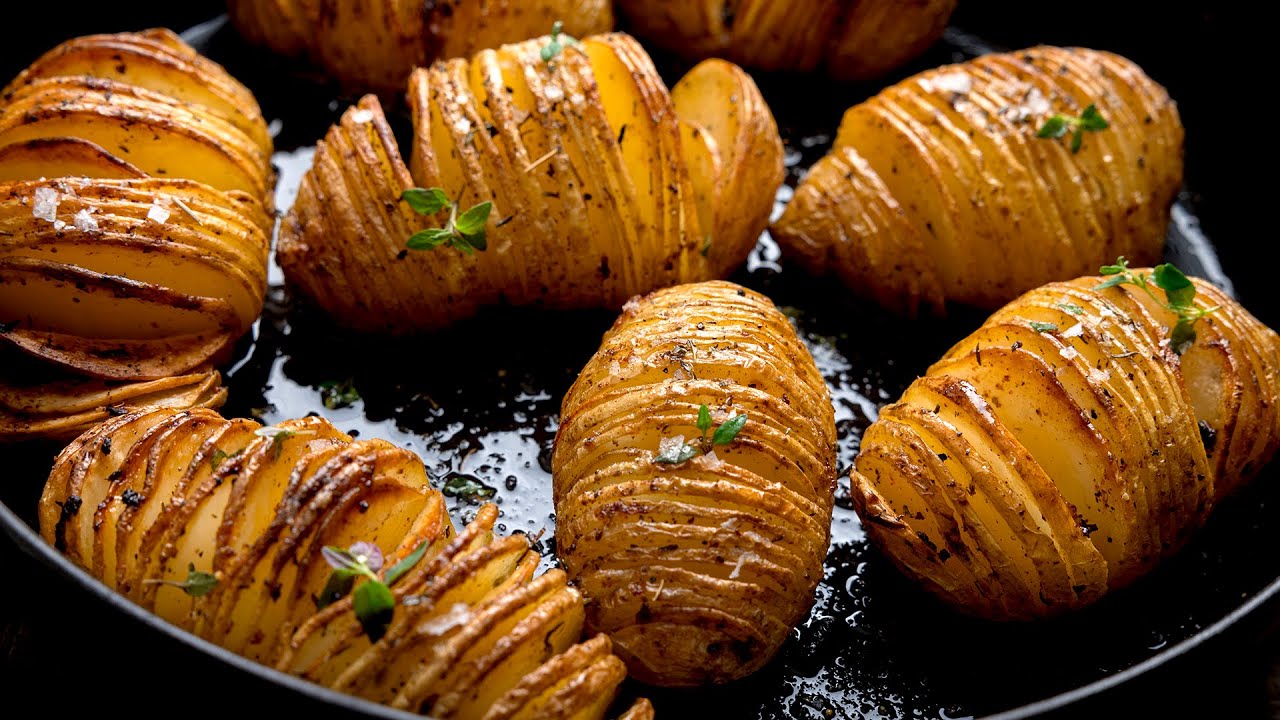
Russet potatoes sliced at 1/8-inch intervals using the chopstick guide method, brushed twice with herb butter, and roasted at 425°F until every layer is distinct and crispy. The chopstick technique and the mandatory second butter application are what separate a proper hasselback from a baked potato with lines on it.
“Hasselback potatoes look like you spent the afternoon in a professional kitchen. The reality: 20 minutes of prep, one pan, and a technique that anyone with a sharp knife and two wooden spoons can execute perfectly. The secret isn't skill — it's understanding why the slices need to fan open during roasting and what prevents them from drying out. Get those two things right and you have a side dish that makes the main course jealous.”
Why This Recipe Works
Hasselback potatoes are one of the few dishes where the technique is the entire point. You're not doing anything chemically complex — you're roasting a potato. But the way you cut that potato determines whether you get something spectacular or something that looks like a regular baked potato that had an accident.
The Physics of the Fan
A whole roasted potato has one enemy: its own skin. The skin is nearly impermeable to moisture loss, which means the interior steams in its own water vapor throughout cooking. That's why baked potatoes are fluffy inside — they're essentially self-steaming. It's also why they're not crispy on the outside beyond a thin shell.
The hasselback cut breaks the skin's monopoly on moisture regulation. By slicing the potato into 1/8-inch cuts that stop just before the base, you expose dozens of interior surfaces directly to the oven's dry heat. Each of those cut surfaces loses moisture rapidly, concentrating starch and sugar at the edges — the exact conditions for Maillard browning. The result is a potato with scores of crispy edges and a creamy, protected interior. It's not a recipe; it's a surface area optimization problem.
Why the Slicing Guides Are Non-Negotiable
Every version of this recipe mentions the wooden spoon trick and half the people who read it skip it anyway. Don't. Here's the problem: a russet potato is tapered, slightly uneven, and gets slippery as you work through it. The cuts you make at the beginning of the potato are easy to control. The cuts near the narrow end, where your knife hand is less stable and the potato wants to roll, are where disasters happen.
One cut through the base and the structural integrity of the entire potato is compromised. The fan collapses in the oven, the pieces separate, and you've turned an elegant side dish into glorified potato chips. The chef's knife stops being the right tool and the whole project falls apart. Two wooden spoon handles cost you thirty seconds of setup and guarantee a clean result every time.
The Herb Butter and Why It Has to Go Deep
Brushing herb butter only over the surface of a hasselback potato produces a potato that tastes like herb butter on the outside and plain starch in the middle. The entire advantage of the cut structure is access — those slices are channels, not decorations.
Use a pastry brush and work the butter into each cut deliberately. Tilt the potato toward you so gravity helps. After the first application, let the potato sit for two minutes so the butter begins melting into the cuts, then apply a second coat. The garlic, thyme, and rosemary should be distributed throughout the interior, not concentrated on the top surface.
The Steam Floor
Pouring broth into the bottom of the baking dish is the step most recipes bury in the ingredient list without explaining. The broth never touches the potatoes directly — it evaporates at 400°F and creates a humid microenvironment inside the pan. That humidity keeps the potato interior from drying out while the exposed cut surfaces crisp.
Without the steam floor, russet potatoes roasted at 400°F for 40 minutes turn cottony inside. The exterior crisps correctly but the interior loses too much moisture and you get a dry, mealy center. The broth creates the humidity gradient that lets crispy and creamy coexist in the same potato.
Thirty-five to forty minutes at 425°F is the sweet spot for medium russets — high enough to produce strong Maillard browning on the cut surfaces, not so high that the butter burns before the interior is cooked through. If your oven runs hot, check at 30 minutes. If the tops are browning faster than the potatoes are softening, cover loosely with foil and continue. The two-application butter method — first on the raw potato, then again at the 20-minute mark when the slices have opened — is what drives flavor into every layer rather than just coating the surface.
The Parmesan goes on last because Parmesan burns. That's the entire explanation.
Where Beginners Mess This Up
Before we start, read this. These are the 4 reasons your easy hasselback potatoes (crispy layers, herb butter, no fail method) will fail:
- 1
Cutting all the way through: If your knife hits the cutting board, the potato falls apart into chips. You need a physical stop — wooden spoon handles, chopsticks, or dowels placed on either side of the potato act as a blade guard. This is not optional. Without guides, you will eventually cut through, especially as the potato gets slippery near the end.
- 2
Slices too thick to fan open: Cuts wider than 1/8 inch don't separate during roasting — the potato stays a solid block with decorative grooves instead of a proper accordion. Use a sharp knife and take your time. Thin, even slices are the entire point of the dish.
- 3
Skipping the steam base: Pouring broth into the bottom of the pan generates steam that keeps the interior of the potato moist while the exterior crisps. Without it, the inside dries out before the outside caramelizes. The broth goes around the potatoes, not over them — you want steam, not a braise.
- 4
Adding cheese at the start: Parmesan added before roasting burns long before the potatoes are done. Add it the moment the pan comes out of the oven — the residual heat melts it perfectly without turning it bitter.
The Video Reference Library
Want to see it in action? Here are the exact videos we analyzed and combined to build this foolproof recipe translation:
The definitive walkthrough on the slicing guide method and how to get butter into every cut. Clear close-ups of the target crisp color and how much the slices should fan open during roasting.
🛠️ Core Equipment
- Sharp chef's knifeA dull knife drags and tears rather than slicing cleanly, making it nearly impossible to achieve consistent 1/8-inch cuts. This is the one dish where knife sharpness directly determines the outcome.
- Two wooden spoons or chopsticksPlaced on either side of the potato as slicing guides, these prevent the knife from going all the way through. Without them, you're relying entirely on feel — and one distracted moment destroys the potato.
- Baking dish with sidesYou need sides to contain the broth that generates steam during roasting. A flat sheet pan lets the liquid spread and evaporate immediately, defeating the purpose. A [casserole dish](/kitchen-gear/review/casserole-dish) or roasting pan with at least 1-inch sides is ideal.
- Pastry brushFor getting the herb butter down into the slices. A spoon can drizzle the surface but won't reach the interior of each cut where the flavor actually lives.
Easy Hasselback Potatoes (Crispy Layers, Herb Butter, No Fail Method)
🛒 Ingredients
- ✦4 medium russet potatoes, about 6 ounces each
- ✦4 tablespoons unsalted butter, softened
- ✦3 tablespoons extra virgin olive oil
- ✦4 cloves garlic, minced
- ✦2 teaspoons fresh thyme leaves
- ✦1 teaspoon fresh rosemary, finely chopped
- ✦1 teaspoon fine sea salt
- ✦1/2 teaspoon freshly cracked black pepper
- ✦1/4 teaspoon smoked paprika
- ✦2 tablespoons grated Parmesan cheese
- ✦1 tablespoon fresh flat-leaf parsley, chopped
- ✦1/2 cup low-sodium vegetable broth
- ✦2 bay leaves
- ✦1/4 teaspoon garlic powder
- ✦Cooking spray or parchment paper for pan
👨🍳 Instructions
01Step 1
Preheat your oven to 425°F and position the rack in the middle.
02Step 2
Scrub each potato thoroughly under cold running water and pat completely dry with paper towels.
03Step 3
Place a potato on a cutting board and position wooden spoons or chopsticks flat on either side as slicing guides.
04Step 4
Using a sharp knife, make thin crosswise cuts about 1/8-inch apart across the entire potato, stopping when the blade hits the wooden guides. Repeat with remaining potatoes.
05Step 5
Combine the softened butter, minced garlic, thyme, rosemary, sea salt, black pepper, smoked paprika, and garlic powder in a small bowl. Stir until fully incorporated.
06Step 6
Brush the herb-butter mixture generously over the top and down into the cuts of each potato, using a pastry brush to work the butter between the slices.
07Step 7
Line a baking dish with parchment paper or lightly coat with cooking spray. Arrange the potatoes cut-side up in a single layer with space between them.
08Step 8
Drizzle olive oil evenly over all the potatoes. Scatter bay leaves around the pan.
09Step 9
Pour the vegetable broth into the bottom of the baking dish around the potatoes — not over them.
10Step 10
Roast uncovered for 20 minutes. Remove from oven and brush again with remaining herb butter, fanning the slices open with your fingers to push butter between them — the slices have opened slightly under heat and can absorb much more butter than before.
11Step 11
Return to oven for another 15-20 minutes at 425°F until the potato skin is deeply golden and crispy at the edges and the interior is fully tender when probed.
12Step 12
In the last 5 minutes, sprinkle Parmesan over the tops of all four potatoes. Return to oven until the Parmesan is melted and beginning to brown.
13Step 13
Remove from oven. Let rest 3 minutes. Discard bay leaves. Top with fresh parsley and serve immediately.
Nutrition Per Serving
Estimates based on standard preparation. Adjustments alter macros.
🔄 Substitutions
Instead of Unsalted butter...
Use Ghee or clarified butter
Higher smoke point and a nuttier, more robust flavor. Ghee also contains less lactose. The browning on the potato edges is marginally better with ghee than with regular butter.
Instead of Russet potatoes...
Use Purple or fingerling potatoes
Earthier, slightly sweet flavor and more visual drama from the color. Firmer flesh holds the fan shape better during roasting. Fingerlings are smaller, so reduce cook time by 10 minutes.
Instead of Vegetable broth...
Use Bone broth or low-sodium chicken stock
Richer, more savory steam base. Adds a silky quality to the finished dish. Not vegetarian, but the flavor upgrade is noticeable.
Instead of Extra virgin olive oil...
Use Avocado oil
Higher smoke point makes it slightly more forgiving at 400°F. Neutral flavor doesn't compete with the herb butter. Identical texture and browning results.
🧊 Storage & Reheating
In the Fridge
Store in an airtight container for up to 3 days. The interior stays creamy but the edges lose their crispiness in the fridge.
In the Freezer
Not recommended. The potato texture becomes grainy and the fanned structure collapses after freezing and thawing.
Reheating Rules
Arrange on a baking sheet and reheat at 375°F for 10-12 minutes until the edges crisp again. Do not microwave — it creates steam inside the potato and destroys the texture contrast.
❓ Frequently Asked Questions
How do I keep from cutting all the way through the potato?
Place two wooden spoon handles or chopsticks flat along either side of the potato before you start cutting. When the blade hits the handles, it stops automatically. This is the only reliable method — relying on feel alone leads to at least one severed potato every time.
Why aren't my slices fanning out during roasting?
Two possible causes: the cuts are too thick (more than 1/8 inch) or the potato went into the oven cold from the fridge. Thick cuts don't have enough flexibility to open. Cold potatoes take longer to soften, which delays the fanning. Cut thinner and start with room-temperature potatoes.
Can I prep these ahead of time?
Yes. Slice and butter the potatoes up to 4 hours ahead, cover with plastic wrap, and refrigerate. Add 5-8 minutes to the roasting time since they'll start cold. Don't add the broth until just before the pan goes in the oven.
What potatoes work best besides russets?
Purple potatoes and fingerlings both work well and hold their shape better than russets. Yukon Gold are acceptable but their higher moisture content means softer edges — you lose the dramatic crispiness that makes hasselback potatoes worth making. Avoid red potatoes entirely; they're too waxy.
Why does the broth go around the potatoes and not over them?
You want steam, not moisture on the surface. Broth poured over the potatoes washes off the herb butter and keeps the skin wet, preventing browning. In the bottom of the pan, it generates steam that keeps the interior moist without touching the surface you're trying to crisp.
Can I add cheese before roasting instead of after?
Not Parmesan — it burns at 400°F before the potatoes are done and turns bitter. If you want melted cheese throughout, add it during the last 5 minutes of roasting rather than at the start. Gruyère and fontina both melt well without burning if you add them late.

The Science of
Easy Hasselback Potatoes (Crispy Layers, Herb Butter, No Fail Method)
We turned everything on this page into a beautiful, flour-proof PDF cheat sheet. Print it out, stick it to your fridge, and never mess up your easy hasselback potatoes (crispy layers, herb butter, no fail method) again.
*We'll email you the high-res PDF instantly. No spam, just perfectly cooked meals.
AlmostChefs Editorial Team
We translate the internet's most popular cooking videos into foolproof, beginner-friendly written recipes. We analyze multiple methods, test them in our kitchen, and engineer a single "Master Recipe" that gives you the best possible result with the least possible stress.