Perfect Seasoned Ground Beef (The Base Recipe You've Been Missing)
A deeply savory, properly browned ground beef base that works for tacos, pasta, rice bowls, and everything in between. We broke down the most-watched ground beef methods on YouTube to find the technique that actually develops flavor instead of just cooking meat gray.
“Most people cook ground beef the same way: dump it in a pan, push it around until it stops being pink, drain it, and wonder why it tastes like nothing. The difference between forgettable ground beef and the kind that anchors a genuinely great taco, pasta, or rice bowl comes down to one principle you've probably been skipping: you have to let it sit. Stop stirring. Let the Maillard reaction happen. This is the whole recipe.”
Why This Recipe Works
Ground beef is the most taken-for-granted protein in the home kitchen. It's cheap, fast, and ubiquitous — which means most people never stop to think about what they're actually doing wrong when they cook it. The answer is almost always the same: they're boiling it.
The Crowding Problem
When ground beef hits a pan, it immediately begins releasing water. This is unavoidable — beef is roughly 70% water by weight, and heat forces that moisture out. The question is what happens to that water next. In a properly sized, sufficiently hot pan with beef spread thin, the moisture evaporates almost immediately, the surface dries out, and the Maillard reaction begins — the same chemical cascade responsible for the crust on a great steak, the color on fresh bread, the depth of a dark roast coffee. In a crowded pan, that moisture has nowhere to go. It pools. The beef braises in its own liquid, stays gray, and never develops any flavor at all.
The fix is not complicated: use a 12-inch cast iron or stainless skillet. Spread the beef. Walk away. This is the entire recipe philosophy in two sentences.
Why You Must Stop Stirring
Browning is a contact sport. The Maillard reaction requires sustained high-heat contact between the protein surface and the pan. Every time you stir ground beef, you accomplish two things simultaneously: you add moisture back to the surface from the wet interior of the meat, and you lower the pan temperature by introducing cooler meat to the hot surface. Both actions halt the browning reaction and restart the steaming cycle. The result is that familiar uniform gray — cooked, technically safe, and completely devoid of the complex flavors you were trying to develop.
Press the beef down with a flat-edged spatula, set a timer for three minutes, and stand there doing nothing. This is the hardest part of the recipe for most home cooks. The urge to stir is almost physical. Resist it. You'll know the first side is done when you can slide the spatula underneath a chunk and it lifts cleanly — no tearing, no sticking. That clean release is the sound of flavor being built.
The Spice Timing Architecture
Professional kitchens season in layers, not all at once, because each addition serves a different purpose at a different point in the cook. Salt goes in first, directly on the raw beef, because it begins drawing surface moisture outward in a controlled way that actually promotes browning — the salt concentrates the surface proteins. The aromatics (onion and garlic) go in after the initial sear because they're mostly water and will steam anything around them if added too early. The dry spices go in after the aromatics because they need fat to bloom — dry-toasting cumin and smoked paprika in rendered beef fat releases their fat-soluble volatile compounds in a way that dissolving them in water never can. The tomato paste goes in last of the dry additions and gets cooked until it darkens from bright red to deep brick, a process that transforms sharp raw tomato flavor into concentrated, caramelized umami.
Each step builds on the last. Skip any of them and you flatten the result.
The Tomato Paste Principle
Tomato paste is the single most underutilized ingredient in the home cook's pantry, and it is especially transformative in ground beef. Tomatoes are extraordinarily high in glutamates — the naturally occurring compounds that activate umami receptors and make food taste meaty, round, and complete. When you cook tomato paste in rendered fat for two minutes until it shifts color, you're driving off the water, concentrating those glutamates, and triggering a secondary Maillard reaction in the sugars. The result is a flavor foundation that makes everything else in the pan taste more like itself. It doesn't taste like tomato. It tastes like depth.
This is the same principle behind the French technique of pinçage — cooking tomato paste in fat before adding liquid to a braise. It's been in professional kitchens for two hundred years. It works in a Tuesday night ground beef skillet for the same reasons it works in a twelve-hour cassoulet.
What You're Actually Building
The finished beef from this recipe isn't a dish — it's a module. It slots into tacos without modification. Add crushed tomatoes and it becomes a Bolognese base. Serve it over rice with a fried egg and you have a Korean-adjacent bowl. Stuff it into peppers, layer it in a lasagna, pile it on nachos. The flavors are calibrated to be directional without being specific — savory, slightly smoky, deeply umami, with just enough heat to make the back of your palate pay attention.
The three minutes of patience at the start of this recipe are responsible for everything that comes after.
Where Beginners Mess This Up
Before we start, read this. These are the 4 reasons your perfect seasoned ground beef (the base recipe you've been missing) will fail:
- 1
Crowding the pan: Ground beef releases a significant amount of moisture during the first two minutes of cooking. If the pan is crowded, that moisture steams the meat instead of evaporating. Steamed beef turns gray and bland. A wide skillet with beef spread in a thin layer gives moisture a place to escape so the surface can brown properly.
- 2
Constant stirring: Browning is a surface reaction. It requires sustained contact with a hot pan. Every time you stir, you cool the surface, interrupt the reaction, and add more moisture back into the mix. Press the beef down, let it sit for 2-3 minutes undisturbed, then break and flip. That's it.
- 3
Draining all the fat: The rendered fat is flavor. Draining it all away throws out the vehicle that carries the seasoning into the meat. If using 80/20 beef, drain about half the fat after browning. If using 90/10, drain none — there isn't enough to worry about. Fully defatted ground beef is dry and flat.
- 4
Seasoning too late: Salt added at the end sits on the surface. Salt added during browning penetrates the meat and draws out moisture in a controlled way that enhances the Maillard reaction. Season early, and season again at the end to finish.
The Video Reference Library
Want to see it in action? Here are the exact videos we analyzed and combined to build this foolproof recipe translation:
The core technique video behind this recipe. Shows exactly how to achieve proper browning without steaming, and demonstrates the visual difference between gray-cooked and properly seared ground beef.
Covers the seasoning timeline — when to add salt, when to add aromatics, and how to build a layered spice profile that works across multiple dish applications.
Demonstrates batch cooking and storage techniques for ground beef, including how to reheat without losing texture or moisture.
🛠️ Core Equipment
- 12-inch cast iron or stainless skilletWide enough to spread the beef in a thin layer without crowding, and retains enough heat that adding cold meat doesn't drop the surface temperature below browning threshold. Non-stick pans run too cool for proper searing.
- Wooden spoon or flat-edged spatulaFor breaking up the beef into even pieces after the initial sear. A flat-edged spatula also lets you press the beef against the pan surface to maximize contact during the browning phase.
- Fat separator or large spoonFor removing excess rendered fat after browning without throwing away the flavorful browned bits at the bottom of the pan. Those bits are the entire point.
- Instant-read thermometerGround beef must reach 160°F internal temperature for food safety. Color is not a reliable indicator — some beef stays pink past safe temperature, others go gray before reaching it.
Perfect Seasoned Ground Beef (The Base Recipe You've Been Missing)
🛒 Ingredients
- ✦1.5 pounds 80/20 ground beef
- ✦1 tablespoon neutral oil (avocado or canola)
- ✦1 medium yellow onion, finely diced
- ✦4 cloves garlic, minced
- ✦1.5 teaspoons kosher salt, divided
- ✦1 teaspoon smoked paprika
- ✦1 teaspoon ground cumin
- ✦1/2 teaspoon garlic powder
- ✦1/2 teaspoon onion powder
- ✦1/2 teaspoon dried oregano
- ✦1/4 teaspoon black pepper
- ✦1/4 teaspoon crushed red pepper flakes (optional)
- ✦2 tablespoons tomato paste
- ✦1/4 cup beef broth or water
- ✦1 teaspoon Worcestershire sauce
- ✦Fresh parsley or cilantro, for serving
👨🍳 Instructions
01Step 1
Remove the ground beef from the refrigerator 10 minutes before cooking. Pat dry with paper towels if there is visible surface moisture.
02Step 2
Heat a 12-inch cast iron or stainless skillet over medium-high heat for 2 minutes until the pan is hot. Add oil and swirl to coat.
03Step 3
Add the ground beef in one layer. Season immediately with 1 teaspoon kosher salt. Do not stir. Press down gently with a spatula and let it sear undisturbed for 3-4 minutes.
04Step 4
Once the bottom is deeply browned, break the beef into large chunks using a wooden spoon or flat spatula. Flip the chunks and let the second side sear for another 2 minutes.
05Step 5
Push the browned beef to the edges of the pan. Add the diced onion to the center and sauté for 3-4 minutes until softened and beginning to caramelize.
06Step 6
Add the minced garlic to the onion and cook for 1 minute until fragrant.
07Step 7
Add the smoked paprika, cumin, garlic powder, onion powder, oregano, black pepper, and red pepper flakes (if using). Stir everything together and cook for 1 minute to toast the spices.
08Step 8
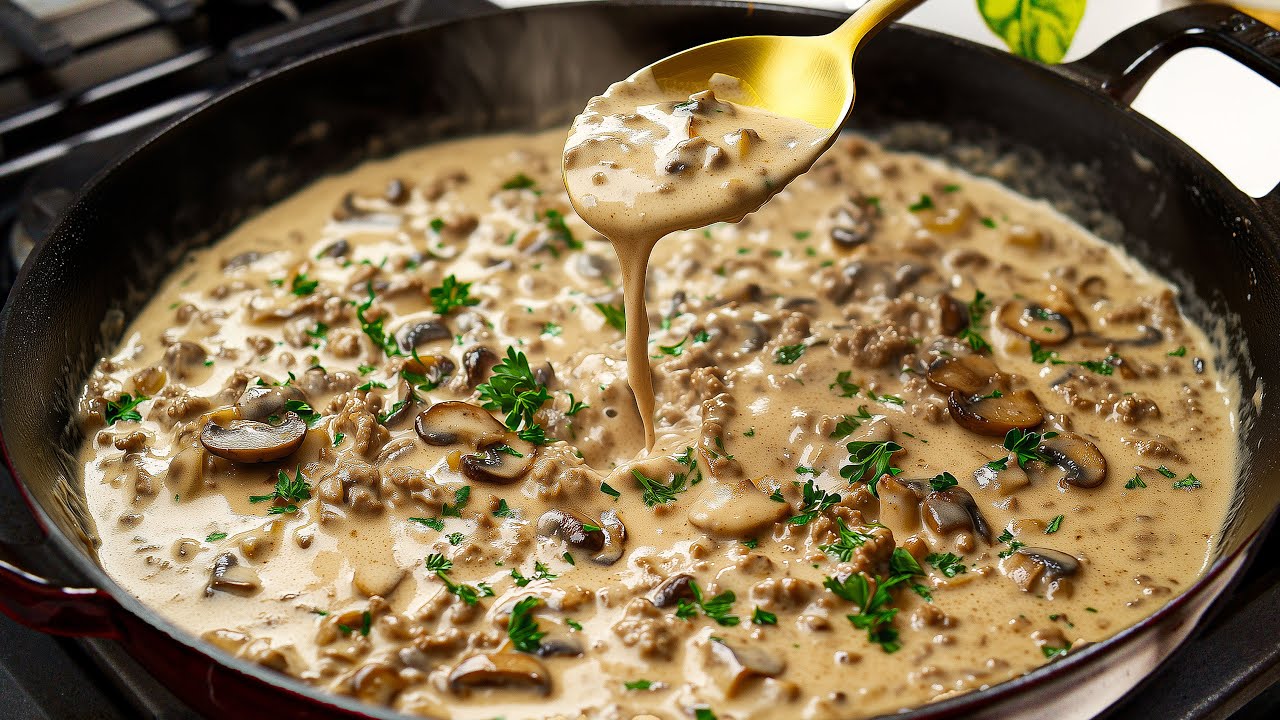
Add the tomato paste and stir to coat the beef. Cook for 2 minutes until the paste darkens slightly from bright red to deep brick red.
09Step 9
Pour in the beef broth and Worcestershire sauce. Stir to deglaze the pan, scraping up any browned bits from the bottom. Cook for 2-3 minutes until the liquid is almost fully absorbed.
10Step 10
Taste and adjust seasoning with remaining salt and black pepper. Remove from heat.
11Step 11
Serve immediately, garnished with fresh parsley or cilantro, or use as a base for tacos, pasta, rice bowls, or stuffed peppers.
Nutrition Per Serving
Estimates based on standard preparation. Adjustments alter macros.
🔄 Substitutions
Instead of 80/20 ground beef...
Use Ground turkey or ground chicken
Lower fat means less natural browning. Add an extra tablespoon of oil and ensure the pan is aggressively hot before the meat goes in. Expect a lighter color and slightly different flavor profile.
Instead of Tomato paste...
Use Sun-dried tomato paste or miso paste
Sun-dried tomato paste intensifies the tomato flavor significantly — use half the amount. White miso provides the same umami function with a different, slightly sweeter flavor.
Instead of Worcestershire sauce...
Use Soy sauce or coconut aminos
Equal amounts. Soy sauce is saltier, so reduce the added salt slightly. Coconut aminos is slightly sweeter and works well if you want a cleaner ingredient list.
Instead of Beef broth...
Use Red wine or water with a splash of soy sauce
Red wine deglazes the pan beautifully and adds depth, but needs 3-4 minutes to cook off the alcohol. Water with soy sauce is a neutral workhorse substitute.
🧊 Storage & Reheating
In the Fridge
Store in an airtight container for up to 4 days. The flavors improve after the first day as the spices continue to meld.
In the Freezer
Freeze in portions for up to 3 months. Spread on a baking sheet to freeze flat before transferring to bags — this prevents one giant frozen block.
Reheating Rules
Reheat in a skillet over medium heat with a tablespoon of water or broth to rehydrate. Microwave works in a pinch but can dry out the edges — cover with a damp paper towel.
❓ Frequently Asked Questions
Why is my ground beef gray instead of brown?
Two causes: the pan wasn't hot enough, or the beef was too crowded. Both result in the meat steaming in its own moisture instead of searing. Use a wide skillet, cook in batches if needed, and wait until the pan is aggressively hot before adding the beef.
Should I drain the fat after browning?
Depends on the fat content. With 80/20 beef, drain about half the rendered fat after browning — keep some for flavor, remove excess to prevent greasiness. With 90/10 beef, drain nothing. The fat carries the seasoning into the meat.
How do I know when ground beef is cooked safely?
Ground beef must reach 160°F internal temperature. Color alone is unreliable — beef can brown before reaching safe temperature, or remain slightly pink after. Use an instant-read thermometer if you're unsure, especially with thicker chunks.
Can I add the spices at the beginning instead of after browning?
You can, but you'll get less browning on the meat because the spices create a barrier between the beef surface and the hot pan. The preferred technique is to sear the beef first, then add aromatics and spices after the initial browning is complete.
What does tomato paste actually do here?
Tomato paste provides glutamates — the compounds responsible for umami, the fifth taste that makes food taste 'meaty' and complete. When cooked in fat until it darkens, it undergoes its own Maillard reaction, developing deep, complex flavor that amplifies everything around it.
Can I make this ahead for meal prep?
Yes — this is one of the best meal prep proteins. Cook a double batch on Sunday, refrigerate in portions, and deploy throughout the week for tacos, pasta sauce, rice bowls, stuffed peppers, or quesadillas. It reheats cleanly and holds its texture well.

The Science of
Perfect Seasoned Ground Beef (The Base Recipe You've Been Missing)
We turned everything on this page into a beautiful, flour-proof PDF cheat sheet. Print it out, stick it to your fridge, and never mess up your perfect seasoned ground beef (the base recipe you've been missing) again.
*We'll email you the high-res PDF instantly. No spam, just perfectly cooked meals.
AlmostChefs Editorial Team
We translate the internet's most popular cooking videos into foolproof, beginner-friendly written recipes. We analyze multiple methods, test them in our kitchen, and engineer a single "Master Recipe" that gives you the best possible result with the least possible stress.