The Perfect Grilled Cheese Sandwich (Low and Slow Wins)
Two cheeses, garlic butter, and a medium-low skillet. The technique here is the whole recipe — most grilled cheese failures come from too much heat too fast. We break down exactly why the crust burns before the cheese melts, and how to fix it with one adjustment.
“You've made grilled cheese a hundred times. At least half of those were overcooked on the outside and not quite melted on the inside. That's not a cheese problem or a bread problem. It's a heat problem. The fix takes one adjustment and produces a sandwich that's properly golden, uniformly crisp, and fully melted from edge to edge.”
Why This Recipe Works
Grilled cheese is a two-ingredient recipe that most people have been making slightly wrong for years. The bread burns. The cheese doesn't fully melt. The crust comes out blotchy — dark in spots, pale in others. None of these are caused by bad ingredients. All of them are caused by the same thing: too much heat applied too fast.
The Heat Physics
Bread is mostly air pockets trapped in a starch-and-protein matrix. When you put it in contact with a hot pan, the surface moisture evaporates quickly, the sugars in the bread undergo Maillard browning, and the texture firms up. This process happens fast — at medium-high heat, the bread surface is ready to brown in under two minutes. The problem is that cheese melting is a much slower process. Cheddar needs sustained heat at roughly 150°F (65°C) to begin losing its solid structure and flowing. That takes time. If the pan is too hot, you've already burned the bread by the time the cheese is anywhere near molten.
The solution is simple and counterintuitive if you're used to cooking at higher temperatures: medium-low heat, every time, with no exceptions. You want the butter on the bread to sizzle gently when it hits the pan — not aggressively. The cook time stretches to 3-4 minutes per side, which feels long for a simple sandwich. But that extended time at lower temperature is what allows the heat to transfer through the bread and into the cheese while still producing a properly golden, evenly browned crust.
Why Butter Goes on the Bread, Not the Pan
Most recipes default to putting butter in the pan. The problem with this approach is pooling — butter melts and collects unevenly in the pan, leaving some areas heavily buttered and others dry. The result is patchy browning: dark spots where the bread sat in pooled butter, pale patches where contact was thin. Spreading softened butter directly onto the bread surface gives you complete, even coverage and ensures uniform contact with the pan. Every millimeter of crust gets the same treatment.
The butter also needs to be softened, not melted. Melted butter soaks into the bread and saturates the starch before cooking, which makes the interior dense and the crust greasier without adding meaningful crispness. Softened butter sits at the surface, creates a fat barrier that conducts heat, and produces the golden, crackling exterior you want.
The Two-Cheese Logic
This isn't about being fancy. It's about covering two separate technical requirements that a single cheese struggles to meet simultaneously. Sharp cheddar has the flavor profile — aged, assertive, slightly tangy — but it melts stiffly and can split into greasy and grainy components if overheated. Gruyere (or fontina) melts fluidly and smoothly due to its higher moisture content and different protein structure, but it's milder and doesn't deliver the same flavor impact. Layering them means you get the cheddar flavor up front with the gruyere providing the flowing, cohesive melt that pulls cleanly when you bite.
The layering order matters slightly: cheddar goes against the mustard (if using), gruyere sits against the top bread slice. Gruyere in contact with both bread surfaces gets heat from both sides simultaneously, which speeds its melting without requiring you to push the temperature.
The Pressing Technique
A cast iron skillet gives you even, radiating heat across the full bread surface. But even with perfect heat, there will be small air pockets between the bread and the pan. Applying gentle, brief pressure with a flat spatula — not smashing, just firm contact for a few seconds every 30 seconds — collapses those air pockets and ensures full surface contact. More contact means more even browning and better heat transfer up through the bread and into the cheese layer. This is the difference between a crust that's uniformly golden and one that has paler patches in the middle.
The Dijon Variable
Dijon mustard is listed as optional, but it's worth understanding what it does. The acidity in the mustard cuts through the fat of the cheese and the butter, preventing the richness from becoming cloying. It also adds a background sharpness that amplifies the cheddar flavor without being identifiable as mustard in the finished sandwich. You won't taste mustard. You'll taste a sharper, more defined grilled cheese. A thin layer is all it takes.
The Rest Period
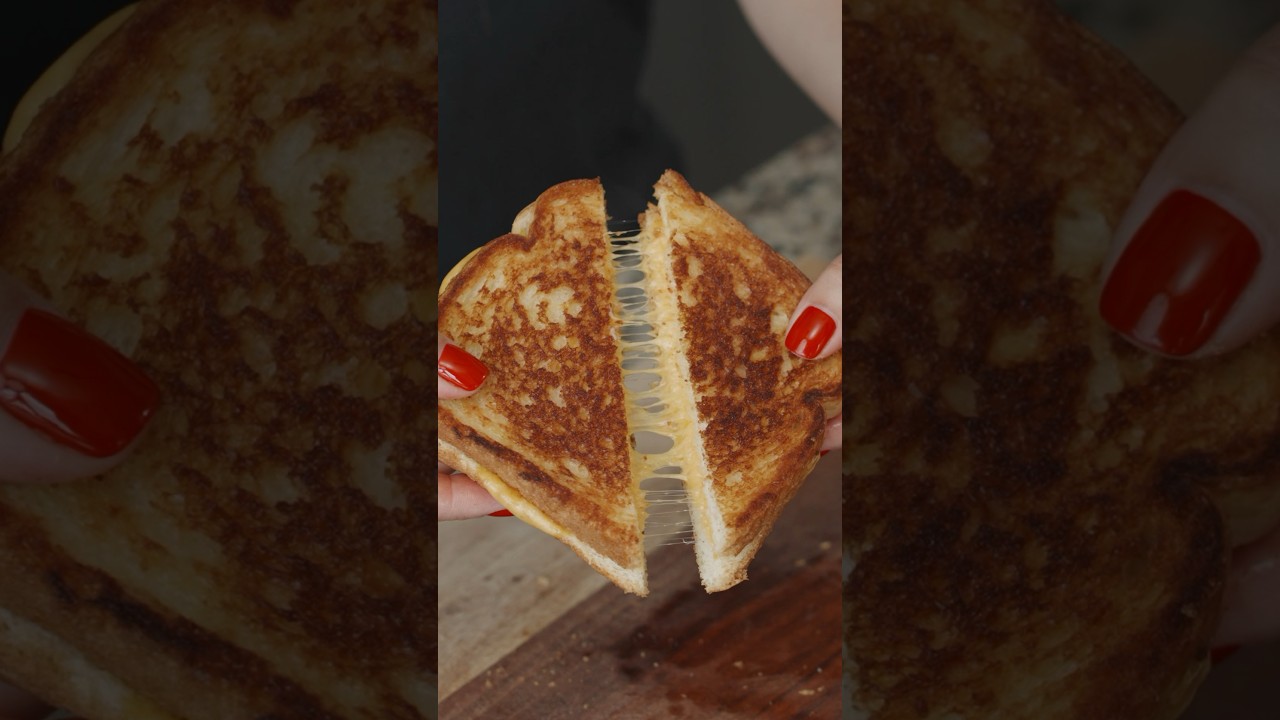
When the sandwich comes off the pan, the cheese is still in a semi-liquid state. Cutting immediately causes the filling to pour out of the cross-section. Thirty seconds of rest allows the cheese to firm slightly — still soft and melted, but cohesive enough to hold its shape when sliced. This is the same principle as resting meat after cooking: the interior temperature equalizes and the proteins firm slightly. Don't skip it. The thirty seconds make the difference between a clean cross-section and a puddle on the board.
Where Beginners Mess This Up
Before we start, read this. These are the 4 reasons your the perfect grilled cheese sandwich (low and slow wins) will fail:
- 1
Heat is too high: This is the source of almost every grilled cheese failure. Medium-high heat crisps the crust in 90 seconds before the interior temperature has had enough time to fully melt the cheese. The bread burns; the cheese is still a solid slab. Drop to medium-low and hold it there for the full cook time.
- 2
Butter on the pan, not the bread: Putting butter in the pan causes it to pool and create uneven contact with the bread. Spreading softened butter directly onto the bread surface ensures complete, even coverage and a uniformly golden crust with no pale or burnt patches.
- 3
Using a single cheese: Sharp cheddar has great flavor but melts stiffly. Gruyere or fontina melts fluidly but is milder. A combination gives you both — flavor from the cheddar, melt flow from the gruyere. The ratio here (60/40 cheddar to gruyere) is deliberate.
- 4
Not pressing during cooking: Light, steady pressure with a spatula increases contact between bread and pan surface, produces more even browning, and compresses the cheese layer slightly to help heat transfer from bread to filling. Don't smash — firm, brief pressure every 30 seconds.
The Video Reference Library
Want to see it in action? Here are the exact videos we analyzed and combined to build this foolproof recipe translation:
Covers the garlic butter prep, the layering order, and the medium-low technique in real time. Watch the color develop on the crust — that's the pace you're aiming for.
🛠️ Core Equipment
- Cast iron skillet or heavy nonstick panEven heat distribution is mandatory for a uniformly golden crust. Thin pans create hot spots that burn patches of bread while the rest stays pale. A well-seasoned cast iron skillet or a quality nonstick skillet delivers even, consistent contact heat across the whole surface.
- Flat spatulaWide enough to flip the whole sandwich in one motion without folding or breaking. You also need it for the pressing step — a narrow spatula applies uneven pressure and can create a dent instead of distributed contact.
The Perfect Grilled Cheese Sandwich (Low and Slow Wins)
🛒 Ingredients
- ✦2 slices whole grain bread or sourdough
- ✦1.5 tablespoons unsalted butter, softened to room temperature
- ✦1.5 oz sharp cheddar cheese, sliced thin
- ✦1 oz gruyere or fontina, sliced thin
- ✦1/4 teaspoon garlic powder
- ✦Pinch of flaky sea salt
- ✦1 teaspoon dijon mustard (optional)
- ✦Fresh thyme leaves (optional)
👨🍳 Instructions
01Step 1
In a small bowl, mix the softened butter with garlic powder until evenly combined. Add a pinch of flaky sea salt.
02Step 2
If using dijon mustard, spread a thin layer on the inner face of one bread slice.
03Step 3
Layer the sliced cheeses on the mustard side of one bread slice — cheddar first, then gruyere on top. Gruyere in direct contact with the other bread slice helps it begin melting from both sides.
04Step 4
Spread the garlic butter evenly across the outer face of both bread slices, covering edge to edge.
05Step 5
Heat a cast iron or heavy nonstick skillet over medium-low. Place the sandwich butter-side down.
06Step 6
Cook undisturbed for 3-4 minutes. Apply gentle, even pressure with a flat spatula for 5 seconds every 30 seconds to maintain full contact.
07Step 7
When the bottom is deep golden — not just lightly tan — flip once using a flat spatula.
08Step 8
Cook the second side for 2-3 minutes until equally golden and the cheese is fully melted to the edges. Remove from heat, let rest 30 seconds, and slice.
Nutrition Per Serving
Estimates based on standard preparation. Adjustments alter macros.
🔄 Substitutions
Instead of Sharp cheddar...
Use Aged Gouda or Comté
Both melt well and have strong flavor. Comté has a slightly nuttier profile. Avoid pre-shredded bags — they contain anti-caking agents that inhibit smooth melting.
Instead of Gruyere...
Use Fontina, Havarti, or Raclette
All melt fluidly. Raclette is the most aggressive in flavor; Havarti is the mildest. Any of the three works for the fluid-melt role in this combination.
Instead of Unsalted butter...
Use Mayonnaise
Spread a thin layer of real mayo on the outer bread face instead of butter. It produces a remarkably even, golden-brown crust and handles slightly higher heat before browning. Not a joke — it works well.
Instead of Whole grain bread...
Use Sourdough or country white
Sourdough is the upgrade — better flavor, better structure. Country white is softer and crisps faster. Avoid thin sandwich bread; it compresses under the spatula.
🧊 Storage & Reheating
In the Fridge
Grilled cheese doesn't store well. If you must, wrap tightly and refrigerate up to 1 day. The crust will soften in storage.
In the Freezer
Not recommended. The crust texture is entirely destroyed by freezing.
Reheating Rules
Reheat in a dry skillet over medium-low heat for 2-3 minutes per side. This restores most of the original crust. The microwave turns the bread rubbery and is not recommended.
❓ Frequently Asked Questions
Why does my grilled cheese always burn before the cheese melts?
Heat is too high. Full stop. Medium-high heat — which is where most people instinctively start — crisps and browns bread in about 90 seconds. The cheese needs 3-4 minutes of sustained warmth to fully melt. The only solution is medium-low heat and patience. It will feel slow. That's correct.
What's the best cheese for grilled cheese?
A blend of one high-flavor cheese and one high-melt cheese. Sharp cheddar for flavor, gruyere or fontina for melt flow. Either alone is a compromise. Together, they cover each other's weaknesses. Avoid pre-shredded cheese — the anti-caking starch coating prevents smooth melting.
Butter or mayo on the outside?
Both work. Butter produces a richer flavor. Mayo produces a more even, consistent browning with slightly more tolerance for temperature variation. If your butter-crust grilled cheese keeps coming out patchy, switch to mayo and the problem usually disappears.
Should I use a lid while cooking?
Optional but useful if your cheese is thick. After flipping, a loose lid traps enough steam to raise the internal temperature slightly and complete the melt faster. Don't seal it tight — you'll steam the crust soft. Just resting the lid ajar for 90 seconds is enough.
Can I make this with non-dairy cheese?
Yes, but results vary significantly by brand. Plant-based cheeses melt at different rates and with different textures than dairy. Use medium-low heat, press gently, and consider adding a small amount of moisture (a light cover for the last 2 minutes) to assist the melt.

The Science of
The Perfect Grilled Cheese Sandwich (Low and Slow Wins)
We turned everything on this page into a beautiful, flour-proof PDF cheat sheet. Print it out, stick it to your fridge, and never mess up your the perfect grilled cheese sandwich (low and slow wins) again.
*We'll email you the high-res PDF instantly. No spam, just perfectly cooked meals.
AlmostChefs Editorial Team
We translate the internet's most popular cooking videos into foolproof, beginner-friendly written recipes. We analyze multiple methods, test them in our kitchen, and engineer a single "Master Recipe" that gives you the best possible result with the least possible stress.