Focaccia Bread That Actually Works (The Dimple Method)
A crispy-bottomed, airy-crumbed Italian flatbread with rosemary, garlic, caramelized onions, and enough olive oil to make you reconsider every bread you've ever made. We broke down the technique to one reliable method that delivers bakery results in a home oven every time.
“Most homemade focaccia fails in one of two directions: dense and doughy, or flat and cracker-dry. The fix isn't a better recipe — it's understanding what the olive oil is actually doing, why your dimples matter, and how to read the dough before it goes in the oven. We built this method around those three fixes and nothing else.”
Why This Recipe Works
Focaccia is the least intimidating yeast bread you can make, which is exactly why so many people make it badly. They treat it casually, skip steps they consider optional, and then wonder why the result tastes like a dense, oily slab. The technique is forgiving, but not infinitely forgiving. A few things matter enormously and the rest is negotiable.
Olive Oil Is the Structure
This is not a recipe where you use olive oil for flavor and could substitute something neutral without consequence. The olive oil on the baking sheet creates a shallow fry effect on the bottom crust during baking. The oil in the dimples pools, heats, and essentially deep-bastes the interior of the bread from below. The drizzle on top before baking creates a barrier that keeps the crust from going hard before the interior is fully set.
Two tablespoons on the pan is the minimum. If you're measuring and it seems like a lot, that's correct. Focaccia is not a lean bread. It never was. The olive oil is load-bearing.
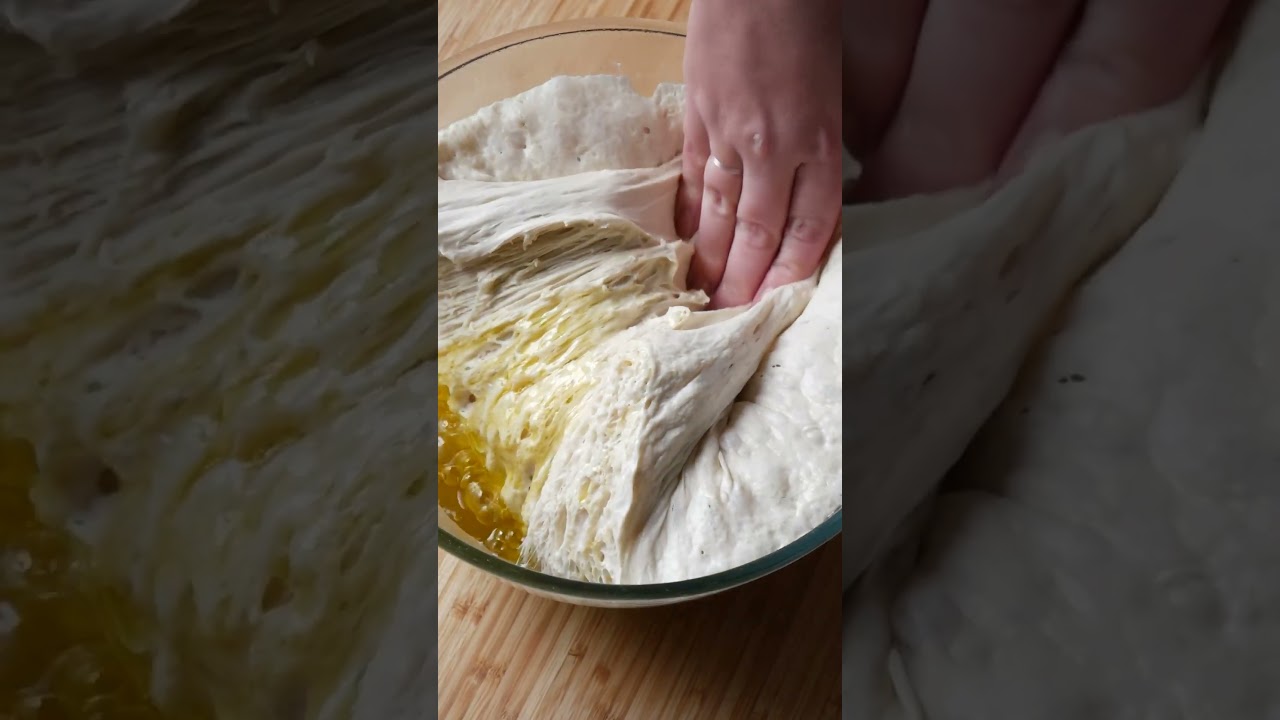
What the Dimples Actually Do
The dimples are not decorative. They are functional topography. Each indentation is a reservoir that holds olive oil, garlic, rosemary, and moisture during baking. Without deep dimples, those ingredients sit on the surface and either slide off or burn. With proper dimples — pressed all the way to the pan — they pool, concentrate, and baste the surrounding dough as the bread bakes.
The depth requirement is non-negotiable: your fingertips should nearly reach the pan. Shallow dimples close during the second rise. Dimples that survive the second rise and enter the oven properly formed are what separate focaccia with character from focaccia that looks like regular white bread pressed into a pan.
The Two-Rise Logic
The first rise builds the gas structure — yeast consuming sugars, producing CO2, creating the network of bubbles that gives focaccia its open, airy crumb. The second rise, after dimpling and topping, allows the dough to recover from being pressed flat and re-establish its airiness before it hits the oven. Skipping the second rise puts cold, compressed dough into the oven and produces dense bread.
Thirty minutes is the floor for the second rise, not the ceiling. If your kitchen runs cool, give it 45. The signal: the dough should look noticeably puffier than when you finished dimpling, and the dimples should have filled in slightly at the edges (not entirely — that would mean overproofed).
Temperature Precision at the Start
Water temperature is where most yeast breads die before they begin. Instant yeast activates optimally at 110-115°F. Below 100°F, it activates sluggishly. Above 120°F, the yeast proteins denature and you've bought yourself a brick. An instant-read thermometer costs less than a bag of flour and removes the only real failure point in this recipe that can't be corrected downstream.
Five minutes of foaming time after sprinkling the yeast over the water-sugar mixture is your confirmation the yeast is alive and working. No foam after five minutes means something is wrong. Bake without confirmation and you've committed 1.5 hours of rise time to a dough that will never rise.
The Oven Finish
425°F is hot for bread, and intentionally so. Focaccia needs high heat to form a proper crust before the interior moisture escapes. A lower temperature produces a bread that dries out from the inside before the exterior develops any color or structure. The upper-middle rack position keeps the top crust out of direct proximity to the heating element while still getting enough top heat to brown properly.
Deep golden brown is the target color — not blonde, not light tan. If you're nervous about burning, you're pulling it too early. The bottom crust, which you can check by running a spatula under one corner, should be an even, deep gold with slight crispiness. That's the confirmation that the olive oil did its job.
Everything else — the rosemary, the caramelized onions, the coarse salt — is the reward for executing the fundamentals.
Where Beginners Mess This Up
Before we start, read this. These are the 4 reasons your focaccia bread that actually works (the dimple method) will fail:
- 1
Under-dimpling the dough: Shallow dimples close up during the second rise and disappear entirely in the oven. Press your fingertips all the way down until you nearly touch the pan. Those cavities are where the olive oil pools and creates the characteristic crispy pockets. Timid dimpling produces a smooth, boring loaf.
- 2
Skimping on olive oil: Focaccia is not a low-fat bread and it was never meant to be. The olive oil on the pan creates a fried bottom crust. The oil in the dimples bastes the bread from the inside as it bakes. Without adequate oil — at least 2 tablespoons on the pan before the dough goes in — you lose both the texture and the flavor.
- 3
Cutting it too early: The interior crumb is still setting for 10-15 minutes after the bread leaves the oven. Slice it hot and the crumb collapses into a gummy, compressed mess. Wait the full 15 minutes minimum. The bread will still be warm. The texture will be completely different.
- 4
Rushing the second rise: The second rise — after dimpling, before baking — is when the dough recovers its airiness after being pressed flat. Skipping it or shortcutting it produces a dense, chewy loaf instead of the open, light crumb that makes focaccia worth making. Thirty minutes is the floor, not the target.
The Video Reference Library
Want to see it in action? Here are the exact videos we analyzed and combined to build this foolproof recipe translation:
The foundational video this recipe draws from. Clear technique on dimpling, olive oil quantity, and reading the dough at each stage. Watch the second rise section carefully.
🛠️ Core Equipment
- 9x13-inch rimmed baking sheetThe standard size for this recipe. Smaller pans produce focaccia that's too thick and doesn't cook evenly through. Rimmed edges prevent olive oil from running off in the oven.
- Stand mixer with dough hookDevelops gluten more consistently than hand kneading for an 8-10 minute knead. You can do this by hand, but the stand mixer removes the guesswork on dough elasticity.
- Wire cooling rackMoving the focaccia off the hot pan immediately after baking prevents the bottom crust from steaming itself soft. The rack keeps air circulating underneath while it rests.
- Instant-read thermometerWater temperature is the most common yeast-killing mistake. 110-115°F is the exact target range. Too hot kills the yeast. Too cool and it won't activate. A thermometer removes the guesswork entirely.
Focaccia Bread That Actually Works (The Dimple Method)
🛒 Ingredients
- ✦3.5 cups all-purpose flour
- ✦1.75 cups warm water (110-115°F)
- ✦1/2 cup extra virgin olive oil, divided
- ✦2 teaspoons instant yeast
- ✦1.5 teaspoons fine sea salt
- ✦1 teaspoon granulated sugar
- ✦2 tablespoons fresh rosemary leaves, finely chopped (or 1 tablespoon dried)
- ✦3 garlic cloves, minced
- ✦2 teaspoons coarse sea salt for topping
- ✦1/2 teaspoon freshly ground black pepper
- ✦3/4 cup caramelized yellow onions, thinly sliced
- ✦1 tablespoon room temperature water (for finishing)
👨🍳 Instructions
01Step 1
Combine the warm water and granulated sugar in a large mixing bowl. Sprinkle the instant yeast over the surface and let it sit undisturbed for 5 minutes until foamy.
02Step 2
Mix in 2 tablespoons of the olive oil and the all-purpose flour with a wooden spoon or stand mixer on low speed until a shaggy dough forms with no dry flour visible.
03Step 3
Sprinkle the fine sea salt over the dough and knead on medium-low speed for 8-10 minutes by stand mixer (or 10-12 minutes by hand) until smooth, elastic, and slightly tacky but not sticky.
04Step 4
Shape the dough into a ball, transfer to a clean bowl coated with 1 tablespoon of olive oil, and cover loosely with plastic wrap or a damp kitchen towel.
05Step 5
Let the dough rise at room temperature for 1 to 1.5 hours until it increases in volume by 50-75% and holds a gentle indent when poked with a floured finger.
06Step 6
Pour 2 tablespoons of olive oil onto a 9x13-inch baking sheet and spread evenly to coat the entire surface. Transfer the risen dough to the sheet and gently stretch it to fill the pan.
07Step 7
Press your fingertips deeply and evenly all over the dough surface to create characteristic dimples, working from the center outward with about 1 inch between each indentation.
08Step 8
Combine the minced garlic and fresh rosemary in a small bowl and distribute evenly across the dimpled surface.
09Step 9
Scatter the caramelized onion slices across the dough to cover most of the surface. Sprinkle coarse sea salt and black pepper over the top.
10Step 10
Cover loosely with plastic wrap and let rise at room temperature for 30-45 minutes until the dough is puffy and the dimples fill in slightly.
11Step 11
Preheat your oven to 425°F and position the rack in the upper-middle position, about 10 minutes before the dough finishes its second rise.
12Step 12
Drizzle the remaining 1 tablespoon of olive oil evenly across the top, making sure it pools in the dimples.
13Step 13
Bake for 20-25 minutes until the top is deep golden brown and the edges pull away slightly from the pan sides.
14Step 14
Remove from the oven and immediately brush the surface with 1 tablespoon of room temperature water to create a tender, slightly moist finish.
15Step 15
Cool on the baking sheet for 5 minutes, then slide onto a [wire cooling rack](/kitchen-gear/review/wire-cooling-rack) and rest for at least 15 minutes before slicing.
Nutrition Per Serving
Estimates based on standard preparation. Adjustments alter macros.
🔄 Substitutions
Instead of All-purpose flour...
Use Half all-purpose, half whole wheat flour (1.75 cups each)
Slightly denser crumb and a nuttier flavor. Add 1-2 tablespoons extra water to compensate for whole wheat's higher absorption rate.
Instead of Instant yeast...
Use Active dry yeast (2.25 teaspoons) or wild sourdough starter (1/2 cup)
Active dry yeast works identically but needs to bloom longer — 10 minutes instead of 5. Sourdough starter requires an 8-12 hour cold fermentation and produces a tangier, more complex loaf.
Instead of Granulated sugar...
Use Honey or pure maple syrup (3/4 teaspoon)
Both activate yeast equally well. Honey adds slight floral complexity. Minimal impact on final flavor since the quantity is small.
Instead of Extra virgin olive oil...
Use 1/3 cup extra virgin olive oil combined with 2 tablespoons avocado oil
Slightly milder flavor, same golden crust. The avocado oil's higher smoke point provides a small buffer if your oven runs hot.
🧊 Storage & Reheating
In the Fridge
Store tightly wrapped at room temperature for up to 2 days. Refrigerating focaccia dries it out — avoid it.
In the Freezer
Freeze in slices or whole for up to 1 month. Wrap tightly in plastic wrap, then foil. Thaw at room temperature for 1 hour.
Reheating Rules
Reheat in a 350°F oven for 5 minutes directly on the rack. This revives the crust without drying the interior. Microwave reheating produces a soft, chewy bread with no crust — not the goal.
❓ Frequently Asked Questions
Why is my focaccia dense instead of airy?
One of three things happened: the yeast was inactive, the dough was under-kneaded, or the first rise was cut short. Test your yeast first — it should foam visibly within 5 minutes. Knead until the dough is genuinely smooth and elastic, not just combined. And give the first rise a full hour minimum.
Can I make focaccia without a stand mixer?
Yes. Hand kneading works fine — it takes 10-12 minutes and requires more effort, but the result is identical. The dough is ready when it passes the windowpane test: stretch a small piece thin enough to see light through without it tearing.
My dimples disappeared during the second rise. What happened?
You didn't press deep enough. The dimples need to go almost all the way to the pan surface. Dimples that are only 1/4 inch deep will close up completely during the second rise. Re-dimple aggressively before the second rise begins if needed.
Can I add other toppings?
Focaccia is one of the most adaptable breads in existence. Cherry tomatoes, olives, thinly sliced zucchini, sun-dried tomatoes, or flaky sea salt all work. Add them before the second rise so they press slightly into the dough and don't roll off when you slice.
Why does my focaccia stick to the pan?
Not enough olive oil on the pan. Two tablespoons minimum is the floor — generous coating, not a thin film. The oil is what creates the fried bottom crust and releases the bread cleanly. If it still sticks, run a thin spatula around the edges and let it rest 5 more minutes before attempting to lift it.
Can I use bread flour instead of all-purpose?
Yes, and many bakers prefer it. Bread flour has higher protein content (12-14% vs 10-12%) which develops stronger gluten and produces a chewier crumb. The texture shifts from light and airy toward toothsome and substantial. Both are correct — it depends on what you want.

The Science of
Focaccia Bread That Actually Works (The Dimple Method)
We turned everything on this page into a beautiful, flour-proof PDF cheat sheet. Print it out, stick it to your fridge, and never mess up your focaccia bread that actually works (the dimple method) again.
*We'll email you the high-res PDF instantly. No spam, just perfectly cooked meals.
AlmostChefs Editorial Team
We translate the internet's most popular cooking videos into foolproof, beginner-friendly written recipes. We analyze multiple methods, test them in our kitchen, and engineer a single "Master Recipe" that gives you the best possible result with the least possible stress.