Perfect Crème Brûlée (The French Custard You've Been Overthinking)
A silky, vanilla-infused French custard with a shatteringly crisp caramelized sugar crust. We broke down the tempering science, water bath geometry, and torching technique so you stop getting scrambled eggs in a ramekin and start getting restaurant-quality results at home.
“Crème brûlée has a reputation it doesn't deserve. It's not difficult. It's not fussy. It's physics. The entire recipe is five ingredients and one technique: keeping eggs from scrambling in hot cream. Get that one thing right — and the water bath, the chilling, the torching all fall into place automatically. Every failure you've ever had with custard traces back to the same thirty-second window when hot cream meets cold yolks. We're going to fix that.”
Why This Recipe Works
Crème brûlée is a test of restraint. Not culinary skill — restraint. The impulse to stir, to check, to crank the heat because the timer seems long, to pour the cream faster because your arm is getting tired. Every failure this dessert produces traces back to impatience at one of three moments: the tempering, the bake, or the chill. Master the patience and the recipe runs itself.
The Tempering Problem
Eggs scramble at 160°F. Heavy cream comes off the stove at 180°F. The entire technique of crème brûlée exists to close that twenty-degree gap without triggering coagulation. You do this by adding the hot cream to the yolks gradually — so gradually that the cream's heat is absorbed and dissipated before it can raise the local yolk temperature above the scramble threshold.
This is why the stream must be thin and the whisking must be constant. You are continuously diluting the heat source. A slow pour into a moving bowl means no single egg protein ever gets exposed to full 180°F cream. By the time the last drop of cream has been incorporated, the entire mixture is sitting comfortably around 140°F — warm enough to eventually set, cool enough to stay smooth.
The fine-mesh sieve is your error correction. Even with perfect tempering technique, stray cooked particles end up in the mixture. Straining catches them before they set into the final texture. It also removes air bubbles that would otherwise create a pocked surface. This step costs thirty seconds and produces a visibly smoother result every time.
The Water Bath Physics
The 325°F oven plus water bath isn't a suggestion — it's temperature engineering. The water surrounding your ramekins cannot exceed 212°F, the boiling point of water. This means your custard has an absolute maximum temperature ceiling of 212°F, regardless of what the oven thermostat says. Without the water bath, an unconstrained 325°F oven would bake the custard edges to 250°F+ while the center struggled to reach setting temperature — producing rubbery edges and liquid centers.
The water bath creates a uniform thermal environment where every part of the custard climbs to setting temperature at roughly the same rate. This is why jiggle is the correct doneness test: the center is the last part to hit setting temperature, so when the center waves like set gelatin, the entire custard has crossed the threshold simultaneously.
Pull them early. The residual heat in the ramekin and the custard itself continues cooking for several minutes after leaving the oven. If you pull them at the moment of perfect jiggle, they'll finish setting during the cool-down. If you wait until they look set in the oven, they'll be over-set by the time they hit room temperature.
The Caramel Architecture
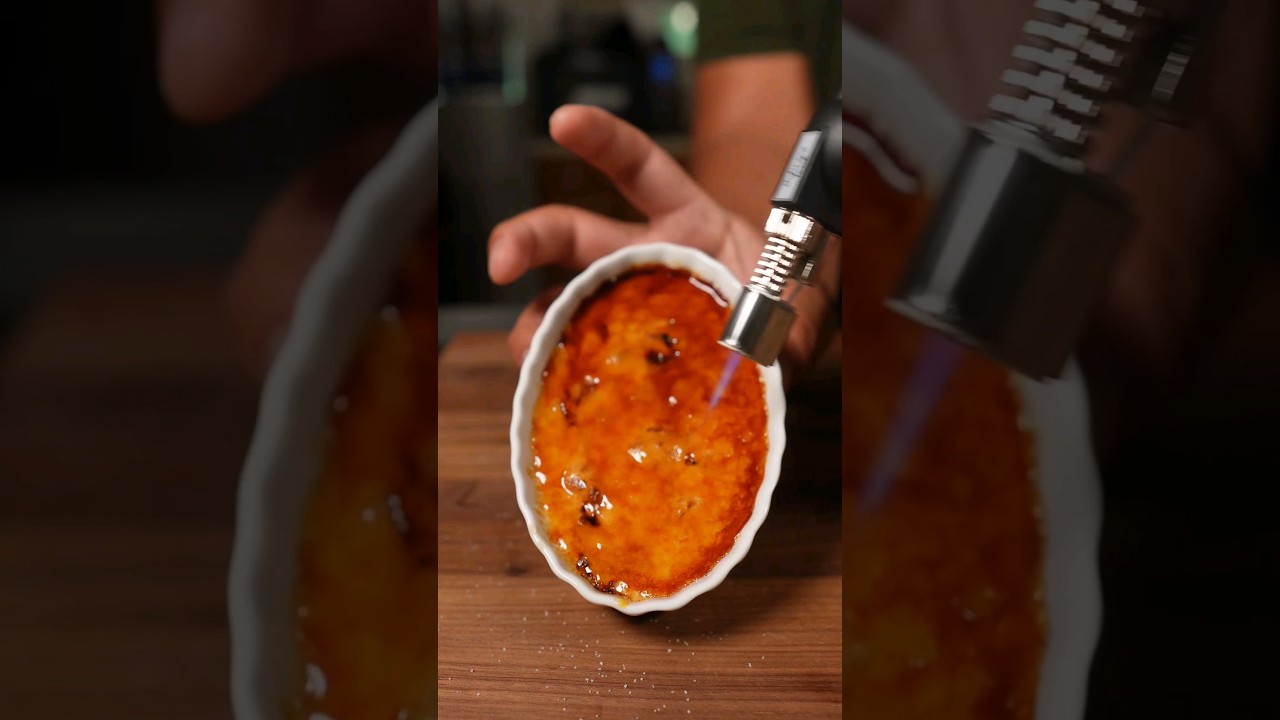
The sugar crust is not decorative. It's structural. The brittle caramel layer provides the textural contrast that makes the dish — the resistance of the crack before the spoon reaches the cold custard below. Achieve this by torching the sugar to deep amber, not light golden. Light golden caramel is still partially liquid and will soften back into itself within minutes. Deep amber caramel has fully dehydrated and vitrified into a rigid glass that holds its shape.
Two tablespoons of sugar per ramekin sounds like a lot until you realize that half of it caramelizes away. Spread it thin and even, blot any moisture first, and move the kitchen torch without stopping. The goal is a uniform mahogany surface that catches light like amber glass. Anything less and the spoon goes through with a disappointing give rather than a satisfying crack.
Serve within the hour. Caramel is hygroscopic — it actively pulls moisture from the air and from the custard below. A perfectly torched crème brûlée left for two hours becomes a soft, sticky disappointment. Torch to order. That's the discipline.
Where Beginners Mess This Up
Before we start, read this. These are the 4 reasons your perfect crème brûlée (the french custard you've been overthinking) will fail:
- 1
Pouring hot cream too fast: Dumping hot cream into egg yolks all at once instantly raises the yolk temperature above 160°F, which scrambles the proteins before they can form a smooth custard network. Pour in a thin, steady stream while whisking constantly — the process should take a full two minutes. You are gradually raising the yolk temperature, not shocking it.
- 2
Overbaking the custard: A properly baked crème brûlée jiggles. The center should wobble like set Jell-O when you gently shake the ramekin — the edges firm, the middle with a subtle wave. If the entire surface is rigid, the proteins have over-coagulated and the texture will be grainy rather than silky. Pull them out while they still move.
- 3
Skipping the overnight chill: The custard needs a minimum of four hours to fully set, and overnight produces measurably better texture. The proteins need time to form a stable gel structure without the interference of residual heat. Torching a warm custard results in a soft shell that collapses back into the custard surface instead of hardening.
- 4
Torching unevenly or too close: Hold the torch 2-3 inches from the surface and keep it moving in small circles. Staying in one spot creates burnt black patches surrounded by unmelted sugar. The goal is deep amber across the entire surface — uniform, mahogany, not spotted. One pass is rarely enough; two or three overlapping passes usually are.
The Video Reference Library
Want to see it in action? Here are the exact videos we analyzed and combined to build this foolproof recipe translation:
The foundational walkthrough — covers tempering technique in detail with clear visual cues for when the custard is properly set versus overcooked.
🛠️ Core Equipment
- Kitchen torchThe only reliable way to caramelize the sugar crust without warming the custard underneath. A broiler gets the job done in emergencies, but the distance from the heat source is uncontrollable and you risk reheating the custard.
- Four 6-ounce ramekinsUniform size ensures all four custards bake at the same rate. Mismatched vessels produce uneven doneness — one perfect, one overcooked, one still liquid.
- Fine-mesh sieveStraining the custard base removes any cooked egg particles and excess air bubbles before they set into the final texture. This one step is the difference between restaurant-smooth and home-cook-acceptable.
- Deep roasting pan or baking dishLarge enough to hold all four ramekins with room for water to circulate freely around each one. The water bath regulates oven temperature and prevents the custard edges from overcooking before the center sets.
Perfect Crème Brûlée (The French Custard You've Been Overthinking)
🛒 Ingredients
- ✦2 cups heavy cream
- ✦1 cup whole milk
- ✦6 large egg yolks
- ✦1/2 cup granulated sugar, divided
- ✦2 teaspoons vanilla extract
- ✦1/4 teaspoon fine sea salt
- ✦2 tablespoons granulated sugar per ramekin, for topping
- ✦Hot water for water bath
👨🍳 Instructions
01Step 1
Preheat oven to 325°F. Combine heavy cream and whole milk in a medium saucepan and warm over medium heat until steam rises and small bubbles form around the edges, about 5-7 minutes. Do not boil.
02Step 2
Whisk egg yolks and 1/2 cup granulated sugar in a large bowl until the mixture is pale yellow and falls in thick ribbons from the whisk, about 2-3 minutes.
03Step 3
With the whisk moving constantly, pour the hot cream into the yolk mixture in a thin, steady stream. Take the full two minutes. This is tempering — and it's the whole recipe.
04Step 4
Stir in vanilla extract and sea salt until fully combined.
05Step 5
Strain the entire custard through a fine-mesh sieve into a measuring cup or pouring vessel. Press gently to catch any cooked egg particles.
06Step 6
Arrange four ramekins in a deep roasting pan. Divide the custard evenly among them, filling each about three-quarters full.
07Step 7
Pour hot water into the roasting pan until it reaches halfway up the sides of the ramekins. Transfer carefully to the oven — do not splash water into the custard.
08Step 8
Bake for 30-40 minutes until the edges are set and the center jiggles like set Jell-O when gently shaken. Start checking at 28 minutes.
09Step 9
Remove ramekins from the water bath and cool to room temperature, about 30 minutes. Cover with plastic wrap and refrigerate for at least 4 hours, preferably overnight.
10Step 10
When ready to serve, blot the top of each custard dry with a paper towel. Sprinkle 2 tablespoons of granulated sugar evenly across the surface of each ramekin.
11Step 11
Hold a kitchen torch 2-3 inches from the surface and move the flame in slow circular passes until the sugar melts and turns deep amber. This takes 1-2 minutes per ramekin.
12Step 12
Let the caramelized topping cool and harden for 1-2 minutes before serving. Tap the surface — it should crack cleanly under the back of a spoon.
Nutrition Per Serving
Estimates based on standard preparation. Adjustments alter macros.
🔄 Substitutions
Instead of Heavy cream...
Use Half heavy cream, half crème fraîche
Adds a subtle tang that cuts through the richness. The higher fat content of crème fraîche maintains the silky texture without compromise.
Instead of Granulated sugar (in custard)...
Use Coconut sugar or monk fruit sweetener blend
Coconut sugar adds a slight molasses depth to the custard base. Do not use it for the topping — it burns unevenly under a torch and won't form a clean caramel shell.
Instead of Vanilla extract...
Use Scraped vanilla bean pod
Split and scrape one bean directly into the cream as it heats. Remove before tempering. The flavor difference is significant — real vanilla has floral complexity that extract can only approximate.
Instead of Whole milk...
Use Unsweetened oat milk
The custard sets slightly firmer and the flavor reads cleaner, less dairy-rich. Reduce baking time by 5 minutes and check earlier — oat milk custards can go from jiggly to set faster.
🧊 Storage & Reheating
In the Fridge
Store unbaked or baked-but-untorched custards covered with plastic wrap for up to 3 days. Once torched, serve within an hour — the caramel shell absorbs moisture from the custard and turns soft.
In the Freezer
Not recommended. Custard texture breaks down on freezing and thawing; the proteins separate and the result is grainy and weeping.
Reheating Rules
Don't. Serve chilled. Torch to order. That's the entire protocol.
❓ Frequently Asked Questions
Why did my custard curdle?
You poured the hot cream too fast. The egg yolks hit 160°F before they could be diluted by the cream, scrambling the proteins. Next time, pour in a thread-thin stream over two full minutes while whisking without stopping. If you catch it early, strain aggressively — some batches are salvageable.
Can I make crème brûlée without a torch?
Yes, but with caveats. Place the ramekins on the top rack under a preheated broiler for 2-4 minutes, watching every 30 seconds. The broiler heats the custard from above, so the caramelization is less controlled and you risk warming the custard underneath. A torch is a fifteen-dollar investment that solves the problem permanently.
Why is my caramel topping soft and not cracking?
Either the sugar layer was too thick, the surface had condensation on it, or you torched it too gently. The caramel needs to reach a minimum internal temperature to vitrify (turn glassy). Blot the surface bone dry before adding sugar, use a thin even layer, and don't stop torching until you see deep amber across the entire surface.
How do I know when the custard is done baking?
The jiggle test: gently nudge the pan. The outer inch should be completely set and opaque. The center 1-2 inches should have a slow, uniform wobble — like a wave, not a slosh. A completely still custard is overcooked. Remove at the first sign of edge-set with center movement.
Do I need to use six egg yolks or can I use fewer?
You can use four yolks for a lighter custard, but the texture will be less rich and the color more pale. The recipe uses six because the ratio produces the silkiest result — enough protein to set firmly but not so much that the custard turns rubbery. Don't go below four or the custard may not set reliably.
Why does my crème brûlée taste eggy?
Two possible causes: you didn't strain the custard (removing cooked egg particles), or you baked it too hot and too fast. The 325°F water bath method keeps the maximum temperature around 212°F — hot enough to set proteins, gentle enough to prevent the sulfurous compounds in overcooked egg from developing. If it tastes eggy, lower your oven temperature and extend the bake time.

The Science of
Perfect Crème Brûlée (The French Custard You've Been Overthinking)
We turned everything on this page into a beautiful, flour-proof PDF cheat sheet. Print it out, stick it to your fridge, and never mess up your perfect crème brûlée (the french custard you've been overthinking) again.
*We'll email you the high-res PDF instantly. No spam, just perfectly cooked meals.
AlmostChefs Editorial Team
We translate the internet's most popular cooking videos into foolproof, beginner-friendly written recipes. We analyze multiple methods, test them in our kitchen, and engineer a single "Master Recipe" that gives you the best possible result with the least possible stress.