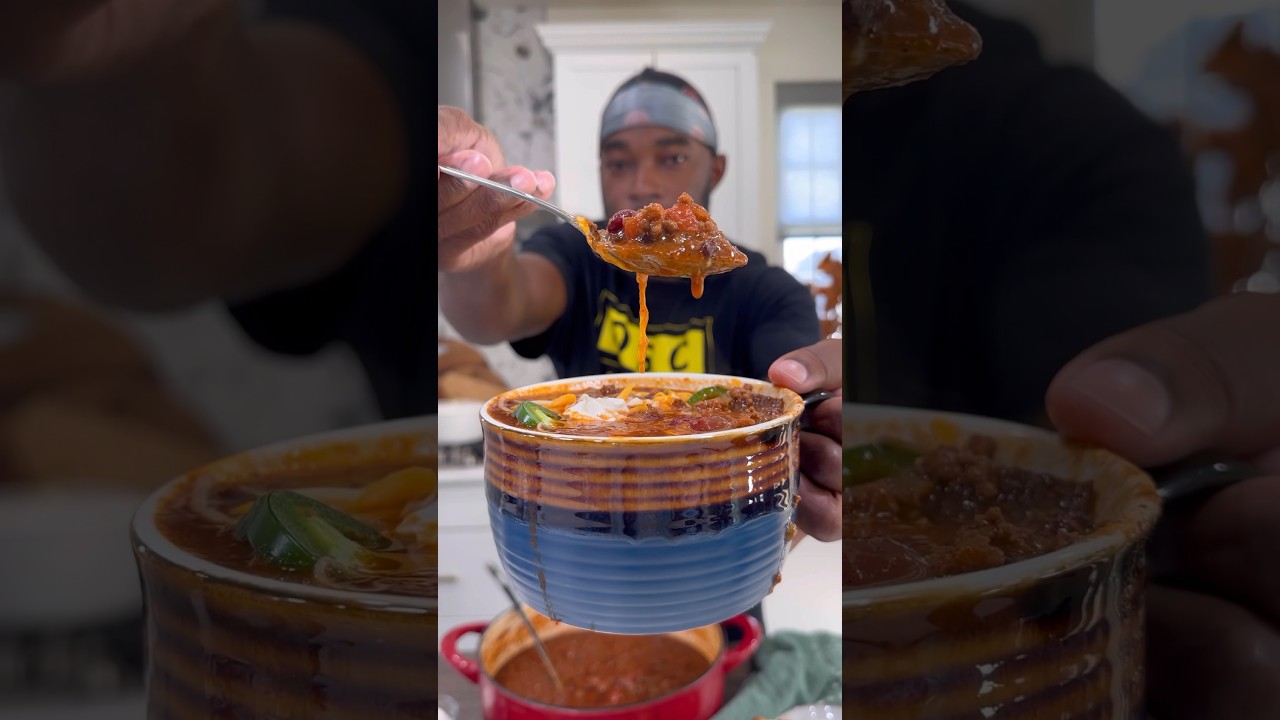
The Best Homemade Chili (Two-Hour Simmer Method)
A hearty, deeply spiced American classic built on browned ground beef, kidney beans, and crushed tomatoes. We analyzed the technique behind the most-watched chili videos to find the method that builds real depth — not just heat. The secret is in the spice bloom and the patience to let it simmer.
“Most chili is just seasoned beef soup. The version that people ask for the recipe afterward is different in three ways: the meat is properly browned (not steamed), the spices are bloomed in fat before the liquid goes in, and it simmers long enough that the beans start to break down slightly and thicken the whole pot. Skip any one of those steps and you have perfectly acceptable chili. Do all three and you have the kind that disappears before anyone gets seconds.”
Why This Recipe Works
Chili is deceptively simple. The ingredient list is short, the technique is forgiving, and the timeline is flexible. This is also why most homemade chili is mediocre — when a dish seems easy, people skip the steps that matter and wonder why their version tastes like the can it came from.
There are three moments in this recipe where the difference between forgettable and memorable chili gets decided. Everything else is just waiting.
Moment One: The Browning
Ground beef is mostly water. When you apply high heat, that water converts to steam — and if the meat is crowded in the pan, the steam can't escape and the temperature drops. Instead of browning, the beef boils. You get gray, soft, flavorless meat that tastes like it was cooked at a catering company. The crust never forms. The Maillard reaction never happens.
The fix is spatial: cook the beef in batches with enough room that steam dissipates rather than accumulates. Leave it alone for 2-3 minutes between stirs. Wait for the golden-brown crust you can see and smell before breaking it up. That crust is concentrated glutamate — it's the umami backbone that the entire pot of chili is going to be built on. Steamed gray beef has none of it.
Moment Two: The Spice Bloom
The spice blend in this recipe — chili powder, cumin, smoked paprika, cayenne — contains dozens of aromatic molecules, most of them fat-soluble. That means they dissolve in oil, not water. If you add them to broth or tomatoes, they float around without releasing their full flavor. If you add them to the hot drippings in the pan before any liquid goes in, they immediately dissolve into the fat and their volatile compounds activate.
Sixty seconds in hot fat. That's the entire step. The smell changes noticeably — from raw, dusty spice to warm, roasted depth. Whatever flavor difference exists between your chili and a great Texas bowl of red can largely be traced to whether or not this step happened.
Moment Three: The Simmer
Canned tomatoes are acidic and raw-tasting straight from the can. Kidney beans are mealy and starchy before they've had time to absorb their surroundings. Ground beef, even properly browned, hasn't had the opportunity for its collagen to break down into gelatin that thickens the pot. At 45 minutes, you have a collection of ingredients that have been introduced to each other. At two hours, you have chili.
The chemistry is slow and non-negotiable. Sugars in the tomatoes caramelize. Acids mellow as they react with the proteins in the beef. The beans' exteriors soften and begin releasing starch into the liquid, thickening the sauce naturally. The Worcestershire — a fermented condiment built on tamarind, anchovy, and molasses — distributes its umami throughout the pot. None of this happens fast.
A Dutch oven matters here because it distributes heat evenly across the base. Thin pots create hot spots that scorch the bottom layer while the center simmers correctly. Scorched chili tastes acrid and the bitterness permeates the whole batch. Cast iron or enameled heavy steel removes this variable entirely.
The optional dark chocolate addition — a grated square of 70% or above added in the final 30 minutes — is the most important optional ingredient in this recipe. Cocoa contains theobromine and hundreds of polyphenolic compounds that add bitterness, depth, and complexity without any sweetness. It doesn't taste like chocolate in the finished dish. It tastes like chili that someone very good made, and no one can identify why.
Make this on Sunday. Eat it Monday. That's the full recipe.
Where Beginners Mess This Up
Before we start, read this. These are the 4 reasons your the best homemade chili (two-hour simmer method) will fail:
- 1
Crowding the meat and steaming it instead of browning it: Ground beef releases water as it cooks. If you dump all 2.5 pounds in at once, the water has nowhere to go and the meat boils in its own liquid. You get gray, flavorless beef with no crust. Cook in batches, give it space, and wait for the Maillard reaction to happen — you'll see a deep golden-brown crust forming on the bottom of the pot. That's the flavor foundation for the entire dish.
- 2
Adding spices to liquid instead of blooming them in fat: Chili powder, cumin, and paprika contain fat-soluble flavor compounds. If you pour them directly into tomatoes or broth, those compounds never fully release — they just float around. Toasting the spices in the hot fat left behind from browning the meat for 60 seconds before the liquid goes in multiplies their flavor output by an order of magnitude.
- 3
Simmering for 30-45 minutes and calling it done: Canned tomatoes have a raw, acidic edge that needs time to cook out. The beans need time to absorb the spiced liquid around them. The collagen in the beef needs time to break down. Two hours is the minimum. Three is better. The texture change alone between hour one and hour two is dramatic — the chili tightens, the beans soften at the edges, and everything tastes like it came from the same pot rather than six different ingredients.
- 4
Skipping the resting period before serving: Chili straight off the stove is too hot and the flavors haven't settled. Ten to fifteen minutes uncovered lets the temperature drop to serving range and allows the sauce to thicken slightly as the steam dissipates. It also gives you a chance to taste and adjust seasoning without burning your mouth.
The Video Reference Library
Want to see it in action? Here are the exact videos we analyzed and combined to build this foolproof recipe translation:
The source video for this method. Covers browning technique, spice blooming, and the long simmer in detail. Clear close-ups of what properly browned beef looks like versus steamed beef.
🛠️ Core Equipment
- Large Dutch oven or heavy-bottomed potEven heat distribution is essential for the 2-hour simmer. A thin pot creates scorched spots on the bottom while the center stays undercooked. A [Dutch oven](/kitchen-gear/review/dutch-oven) retains heat evenly and transitions cleanly from high-heat browning to low-and-slow simmering without adjustment.
- Wooden spoon or stiff silicone spatulaYou need to scrape the fond (brown bits) off the bottom of the pot when the tomatoes go in. That fond is concentrated flavor. A flat-edged wooden spoon reaches the corners of the pot where a spatula won't.
- Fine-mesh sieve or colanderFor draining excess fat after browning the beef. You want about 2 tablespoons of drippings left in the pot — enough to bloom the spices and soften the vegetables, not so much that the finished chili is greasy.
- LadleChili is thick. A [good ladle](/kitchen-gear/review/ladle) with a deep bowl moves it without splashing and portions it cleanly into bowls.
The Best Homemade Chili (Two-Hour Simmer Method)
🛒 Ingredients
- ✦2 tablespoons extra virgin olive oil
- ✦2.5 pounds lean ground beef
- ✦2 medium yellow onions, finely diced
- ✦1 large red bell pepper, diced
- ✦5 garlic cloves, minced
- ✦3 tablespoons tomato paste
- ✦3 tablespoons ground chili powder
- ✦2 teaspoons ground cumin
- ✦1 teaspoon smoked paprika
- ✦1/4 teaspoon cayenne pepper
- ✦2 cans (28 ounces each) crushed tomatoes
- ✦3 cans (15 ounces each) kidney beans, drained and rinsed
- ✦1.5 cups beef broth
- ✦2 tablespoons Worcestershire sauce
- ✦1 teaspoon sea salt
- ✦1/2 teaspoon freshly ground black pepper
- ✦1/4 teaspoon sugar (optional, for balancing acidity)
👨🍳 Instructions
01Step 1
Warm the olive oil in a large heavy-bottomed pot or Dutch oven over medium-high heat until it shimmers, about 1 minute.
02Step 2
Add the ground beef in batches, breaking it apart with a wooden spoon, and brown thoroughly for 8-10 minutes until no pink remains and the meat has developed a deep golden crust.
03Step 3
Drain off excess fat from the pot, leaving about 2 tablespoons of drippings behind.
04Step 4
Reduce heat to medium. Add the diced onions and bell pepper, stirring frequently until soft and translucent, approximately 5-7 minutes.
05Step 5
Stir in the minced garlic and cook for 60 seconds until fragrant. Add the tomato paste and cook for 2 minutes, stirring constantly to deepen its color and flavor.
06Step 6
Sprinkle the chili powder, cumin, paprika, and cayenne over the mixture. Stir continuously for about 1 minute to bloom the spices in the fat.
07Step 7
Pour in the crushed tomatoes with their juices and the beef broth, scraping up any brown bits stuck to the bottom of the pot with a wooden spoon.
08Step 8
Add the Worcestershire sauce and drained kidney beans, stirring until well combined.
09Step 9
Bring the mixture to a gentle boil, then reduce heat to low and partially cover with a lid left slightly ajar.
10Step 10
Simmer gently for at least 2 hours, stirring every 20-30 minutes to prevent sticking. Three hours produces noticeably deeper flavor.
11Step 11
Season with sea salt and black pepper. Taste and adjust — add a pinch of sugar if the tomatoes taste sharp or acidic.
12Step 12
Remove from heat and let rest uncovered for 10-15 minutes before serving.
13Step 13
Ladle into bowls and serve hot, topped with diced onions, shredded cheddar, sour cream, or fresh cilantro as desired.
Nutrition Per Serving
Estimates based on standard preparation. Adjustments alter macros.
🔄 Substitutions
Instead of Ground beef...
Use Grass-fed ground beef or a 50/50 mix of ground beef and diced beef chuck
Grass-fed beef has higher omega-3 content and a deeper, slightly gamier flavor. Mixing in chuck adds chew and richer fat distribution. Requires no technique change.
Instead of Kidney beans (canned)...
Use Dried kidney beans soaked overnight and cooked, or a mix of kidney and black beans
Dried beans significantly lower the sodium content and produce a firmer, more distinct bean texture. Black beans add anthocyanins and a slightly earthier flavor. Add an additional 30 minutes of simmer time if using dried beans cooked from scratch.
Instead of Beef broth...
Use Homemade bone broth or low-sodium beef broth with a tablespoon of gelatin stirred in
Bone broth adds collagen and a silkier mouthfeel. The gelatin trick achieves a similar texture improvement with store-bought broth. Either option reduces sodium and improves the finished sauce consistency.
Instead of Olive oil...
Use Avocado oil or ghee
Avocado oil has a higher smoke point and handles the high-heat browning phase better without generating off-flavors. [Ghee](/kitchen-gear/review/ghee) adds a nutty richness and contains butyric acid, a short-chain fatty acid associated with gut lining health.
🧊 Storage & Reheating
In the Fridge
Store in an airtight container for up to 4 days. The flavor improves significantly after 24 hours as the spices continue to develop.
In the Freezer
Freeze in individual portions for up to 3 months. Chili freezes exceptionally well — the beans and beef maintain their texture through a proper freeze-thaw cycle.
Reheating Rules
Add 2-3 tablespoons of water or broth before reheating to compensate for moisture lost during storage. Reheat covered on the stovetop over medium-low heat for 10 minutes, stirring occasionally. Microwave works but can make the beans mealy — stovetop is strongly preferred.
❓ Frequently Asked Questions
Why is my chili watery?
Two likely causes: you didn't brown the beef properly (steamed meat releases more water during simmering) or you didn't simmer long enough with the lid ajar. Remove the lid entirely for the final 30 minutes and the excess moisture will evaporate. If it's still too thin, mash a portion of the beans against the side of the pot — the starch will tighten it within 10 minutes.
Can I make this in a slow cooker?
Yes, but you must still brown the beef and bloom the spices on the stovetop first. Slow cookers can't reach the temperature needed for either step. After completing steps 1-6, transfer everything to a slow cooker, add the remaining ingredients, and cook on low for 6-8 hours or high for 3-4 hours.
Is this chili spicy?
At the specified amounts, it's mild-medium — noticeable warmth without heat that builds uncomfortably. The cayenne is the primary heat driver. Halve it for mild, double it for genuinely spicy, or add a diced jalapeño with the onions for fresh chili heat with a different character than cayenne.
Do I have to use kidney beans?
No. Kidney beans are traditional in American-style chili because they hold their shape through the long simmer, but black beans, pinto beans, or a combination all work. Avoid chickpeas — they're too firm and their flavor profile fights the chili spices.
Why does my chili taste flat even though I used a lot of spices?
Almost certainly because the spices were added to liquid rather than bloomed in fat. Chili powder, cumin, and paprika contain fat-soluble aromatic compounds that only release fully when they hit hot oil. Dry-adding them to tomatoes produces muted flavor regardless of the quantity used. You cannot fix this after the fact — the next batch needs the blooming step.
What toppings go with this chili?
The classics: shredded sharp cheddar, sour cream, diced white onion, sliced jalapeños, and fresh cilantro. Cornbread alongside is not a topping but it is mandatory. Fritos or corn chips on top for texture is a divisive but defensible choice.

The Science of
The Best Homemade Chili (Two-Hour Simmer Method)
We turned everything on this page into a beautiful, flour-proof PDF cheat sheet. Print it out, stick it to your fridge, and never mess up your the best homemade chili (two-hour simmer method) again.
*We'll email you the high-res PDF instantly. No spam, just perfectly cooked meals.
AlmostChefs Editorial Team
We translate the internet's most popular cooking videos into foolproof, beginner-friendly written recipes. We analyze multiple methods, test them in our kitchen, and engineer a single "Master Recipe" that gives you the best possible result with the least possible stress.