Easy Chicken Tikka (Yogurt-Charred, Broiler Method)
Chicken tikka built on a yogurt-acid marinade and broiled at maximum heat for genuine surface char. The marinade is doing surface chemistry, not just seasoning. Understand that distinction and a domestic broiler produces tandoor-quality results.
“Chicken tikka is not chicken tikka masala. It's the first half — the part that matters most. Cubed chicken, a yogurt-spice marinade, and direct high heat. When the outside chars and the inside stays juicy, you've done it correctly. When everything comes out pale and steamed, you've made the mistake that most home cooks make: not enough heat, not enough time in the marinade, and a misunderstanding of what yogurt actually does to protein.”
Why This Recipe Works
Chicken tikka is frequently misrepresented as a simple recipe. It has few ingredients, no complex technique, and a short cook time once the marinade work is done. What makes it fail consistently in home kitchens isn't complexity — it's a chain of small misunderstandings about the chemistry that makes the dish what it is. The yogurt marinade is not seasoning. The char is not optional. The fork-piercing is not a suggestion. These elements are the mechanism of the recipe, and once you understand each one's function, the dish becomes as straightforward to execute correctly as it appears to be on paper.
The Yogurt Marinade Is a Biochemical System
Plain full-fat yogurt is a carrier for three distinct systems that operate simultaneously on the chicken during the marinating period.
The first is lactic acid tenderization. Yogurt contains approximately 1.5–2% lactic acid by weight, a mild organic acid that denatures surface proteins by breaking peptide bonds. Unlike the fast, aggressive acid denaturation produced by lemon juice or vinegar — which can turn chicken surfaces mushy if left too long — lactic acid works slowly, modifying only the outermost muscle fibers over an 8–12 hour window. The result is a surface that is genuinely tender rather than merely softened. At two hours, this process has begun but not completed. At eight hours, the outermost millimeter of each cube has been structurally transformed.
The second system is calcium-activated protease activity. Yogurt contains naturally occurring proteolytic enzymes — protein-cleaving enzymes activated in the presence of calcium, which yogurt contains in significant quantity as a dairy product. These enzymes attack the same muscle protein bonds as the lactic acid, but through a different mechanism, working on the interior protein structure where acid diffusion penetrates more slowly. This dual-system tenderization is why properly marinated chicken tikka has a specific texture that no non-dairy marinade can replicate.
The third is fat-soluble spice delivery. The garam masala, cumin, coriander, smoked paprika, and turmeric in this marinade are largely fat-soluble — their active flavor and color compounds dissolve into fats rather than water. In the fat fraction of full-fat yogurt, these compounds are in continuous molecular contact with the chicken surface throughout the marinating period, carried against the protein by the fat itself. In a water-based marinade, the same spices float suspended in liquid rather than bonding to the surface. The difference in flavor penetration depth between a full-fat yogurt marinade and a water-based spice marinade is significant and measurable by taste.
Why Char Is Not Burned Chicken
The instruction to produce char on chicken tikka creates consistent hesitation in home cooks who have been trained to associate dark coloring on chicken with error. This hesitation results in pale, steamed tikka that tastes technically correct but texturally and aromatically wrong.
Char on chicken tikka is the product of two simultaneous Maillard reactions operating on two different substrates. The first is the standard Maillard reaction on the chicken's own amino acids and reducing sugars — the same reaction that creates crust on a seared steak, and that requires surface temperatures above 280°F to proceed. The second is a separate Maillard reaction between the lactose and milk proteins in the yogurt coating, which produces a distinct set of flavor compounds associated with browned dairy — the same chemistry that makes brown butter taste different from melted butter, or that makes the exterior of a well-baked milk-enriched bread taste different from a lean baguette. The convergence of these two reactions on the same surface at the same time produces flavor complexity that is the defining characteristic of properly cooked tikka. The slightly bitter edge of the dark char patches is not a defect — it is a deliberate flavor counterpoint to the sweet-spiced interior of the cube.
Fork-Piercing and Marinade Penetration
Chicken breast is dense, low-fat muscle tissue with minimal connective tissue channels. Marinade penetrates it by diffusion alone — a slow process that, over a 12-hour period, moves spice compounds approximately 2–3mm into the flesh from any cut surface. Fork-piercing multiplies the number of cut surfaces on each cube by creating new interior channels, dramatically increasing the surface area through which diffusion can operate. A 1.5-inch cube that has been fork-pierced on all six faces has roughly four to five times the penetration surface area of an unpierced cube. The interior of the finished tikka reflects that difference in perceptible spice depth.
The Broiler Setup: Distance and Elevation
A home broiler element typically produces approximately 500–550°F of radiant heat at the element surface. The intensity of that radiant heat follows the inverse square law — at double the distance from the element, the heat flux drops to one-quarter. Rack position is therefore the single most important variable in domestic tikka production.
At 3–4 inches from the broiler element, the heat flux reaching the chicken surface is sufficient to drive the yogurt coating from wet to dry to charred within 12–15 minutes. At 6 inches, the same coating dries and colors to orange-gold without the Maillard reaction proceeding fully to char. Many home ovens with an upper broiler element offer two or three rack positions — use the highest compatible with keeping the skewers 3–4 inches from the element.
Elevation of the chicken off the pan surface is equally important. Chicken cubes sitting on a flat pan surface release liquid as they cook. That liquid pools around the base of each cube and steams the bottom surface. A wire rack and rimmed baking sheet combination, or skewers suspended across a lined pan, ensures the liquid drips clear of the chicken and all surfaces remain in dry radiant heat contact throughout the cook. The difference between the bottom surface of a racked tikka cube and the bottom surface of a flat-pan tikka cube — one charred, one steamed — demonstrates exactly why elevation is structural rather than cosmetic.
The Rest Period and Carryover Heat
Three minutes of resting after the tikka comes off the broiler is not a courtesy to the impatient cook's knife. Chicken breast cubes pulled from a 500°F broiler environment carry residual thermal energy that continues cooking the interior for approximately 90 seconds after the heat source is removed. Internal temperatures at the pull point of 163°F finish at 165°F+ during this rest, meaning precise pull-timing produces a perfectly cooked result without overshooting into the dryness zone. Cutting immediately releases the moisture driven to the center during cooking before it can redistribute into the muscle fibers. Three minutes is the minimum. Five minutes is better.
Building Tikka Masala from This Recipe
Chicken tikka is the structural and flavor foundation of tikka masala, and the quality of the tikka directly determines the ceiling of any masala built on it. Restaurant tikka masala has a specific smoky undertone that home butter chicken versions typically lack — that undertone comes from the char on the tikka pieces. Cubed chicken simmered directly in a masala sauce without the broiler step produces a dish that tastes like spiced chicken in cream sauce. Charred tikka folded into that same sauce at the end of cooking, with just enough simmer time to marry the surfaces, produces tikka masala. The sequence is not interchangeable.
Why Full-Fat Yogurt Is Not Negotiable
The fat fraction of full-fat yogurt is not a nutritional consideration in this recipe — it is a functional one. Three roles converge in that fat: it carries the fat-soluble spice compounds against the chicken surface during marination, it protects the exterior of the cube from drying during broiling by providing a physical moisture barrier, and it is the substrate in which the dairy Maillard reaction occurs during charring. Remove the fat by substituting low-fat or nonfat yogurt and all three functions degrade simultaneously. The spices sit in an aqueous suspension rather than a fat solution and penetrate less deeply. The coating provides less moisture protection and produces more steam. The Maillard reaction on the coating is less intense because there is less fat-bound dairy protein available to react. The result on all three fronts is a worse tikka — not marginally worse, but categorically worse, and in ways that cannot be compensated for by technique adjustments.
Where Beginners Mess This Up
Before we start, read this. These are the 4 reasons your easy chicken tikka (yogurt-charred, broiler method) will fail:
- 1
Under-marinating: Two hours is the stated minimum, but two hours is also where results start being acceptable rather than genuinely good. The yogurt marinade works through lactic acid and calcium-activated proteases — enzymes naturally present in yogurt that cleave muscle protein bonds on contact. At two hours, surface penetration is shallow. At eight hours, the spice compounds have migrated into the interior flesh through the cut surfaces, and the protein structure at the periphery of each cube has been meaningfully transformed. Overnight marination is not cautious home-cook hedging. It produces a categorically different texture and flavor depth than two-hour marination.
- 2
Not piercing the chicken: The instruction to pierce each cube with a fork before marinating is not a minor step. Chicken breast, which is the cut used here, is dense, low-fat muscle tissue that marinade penetrates slowly by diffusion. Fork tines create physical channels — pathways that allow the yogurt and spice mixture to contact interior muscle fibers directly rather than waiting for diffusion to carry them there. Skipping this step means the marinade works only on the surface of each cube. The interior stays unseasoned.
- 3
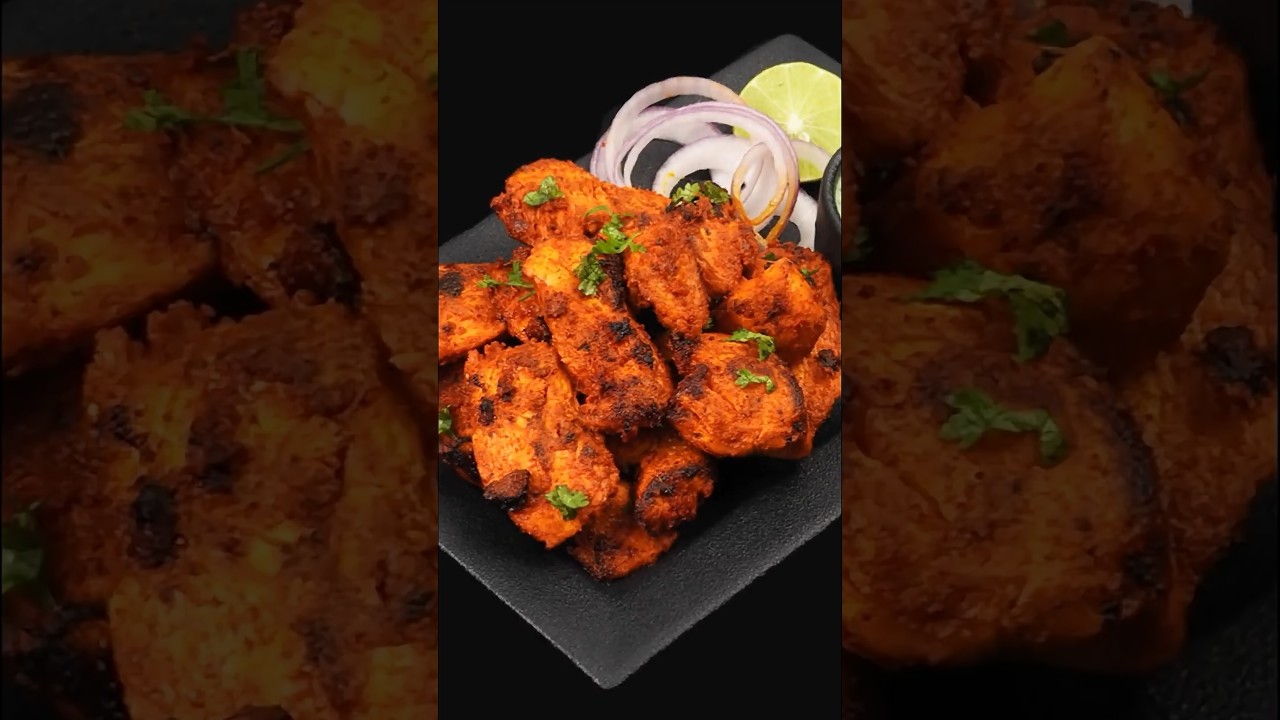
Skipping the char: Chicken tikka is supposed to be charred. Not browned, not golden — charred, with dark patches and slightly blackened edges on the contact points where the spiced yogurt coating hit maximum broiler heat. This is not cosmetic. The char is the Maillard reaction operating on concentrated dairy proteins and lactose from the yogurt coating simultaneously with the Maillard reaction on the meat surface. Two simultaneous browning reactions produce flavor compound complexity that neither reaction alone generates. If your tikka comes out uniformly orange-gold, move the rack closer to the broiler element.
- 4
Broiling on a flat sheet pan without elevation: Chicken cubes placed directly on a flat sheet pan under the broiler sit in the liquid they release as they cook. That liquid steams the bottom surface of each cube rather than charring it. Skewering the chicken and suspending it over a foil-lined pan — or using a wire rack — ensures that released liquid drips away from the protein surface and all sides are exposed to radiant heat and circulating air. Steamed tikka is a different, worse dish.
The Video Reference Library
Want to see it in action? Here are the exact videos we analyzed and combined to build this foolproof recipe translation:
Primary technique reference for this recipe. Demonstrates the marinade composition, skewer threading, broiler positioning, and the visual target for char development — what properly charred tikka looks like versus underdone.
🛠️ Core Equipment
- Metal skewers or broiler-safe wire rackMetal skewers are the traditional vessel for chicken tikka and serve a functional purpose: they elevate the chicken off any pan surface and allow all sides to receive broiler heat. Flat-side metal skewers prevent the chicken from spinning when you rotate them. If you don't have metal skewers, a [wire rack](/kitchen-gear/review/baking-sheet-and-rack) set inside a foil-lined rimmed sheet pan achieves the same elevation and air circulation.
- Instant-read thermometerChicken breast cooked to exactly 165°F retains moisture. Chicken breast cooked to 175°F because you were relying on visual cues is dry. The difference under a high broiler is approximately 3 minutes. An instant-read thermometer inserted into the thickest cube is the only reliable way to pull the chicken at the correct internal temperature when char is already developing on the exterior.
- Microplane or fine graterGinger-garlic paste for a broiled recipe must be grated to a fine paste, not minced into chunks. Minced aromatics in a yogurt marinade leave discrete particles that char to bitterness under broiler heat before the chicken is cooked through. Grated paste integrates into the yogurt matrix and distributes evenly across every cube surface.
- Large zip-lock bag or covered bowlMarination in a zip-lock bag rather than an open bowl ensures every surface of every chicken cube remains in continuous contact with the marinade. In a bowl, the top-facing surfaces of the chicken are in contact with the yogurt; the bottom-facing surfaces are in contact with the bowl. A bag with air pressed out creates 360-degree marinade contact with no exposed surfaces.
Easy Chicken Tikka (Yogurt-Charred, Broiler Method)
🛒 Ingredients
- ✦2 lbs boneless skinless chicken breasts, cut into 1.5-inch cubes
- ✦1 cup plain full-fat Greek yogurt
- ✦3 tablespoons ginger-garlic paste (or 3 garlic cloves + 1 tablespoon ginger, grated to paste)
- ✦2 tablespoons fresh lemon juice
- ✦2 teaspoons ground cumin
- ✦2 teaspoons ground coriander
- ✦1.5 teaspoons garam masala
- ✦1 teaspoon smoked paprika
- ✦0.5 teaspoon cayenne pepper
- ✦0.5 teaspoon ground turmeric
- ✦1 tablespoon olive oil (in marinade)
- ✦2 tablespoons olive oil (divided, for skewers and pan)
- ✦1 teaspoon sea salt
- ✦0.25 teaspoon black pepper
- ✦1 medium red onion, thinly sliced (to serve)
- ✦Fresh cilantro, roughly chopped (to serve)
- ✦1 lime, cut into wedges (to serve)
👨🍳 Instructions
01Step 1
Combine yogurt, ginger-garlic paste, lemon juice, cumin, coriander, garam masala, smoked paprika, cayenne, turmeric, 1 tablespoon olive oil, salt, and black pepper in a large bowl. Whisk until fully uniform — no streaks of plain yogurt.
02Step 2
Pierce each chicken cube 3–4 times with a fork on each exposed face. This is not optional — it creates physical channels for the marinade to penetrate beyond the surface.
03Step 3
Add the chicken cubes to the marinade and toss to coat every surface thoroughly. Press the marinade into the fork-pierced faces with your fingers. Cover tightly and refrigerate for a minimum of 2 hours. Overnight (8–12 hours) produces noticeably better results.
04Step 4
Remove chicken from the refrigerator 20–30 minutes before cooking. Thread the cubes onto metal skewers, leaving a small gap between each piece for air circulation. Do not pack them tightly together — crowded cubes steam at their contact points.
05Step 5
Position the oven rack so the chicken surface will be 3–4 inches from the broiler element. Set the broiler to its maximum setting. Line a rimmed baking sheet with foil and place under the rack to catch drips.
06Step 6
Broil for 12–15 minutes, turning skewers once at the halfway point, until the chicken is charred in spots and cooked through to 165°F internal temperature. Deep, dark patches on the surface are the target — not uniformly golden.
07Step 7
Rest the skewers for 3 minutes before serving. This allows carryover heat to finish any cubes that were at the edges of the temperature range.
08Step 8
Serve with thinly sliced red onion dressed with a squeeze of lime, fresh cilantro, lime wedges, and naan or basmati rice.
Nutrition Per Serving
Estimates based on standard preparation. Adjustments alter macros.
🔄 Substitutions
Instead of Plain full-fat Greek yogurt...
Use Regular full-fat plain yogurt
Regular yogurt is less thick than Greek yogurt and will coat the chicken slightly less aggressively. The flavor and tenderizing chemistry are identical. Do not use nonfat or low-fat yogurt — the water content is too high and will steam rather than char.
Instead of Ginger-garlic paste...
Use 3 garlic cloves grated + 1 tablespoon fresh ginger grated
Grating rather than mincing is important. Minced pieces leave chunks in the marinade that burn under the broiler. Grated paste integrates into the yogurt and distributes evenly.
Instead of Metal skewers...
Use Bamboo skewers soaked in water for 30 minutes
Bamboo skewers work under a broiler for 12–15 minutes without burning if pre-soaked. They are less thermally stable than metal and will char at the exposed ends regardless. Keep the chicken cubes clustered toward the center of the skewer away from the tips.
Instead of Smoked paprika...
Use Kashmiri chili powder
Kashmiri chili powder produces a more vivid red color and a slightly fruity, less smoky heat. It is the more traditional Indian pantry ingredient for this application. Use an equal substitution.
🧊 Storage & Reheating
In the Fridge
Store cooked chicken tikka in an airtight container for up to 4 days. The char softens in the refrigerator but the spice penetration remains fully intact.
In the Freezer
Freeze cooked tikka pieces on a sheet pan until solid, then transfer to a freezer bag for up to 3 months. Texture is well-preserved — chicken breast handles freezing better than thighs in this application because the low fat content means less ice crystal disruption.
Reheating Rules
Reheat under the broiler on a wire rack for 4–5 minutes rather than in a microwave. The broiler partially restores the exterior texture. Microwave reheating steams the exterior to a gray, rubbery result.
❓ Frequently Asked Questions
What is the difference between chicken tikka and tandoori chicken?
Chicken tikka uses boneless cubed chicken breast. Tandoori chicken uses whole bone-in pieces — typically thighs and drumsticks. Both use a yogurt-spice marinade and high-heat direct cooking. The practical differences are cooking time (tikka cooks faster because the cubes are small and boneless), texture (tikka is more uniform; tandoori has the collagen and connective tissue richness of bone-in dark meat), and application (tikka is typically used as a building block for sauces; tandoori is more commonly a standalone dish).
Can I use chicken thighs instead of breasts?
Yes, and many cooks prefer thighs for this recipe. Boneless skinless thighs have more fat and collagen than breast, which means more moisture, more richness, and greater tolerance for slightly over-cooking. Cut thighs into the same 1.5-inch cube size as breasts. The cook time is the same — pull at 165°F internal temperature.
My chicken came out pale and steamed instead of charred. What went wrong?
Three causes in order of likelihood: the rack was too far from the broiler element, there was too much free moisture on the surface of the cubes when they went in, or the marinade was too thick and wet. Move the rack to the highest position that keeps the chicken 3–4 inches from the element. If the yogurt marinade is very loose, press the excess off with your hands before threading on skewers. Full-fat yogurt produces less steam than low-fat; if you used low-fat, the water content may be the issue.
Do I need actual skewers or can I just put the chicken directly on a rack?
A wire rack works well. Thread the chicken or lay the cubes on a wire rack set over a foil-lined sheet pan. The rack provides the same elevation and air circulation as skewers. The only advantage of skewers is easier rotation — with a wire rack, you flip individual cubes rather than rotating a skewer. Both produce the same result.
How do I know when the char is right and when it's just burned?
Correct char: deep brown to almost-black at the most exposed peaks and edges, orange-red on the less-exposed surfaces, a slightly smoky aroma. Burned: completely black on all surfaces, a bitter acrid smell, no visible orange-red remaining anywhere on the cube. The target is contrast — dark char peaks with orange interior color visible between them. If every surface is the same dark color, you've pushed past char into burn.

The Science of
Easy Chicken Tikka (Yogurt-Charred, Broiler Method)
We turned everything on this page into a beautiful, flour-proof PDF cheat sheet. Print it out, stick it to your fridge, and never mess up your easy chicken tikka (yogurt-charred, broiler method) again.
*We'll email you the high-res PDF instantly. No spam, just perfectly cooked meals.
AlmostChefs Editorial Team
We translate the internet's most popular cooking videos into foolproof, beginner-friendly written recipes. We analyze multiple methods, test them in our kitchen, and engineer a single "Master Recipe" that gives you the best possible result with the least possible stress.