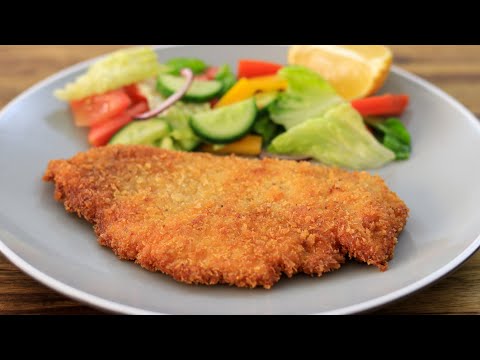
Crispy Chicken Schnitzel (The 25-Minute Weeknight Fix)
Thin-pounded chicken breasts coated in seasoned whole wheat panko and pan-fried in a butter-oil blend until shatteringly crisp. We broke down every failure point in the breading process so you get a crust that stays on and a chicken that stays juicy — every single time.

“Schnitzel looks like a simple dish. It is a simple dish. And yet most homemade versions produce a coating that slides off, a crust that's soggy in the middle, or a chicken that's dry and overcooked by the time the outside browns. The problems are always the same: wet chicken, wrong oil temperature, and a coating that wasn't pressed on properly. Fix those three things and you get the real deal — a thin, golden cutlet with a crust that crackles when you cut into it.”
Why This Recipe Works
Schnitzel is one of the oldest fried foods in European cooking, and its staying power isn't nostalgia — it's engineering. The dish is essentially a solved problem: thin meat, three-stage coating, hot fat, fast cook. Everything about the technique exists to produce a specific result: a crust that is completely separate from the meat surface, so thin and crisp it almost floats above the chicken rather than sticking to it. This is called the "soufflé effect," and it's what separates a real schnitzel from a chicken cutlet wearing breadcrumbs.
The Physics of a Good Crust
The three-stage breading sequence — flour, egg, breadcrumbs — isn't ceremony. Each layer has a job.
The flour goes on first because raw chicken is too slick for egg wash to grab. Flour is hydrophilic: it absorbs surface moisture from the chicken and creates a dry, adhesive base that the egg wash bonds to. Skip the flour and the egg slides off, taking the breadcrumbs with it.
The egg wash binds the flour layer to the breadcrumb layer. This is why the egg-milk ratio matters — too much milk makes it thin and watery, too little makes it tacky. Two eggs to 1/4 cup milk is the right viscosity: enough protein to bind, enough liquid to coat evenly.
The panko goes on last, and whole wheat panko specifically provides two advantages over standard breadcrumbs. First, its larger, flakier structure creates more air gaps, which means more surface area in contact with hot oil, which means more Maillard reaction, which means more crust flavor. Second, the fiber content gives it a slightly rougher texture that grips the egg wash better than fine breadcrumbs.
The pressing step is where most home cooks lose the battle. You cannot dredge schnitzel passively. You must press the panko into the egg-coated chicken with enough force to embed the crumbs — not just dust the surface. A single firm palm press on each side takes two seconds and is the difference between a crust that stays on through flipping and one that peels off in the pan.
The Fat Question
The butter-oil combination in this recipe is not a compromise — it's precision. Pure butter burns at around 300°F. Medium-high heat in a skillet reaches 350-375°F. Butter alone would blacken before the crust develops. Adding olive oil raises the smoke point of the fat blend to around 375°F, giving you a window to achieve deep golden color without bitterness.
The butter still matters, though. Its milk solids contain amino acids and sugars that participate in the Maillard reaction at lower temperatures than the oil does. The result is a crust with complex, slightly nutty flavor that pure oil can't replicate. This is why restaurant schnitzel tastes different from home versions made in neutral oil — the butter is doing flavor work that seems invisible but is completely responsible for the final result.
A heavy-bottomed skillet is the other half of this equation. Thin pans lose temperature the moment cold chicken hits them. A heavy pan maintains its heat through the thermal shock of adding a cold cutlet, which means immediate sizzle, immediate crust formation, and no soggy middle phase. If your pan can't sustain high heat under load, the coating absorbs fat instead of crisping in it.
The Pounding Imperative
Uniform thickness isn't about aesthetics. It's about simultaneous doneness. A chicken breast that's 1/2-inch at the center and 1/8-inch at the edges cannot cook evenly — the thin sections are overcooked by the time the center is safe to eat. Pounding to a consistent 1/4-inch means every part of the cutlet crosses 165°F at the same moment the crust reaches its optimal color.
Work from the center outward with the flat side of a meat mallet, using controlled strokes rather than hard strikes. The goal is to stretch the muscle fibers laterally, not hammer them into oblivion. Shredded chicken doesn't hold a coating. Stretched chicken does.
The technique is two hundred years old. The physics haven't changed.
Where Beginners Mess This Up
Before we start, read this. These are the 4 reasons your crispy chicken schnitzel (the 25-minute weeknight fix) will fail:
- 1
Skipping the pat-dry step: Surface moisture is the enemy of adhesion. If the chicken is wet when it hits the flour, the coating forms a paste that steams instead of crisping. Paper towels first, every time. Dry chicken means the flour creates a dry, even base layer that the egg wash can grip.
- 2
Oil temperature too low when the schnitzel goes in: If the oil isn't hot enough — specifically, if the butter hasn't foamed and just begun to brown — the breading absorbs the fat instead of crisping in it. The result is heavy, greasy schnitzel. You want immediate sizzle the moment the cutlet touches the pan. If it doesn't sizzle, pull it out and wait another 60 seconds.
- 3
Not pressing the coating on firmly: Dredging isn't enough. You need to press the panko into the egg-coated chicken with your palm — enough pressure to embed the breadcrumbs, not just dust the surface. Loose breadcrumbs fall off in the oil and leave bald patches. A single firm press on each side is all it takes.
- 4
Pounding unevenly: Thick spots cook slower than thin spots. By the time the thickest section reaches 165°F, the thinner edges are dry and leathery. Work from the center outward and check that the entire cutlet is uniformly 1/4-inch. Consistent thickness is what gives you even browning and even cook.
The Video Reference Library
Want to see it in action? Here are the exact videos we analyzed and combined to build this foolproof recipe translation:
The primary reference video for this recipe. Clear technique on pounding to uniform thickness and the exact oil-butter ratio that delivers consistent browning.
2. Classic Wiener Schnitzel Method
Traditional Austrian technique with close-ups of the breading adhesion process and the precise visual cues for when the oil is properly hot.
3. Perfect Pan-Fried Schnitzel Every TimeFocused on the frying phase — oil temperature management, when to flip, and how to drain without losing the crust. Useful for first-timers.
🛠️ Core Equipment
- Meat mallet ↗The flat side is essential for pounding chicken to an even 1/4-inch without tearing the meat. A rolling pin works in a pinch but gives less control over thickness uniformity.
- Large heavy-bottomed skillet ↗Thin pans cause hot spots that brown the schnitzel unevenly — you get dark patches next to pale ones. A heavy [skillet](/kitchen-gear/review/cast-iron-skillet) distributes heat across the entire surface for uniform golden color.
- Instant-read thermometer ↗Chicken schnitzel is thin enough that visual cues alone are unreliable. A thermometer takes the guesswork out — pull at 165°F internally and the meat will still be juicy.
- Shallow bowls or wide plates for dredging ↗Deep bowls make it awkward to coat a wide cutlet evenly. Shallow vessels let you lay the chicken flat and coat both sides without fumbling.
Crispy Chicken Schnitzel (The 25-Minute Weeknight Fix)
🛒 Ingredients
- ✦4 boneless, skinless chicken breasts (about 6 ounces each)
- ✦1 cup whole wheat panko breadcrumbs
- ✦3/4 cup all-purpose flour
- ✦2 large eggs
- ✦1/4 cup low-fat milk
- ✦1 teaspoon garlic powder
- ✦1 teaspoon onion powder
- ✦1 teaspoon smoked paprika
- ✦1/2 teaspoon sea salt
- ✦1/4 teaspoon black pepper
- ✦3 tablespoons extra virgin olive oil
- ✦2 tablespoons unsalted butter
- ✦2 medium lemons, cut into wedges
- ✦2 tablespoons fresh flat-leaf parsley, finely chopped
- ✦1 tablespoon Dijon mustard (optional, for serving)
👨🍳 Instructions
01Step 1
Pat each chicken breast thoroughly dry with paper towels on both sides.
02Step 2
Place one chicken breast between two sheets of plastic wrap. Using the flat side of a meat mallet, pound from the center outward until the cutlet is uniformly 1/4-inch thick. Repeat with remaining breasts.
03Step 3
Combine the panko, flour, garlic powder, onion powder, smoked paprika, salt, and pepper in a shallow bowl. Mix thoroughly.
04Step 4
Whisk together the eggs and milk in a second shallow bowl until fully combined.
05Step 5
Heat the olive oil and butter together in a large skillet over medium-high heat until the butter foams and just begins to turn golden brown, about 2 minutes.
06Step 6
Working one cutlet at a time, dip it in the egg mixture, letting excess drip off, then lay it in the breadcrumb mixture and press firmly with your palm on each side to embed the coating.
07Step 7
Carefully lay the breaded cutlet in the hot skillet. Cook undisturbed for 4-5 minutes until the bottom is deep golden brown.
08Step 8
Flip using tongs and cook the second side for 4-5 minutes until equally golden and the internal temperature reads 165°F on an instant-read thermometer.
09Step 9
Transfer to a paper towel-lined plate. Repeat with remaining cutlets.
10Step 10
Arrange on a serving platter, scatter parsley over the top, and serve immediately with lemon wedges and Dijon mustard on the side.
Nutrition Per Serving
Estimates based on standard preparation. Adjustments alter macros.
🔄 Substitutions
Instead of Whole wheat panko breadcrumbs...
Use Almond flour mixed with regular panko (1:1 ratio)
Slightly nuttier flavor with a denser crust. Works well for those reducing grains. The almond flour browns more quickly, so watch heat carefully.
Instead of All-purpose flour...
Use Chickpea flour or tapioca starch
Chickpea flour adds mild earthiness and extra protein. Tapioca starch produces an exceptionally light, crispy coating with a neutral flavor.
Instead of Extra virgin olive oil and butter...
Use Avocado oil or ghee
Both have higher smoke points, which gives you a wider margin for error on heat management. Ghee adds a subtle nuttiness similar to browned butter.
Instead of Boneless, skinless chicken breasts...
Use Thin-cut pork loin or turkey cutlets
Turkey is leaner with a milder flavor. Pork is richer and more forgiving of slightly higher heat. Both pound and coat identically.
🧊 Storage & Reheating
In the Fridge
Store cooled schnitzels in an airtight container for up to 3 days. The crust softens overnight — that's expected.
In the Freezer
Freeze breaded, uncooked cutlets in a single layer on a sheet pan, then transfer to a freezer bag for up to 2 months. Fry directly from frozen, adding 3-4 minutes per side.
Reheating Rules
Reheat in a 375°F oven on a wire rack for 8-10 minutes. The rack allows hot air to circulate underneath and partially restore the crust. Avoid the microwave entirely — it turns the coating rubbery.
❓ Frequently Asked Questions
Why does my breading always fall off?
Three likely causes: the chicken was wet before flouring, you didn't press the coating firmly enough during dredging, or the oil wasn't hot enough when the cutlet went in. Fix all three — pat dry, press hard, wait for the butter to brown.
Can I bake schnitzel instead of frying?
You can, but it's a different dish. Baked schnitzel at 425°F for 20-25 minutes produces a decent crust, but it lacks the direct contact with hot fat that creates the shatteringly crisp exterior of a properly fried schnitzel. If you're avoiding oil, baking is fine. If you want the real texture, fry it.
How thin does the chicken actually need to be?
Exactly 1/4-inch. At that thickness, the 4-5 minutes per side cooks the chicken through precisely as the crust reaches deep golden brown. Thicker cutlets mean either an overbrowned crust or undercooked interior. There's no flexibility here.
Can I bread the schnitzels ahead of time?
Yes — up to 2 hours ahead. Keep them uncovered on a wire rack in the refrigerator. The cold air actually helps the coating dry out slightly, which improves crust formation during frying. Don't cover them or the moisture has nowhere to go.
My schnitzel is golden on the outside but pink inside. What happened?
The cutlets were too thick or the oil was too hot. When oil is too hot, the exterior browns in 2-3 minutes before the interior reaches temperature. Pound to a consistent 1/4-inch, use medium-high heat, and verify doneness with a thermometer rather than color alone.
Do I need to use both oil and butter?
The combination is intentional. Oil raises the smoke point so the fat stays stable at medium-high heat. Butter contributes flavor and promotes even browning through its milk solids. Using butter alone risks burning before the crust is set. Using oil alone produces a crust with less color and flavor depth.

The Science of
Crispy Chicken Schnitzel (The 25-Minute Weeknight Fix)
We turned everything on this page into a beautiful, flour-proof PDF cheat sheet. Print it out, stick it to your fridge, and never mess up your crispy chicken schnitzel (the 25-minute weeknight fix) again.
*We'll email you the high-res PDF instantly. No spam, just perfectly cooked meals.
AlmostChefs Editorial Team
We translate the internet's most popular cooking videos into foolproof, beginner-friendly written recipes. We analyze multiple methods, test them in our kitchen, and engineer a single "Master Recipe" that gives you the best possible result with the least possible stress.