Crispy Chicken Quesadillas (The 22-Minute Weeknight Fix)
Golden flour tortillas loaded with seasoned shredded chicken, melted Monterey Jack, and sautéed peppers — cooked in a skillet until crackling crisp. We broke down the cheese-layering technique and pan temperature logic that most recipes skip, so you get a melted center and shatteringly crisp exterior every single time.
“Most quesadilla failures come down to one of two things: the wrong pan temperature, or cheese applied like an afterthought. Too hot and the tortilla burns before the cheese melts. Too low and you get a pale, floppy sandwich. The fix is embarrassingly simple once you understand the two-layer cheese method — and why you should season the chicken before it ever touches the skillet.”
Why This Recipe Works
A quesadilla is four ingredients. Tortilla, cheese, filling, fat. The fact that it can go wrong in this many ways is almost impressive — but every failure traces back to the same root cause: treating simplicity as permission to be careless.
The Pan Temperature Problem
Butter is the diagnostic tool here, not just the cooking fat. When butter hits the pan and immediately turns brown, your skillet is too hot. When it foams gently and subsides within 30 seconds, you're in range. The target is the moment the foam dies down — that's when the surface temperature is hot enough to color the tortilla without burning it in under two minutes.
The quesadilla needs 3-4 minutes per side at moderate heat to accomplish two things simultaneously: browning the exterior and fully melting the cheese inside. These processes run at different speeds. Cheese melts at around 150°F. Maillard browning on the tortilla happens above 280°F. Too much heat and the exterior finishes before the interior ever gets there. The medium heat range is the only range where they complete at roughly the same time.
The Double Cheese Architecture
Single-layer cheese — piled in the center of the bottom tortilla — migrates toward heat, pools in the middle, and leaves the outer third of the quesadilla dry. It also provides no structural adhesion between filling and tortilla.
The correct assembly is a cheese foundation on the bottom tortilla, filling in the middle, and a second cheese layer on top before the lid tortilla goes on. The bottom cheese melts into the lower tortilla surface, creating a sealed layer. The top cheese melts through the filling, binding it to the upper tortilla. When you cut through it, every triangle has cheese running edge to edge — not just a molten pocket in the center.
Why the Vegetables Must Be Pre-Cooked
Raw onion is 89% water. Raw bell pepper is 92% water. That water has to go somewhere, and inside a sealed tortilla, it goes into the bottom surface — softening the tortilla from the inside while the outside tries to crisp. You end up with a quesadilla that looks golden on the outside and is wet and floppy in the middle.
Four minutes in a hot skillet removes most of that water as steam, concentrates the natural sugars through the Maillard reaction, and develops the sweetness that makes bell peppers worth including in the first place. Raw peppers taste like bell peppers. Sautéed peppers taste like something.
The Rest and Cut Protocol
Melted cheese is a liquid. Cut it immediately and it pours out, pulling filling in its wake. One to two minutes of resting drops the cheese from fully liquid to a semi-solid gel that holds its shape under the knife. This is identical logic to resting a steak — the proteins and fats need time to redistribute and set.
The cut itself matters too. A dragging motion pushes the filling toward the far edge. A pressing motion — sharp chef's knife straight down through all layers — leaves clean triangles with intact cross-sections. If your knife requires pressure and back-and-forth movement to get through a quesadilla, it needs sharpening before your next cook.
This is a 22-minute recipe. Every variable that matters has been addressed. There's nothing left to blame but the execution.
Where Beginners Mess This Up
Before we start, read this. These are the 4 reasons your crispy chicken quesadillas (the 22-minute weeknight fix) will fail:
- 1
Pan too hot when the quesadilla goes in: Medium-high heat is correct for the vegetables, but you need to drop it slightly before adding the assembled quesadilla. A screaming hot pan scorches the tortilla in under two minutes, leaving raw cheese and cold chicken in the center. Let the pan settle for 30 seconds after adding fresh butter before you slide the quesadilla in.
- 2
Cheese on only one side: Sprinkling cheese on just the bottom tortilla means it pools toward the center and slides around when you flip. The correct method is cheese on both inner surfaces — bottom layer first, then filling, then another cheese layer before the top tortilla. The second cheese layer acts as glue that holds the filling in place.
- 3
Not resting before cutting: Cut a quesadilla straight from the pan and the cheese flows out like lava, taking the filling with it. One to two minutes of resting lets the melted cheese re-solidify just enough to hold the layers together when sliced. This is the difference between clean triangles and a pile of filling on the cutting board.
- 4
Skipping the vegetable sauté: Raw onion and bell pepper have high water content. Add them to the quesadilla uncooked and they steam inside the tortilla, making the interior wet and the tortilla soft. Sautéing first removes that water and develops sweetness. It takes four minutes. It matters.
The Video Reference Library
Want to see it in action? Here are the exact videos we analyzed and combined to build this foolproof recipe translation:
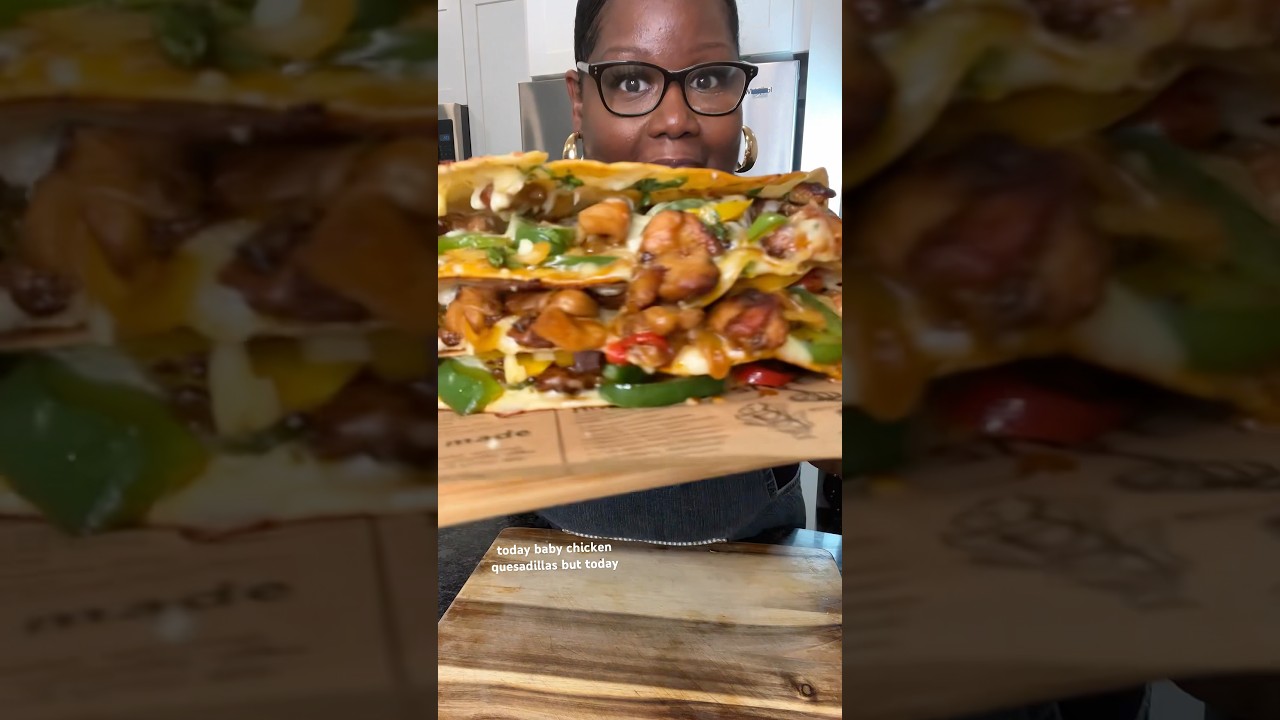
The source video for this recipe. Clear technique on the two-cheese-layer method and pan temperature management throughout the cook.
🛠️ Core Equipment
- 10 or 12-inch skilletThe quesadilla needs to lay completely flat with no overhang. Overhang folds and burns before the center cooks. A [cast iron skillet](/kitchen-gear/review/cast-iron-skillet) is ideal for even heat retention.
- Wide flat spatulaYou need full coverage under the quesadilla when flipping — a narrow spatula lets the far edge flop and dump the filling. The wider the better.
- Sharp chef's knife or pizza wheelDragging a dull knife through a quesadilla drags the filling with it. A [sharp chef's knife](/kitchen-gear/review/chefs-knife) in one clean press cuts all four triangles without disturbing the layers.
Crispy Chicken Quesadillas (The 22-Minute Weeknight Fix)
🛒 Ingredients
- ✦1.5 cups shredded cooked chicken breast
- ✦4 large flour tortillas
- ✦1.5 cups shredded Monterey Jack cheese
- ✦2 tablespoons unsalted butter, divided
- ✦1 medium yellow onion, finely diced
- ✦1 red bell pepper, diced into small pieces
- ✦2 jalapeños, thinly sliced
- ✦1/2 teaspoon ground cumin
- ✦1/4 teaspoon smoked paprika
- ✦1/2 teaspoon kosher salt
- ✦1/4 teaspoon freshly ground black pepper
- ✦2 tablespoons fresh cilantro, chopped
- ✦Sour cream for serving
- ✦Salsa for serving
👨🍳 Instructions
01Step 1
Combine the shredded chicken with cumin, smoked paprika, salt, pepper, and cilantro in a medium bowl. Toss until every piece is evenly coated.
02Step 2
Heat 1 tablespoon of butter in a skillet over medium-high heat. Add the diced onion and cook for 3 minutes until softened and translucent.
03Step 3
Add the diced red bell pepper and sliced jalapeños. Sauté for 2 more minutes until the peppers begin to soften.
04Step 4
Stir in the seasoned chicken and cook for 2-3 minutes until heated through and the flavors have melded. Remove from heat and transfer to a bowl. Wipe the skillet clean.
05Step 5
Lay one tortilla flat on a work surface. Sprinkle 1/4 cup of cheese evenly over the entire surface. Spread one quarter of the chicken mixture over the cheese. Add another 1/4 cup of cheese on top of the filling. Place a second tortilla on top.
06Step 6
Melt 1/2 tablespoon of butter in the skillet over medium heat. Let it stop foaming before adding the quesadilla. Slide the assembled quesadilla into the pan.
07Step 7
Cook for 3-4 minutes, pressing gently with a spatula to ensure full contact with the pan. The bottom tortilla should be deep golden brown and the cheese should be visibly melting at the edges.
08Step 8
Using a wide spatula, flip the quesadilla in one confident motion. Cook the second side for 3-4 minutes until equally golden.
09Step 9
Transfer to a cutting board and rest for 1-2 minutes. Slice into four triangles with a sharp knife using a single pressing motion — do not drag.
10Step 10
Repeat with the remaining tortillas, filling, and butter. Serve immediately with sour cream and salsa.
Nutrition Per Serving
Estimates based on standard preparation. Adjustments alter macros.
🔄 Substitutions
Instead of Flour tortillas...
Use Whole wheat tortillas
Slightly nuttier flavor, denser texture. Lower glycemic impact. Behaves identically in the skillet — same time, same temperature.
Instead of Monterey Jack cheese...
Use Low-fat mozzarella or part-skim cheddar
20-30% fewer calories. Mozzarella melts even smoother than Jack. Cheddar adds sharpness. Either works technically.
Instead of Unsalted butter...
Use Extra virgin olive oil or avocado oil
Different browning behavior — oil doesn't foam, so temperature is harder to read. Start at medium and adjust. Produces a slightly crisper exterior.
Instead of Sour cream...
Use Full-fat Greek yogurt
Tangier and thicker. Higher protein. Works as a dip with no modification. Some people prefer it — the tang cuts the richness of the cheese.
🧊 Storage & Reheating
In the Fridge
Store leftover quesadillas in an airtight container for up to 3 days. They will soften in the fridge — that is unavoidable.
In the Freezer
Freeze fully cooked and cooled quesadillas wrapped individually in foil for up to 1 month. Freeze flat — stacking causes them to fuse together.
Reheating Rules
Reheat in a dry skillet over medium heat for 2-3 minutes per side. This restores the crispy exterior. The microwave produces a steam-softened result that is acceptable but not good.
❓ Frequently Asked Questions
Why is my quesadilla soggy in the middle?
Two likely causes: the vegetables went in raw (releasing water inside the tortilla during cooking) or the pan heat was too low and the tortilla steamed instead of crisped. Sauté the vegetables dry before assembly, and make sure the butter has stopped foaming before the quesadilla goes in.
Can I make these ahead of time?
The filling, yes. The assembled quesadilla, no — it softens quickly. Cook the chicken-vegetable mixture up to 3 days ahead, refrigerate, and do the skillet step fresh. The whole cook takes under 10 minutes.
What's the best way to flip without losing everything?
Use the widest spatula you own, slide it all the way under the center of the quesadilla, press very gently to confirm the bottom is set, and flip in a single fast motion. Slow tentative flips let the filling shift. Speed and confidence are the technique.
Can I use raw chicken instead of pre-cooked?
Yes, but it changes the process. Dice the raw chicken small, season it, and cook it fully in the skillet first — internal temperature of 165°F — before adding the vegetables. Don't try to cook raw chicken inside the quesadilla; it won't reach temperature before the tortilla burns.
How do I get both sides equally golden?
Add fresh butter before each side, not just the first. The first side uses the initial butter. The second side has nothing unless you add more when you flip. A dry second side produces pale, papery results.
Can I cook two quesadillas at the same time?
Only if you have two skillets of the right size. Crowding one skillet means one quesadilla is hanging off the heat and cooking unevenly. Hold the first in a 200°F oven on a wire rack while the second cooks.

The Science of
Crispy Chicken Quesadillas (The 22-Minute Weeknight Fix)
We turned everything on this page into a beautiful, flour-proof PDF cheat sheet. Print it out, stick it to your fridge, and never mess up your crispy chicken quesadillas (the 22-minute weeknight fix) again.
*We'll email you the high-res PDF instantly. No spam, just perfectly cooked meals.
AlmostChefs Editorial Team
We translate the internet's most popular cooking videos into foolproof, beginner-friendly written recipes. We analyze multiple methods, test them in our kitchen, and engineer a single "Master Recipe" that gives you the best possible result with the least possible stress.