Crispy Baked Chicken Parmesan (No Deep Fryer Required)
Golden-crusted chicken cutlets layered with tangy marinara and melted mozzarella, finished in a hot oven for that bubbling, restaurant-quality result. We broke down the pan-sear-then-bake method that gets you a shatteringly crisp exterior without a vat of oil — and without dry, rubbery chicken underneath.
“Chicken Parmesan fails in one of two ways: soggy breading that slides off in a wet sheet, or dry, overcooked chicken buried under a sauce that can't save it. Both failures come from the same root cause — treating the breading and the baking as afterthoughts. The pan-sear-then-bake method fixes both problems by solving them at different stages. Here's the technique that actually delivers.”
Why This Recipe Works
Chicken Parmesan has a branding problem. It sounds simple — bread a chicken breast, add sauce and cheese — and so people treat it simply, skipping steps that look optional but aren't. The result is the version you've eaten a dozen times at mediocre Italian-American restaurants: a pale, soft slab of chicken under a tide of sauce, the breading dissolved into a wet mush that tastes vaguely of nothing. That version exists because someone, somewhere, decided that the technique didn't matter.
It does. Here's why.
Even Thickness Is the Whole Game
A raw chicken breast is not a flat slab. It's a tapered wedge — thick at one end, thin at the other — and this geometry makes it nearly impossible to cook properly without intervention. By the time the thick center reaches 165°F, the thin edge has been at 185°F for three minutes and is dry, stringy, and chewy in a way that no amount of cheese will fix.
The pound is the fix. A meat mallet pressed down to a uniform ⅜ inch gives you a cutlet where every part reaches temperature simultaneously. The technique takes 30 seconds per breast and is the single highest-leverage step in the entire recipe. Skip it and every subsequent step is compensating for a structural defect you introduced at the start.
The Three-Stage Crust
Panko breadcrumbs don't adhere to protein on their own. Chicken is too smooth and too moist for a dry coating to grab onto. The flour-egg-panko sequence exists to solve this problem in layers.
The flour dredge creates a dry, slightly tacky surface that gives the egg wash something to cling to. The egg wash acts as a hydrophilic glue — its proteins bond to both the flour beneath and the panko above when heat is applied. The panko layer itself is the texture play: those irregular, angular flakes create a surface area at least three times larger than fine breadcrumbs, which means more contact with hot oil and a dramatically crunchier result.
The step people skip: pressing. After dipping in panko, press the breast down firmly with your palm. This isn't optional. Physical compression is what transforms loose breadcrumb contact into bonded coating. Without it, the panko sits on the surface like gravel on ice — one contact with a hot pan and it scatters.
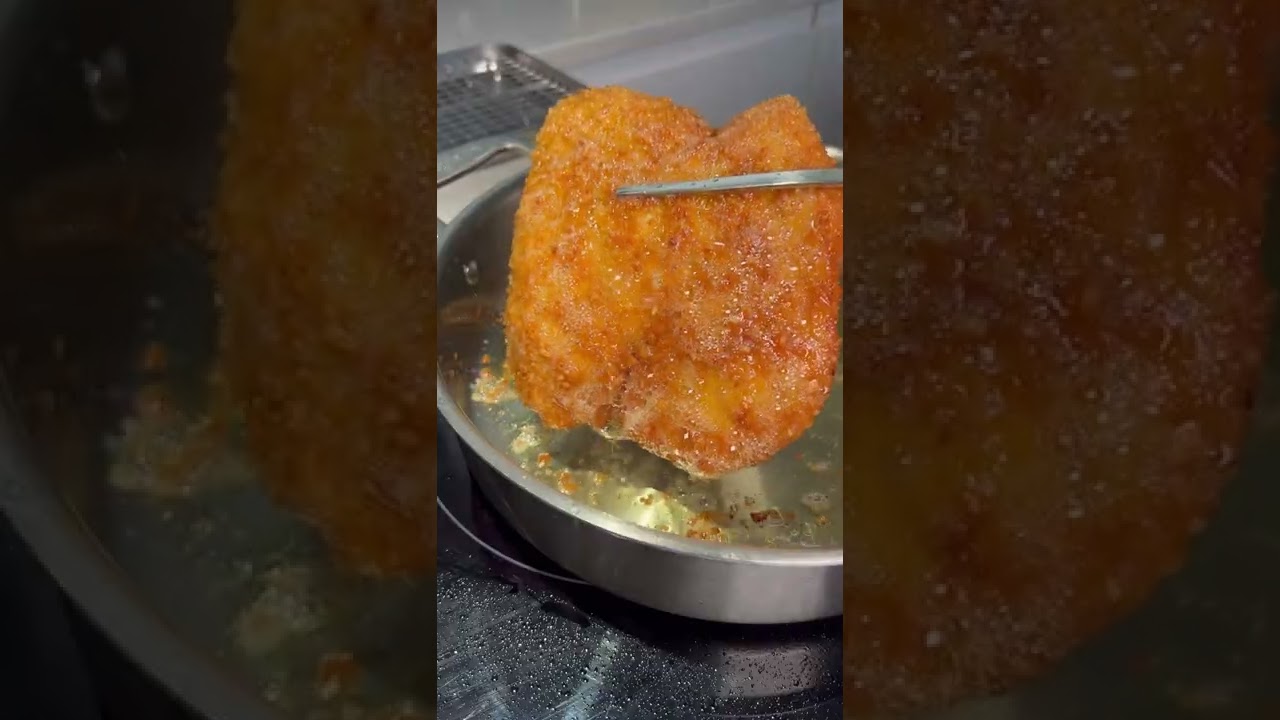
Why Pan-Sear First, Bake Second
Direct contact with 375°F oil produces a crust that baking alone cannot replicate. The Maillard reaction — the same chemistry that makes seared steak taste different from boiled meat — requires direct, dry heat above 280°F. An oven at 420°F can eventually get there, but it takes too long, and by the time the crust browns the chicken is overcooked.
The sear sets the crust in 3–4 minutes per side. The bake finishes the interior gently, without hammering a 165°F target with aggressive dry heat. Together they produce a cutlet with a shattering exterior and juicy interior. Separately, neither method achieves both.
The oven-safe cast iron skillet makes this a one-vessel operation. You sear on the stovetop, transfer the skillet directly to the oven. No moving individual cutlets, no losing heat between vessels, no extra dishes.
The Cheese Architecture
Mozzarella provides melt and pull. Parmesan provides salt and umami. Neither alone does what both together accomplish. The layering order matters: mozzarella first (it needs more time to fully melt), Parmesan on top (it browns faster and benefits from direct oven exposure). The result is a cheese layer that's creamy underneath and slightly crisped on the surface — two textures from two cheeses doing different jobs.
The lemon finish is not garnish. Acid is what keeps a rich dish from tasting heavy. A tablespoon of fresh lemon juice distributed over the finished chicken brightens every element on the plate — the tomato, the cheese, the chicken — in a way that makes the dish taste more of itself rather than adding something foreign.
Fresh basil goes on after the oven. High heat turns basil black and strips its volatile aromatic oils inside of 60 seconds. Adding it post-bake means the herbs land as a top note — fragrant, bright, green — rather than disappearing into the background as a vague herbal suggestion.
Where Beginners Mess This Up
Before we start, read this. These are the 4 reasons your crispy baked chicken parmesan (no deep fryer required) will fail:
- 1
Skipping the pound: Chicken breasts are uneven by nature — thick in the center, thin at the edges. An uneven cutlet means the edges overcook before the center is done, or the center is still pink when the edges are dry. Pound to a uniform ⅜ inch and every bite finishes at the same time.
- 2
Wet chicken going into the flour: Surface moisture is the enemy of adhesive breading. If the chicken is damp, the flour clumps into paste, the egg wash can't bond evenly, and the panko layer lifts off during searing. Pat each breast completely dry before the first dredge.
- 3
Overcrowding the skillet: Packing too many cutlets into the pan drops the oil temperature dramatically. Instead of searing, the chicken steams. Steamed panko is not crispy panko. Work in batches — two cutlets at a time if needed — and let the oil recover between rounds.
- 4
Saucing the crust directly: Pouring marinara directly onto bare breaded chicken before baking turns the top crust into a soggy mat of wet breadcrumbs. Always layer the sauce on top after the cheese starts to act as a barrier, or apply it in a controlled spoon placement that keeps the edges exposed.
The Video Reference Library
Want to see it in action? Here are the exact videos we analyzed and combined to build this foolproof recipe translation:
The source video for this recipe. Clear breakdown of the pan-sear-then-bake method and the exact color you're looking for before the cutlets go into the oven.
🛠️ Core Equipment
- Oven-safe skillet (cast iron or stainless steel)You sear and then transfer directly to the oven — one pan, no transfer to a baking dish. Cast iron holds heat exceptionally well, giving you a consistent crust across the entire surface.
- Meat malletNon-negotiable for even thickness. A rolling pin works in a pinch, but a flat-faced [meat mallet](/kitchen-gear/review/meat-mallet) gives you more control and won't tear the plastic wrap.
- Three shallow bowlsThe breading station only works with dedicated, wide vessels. Deep bowls trap flour and make even coating nearly impossible. Wide, flat bowls let you dredge cleanly in one motion.
- Instant-read thermometerThe difference between 155°F and 165°F is the difference between juicy and dry. An [instant-read thermometer](/kitchen-gear/review/instant-read-thermometer) removes all guesswork from the oven phase.
Crispy Baked Chicken Parmesan (No Deep Fryer Required)
🛒 Ingredients
- ✦4 boneless, skinless chicken breasts (6–8 oz each)
- ✦1 cup all-purpose flour
- ✦2 large eggs
- ✦1.5 cups panko breadcrumbs
- ✦2.5 cups marinara sauce (preferably low-sodium)
- ✦2 cups shredded mozzarella cheese
- ✦1 cup grated Parmesan cheese
- ✦3 tablespoons extra-virgin olive oil
- ✦1 teaspoon kosher salt
- ✦½ teaspoon freshly ground black pepper
- ✦1 teaspoon garlic powder
- ✦1.5 teaspoons Italian seasoning
- ✦¼ cup fresh basil leaves, roughly torn
- ✦1 tablespoon fresh lemon juice
👨🍳 Instructions
01Step 1
Remove chicken breasts from the refrigerator 15 minutes before cooking to bring them closer to room temperature.
02Step 2
Place each chicken breast between two sheets of plastic wrap and pound with a meat mallet to an even ⅜-inch thickness throughout.
03Step 3
Pat each breast completely dry with paper towels.
04Step 4
Set up three shallow bowls: flour mixed with ½ teaspoon salt and ¼ teaspoon pepper in the first; whisked eggs in the second; panko combined with garlic powder, Italian seasoning, and remaining salt and pepper in the third.
05Step 5
Dredge each breast in flour, shaking off excess. Dip into egg wash to coat fully. Press firmly into the panko mixture, coating all surfaces completely.
06Step 6
Heat olive oil in a large oven-safe skillet over medium-high heat until shimmering and just beginning to smoke, about 2 minutes.
07Step 7
Working in batches if needed, cook breaded chicken 3–4 minutes on the first side until deep golden brown. Flip and cook another 2–3 minutes until golden but not cooked through.
08Step 8
Transfer to a paper towel-lined plate and rest 2 minutes. Preheat oven to 420°F.
09Step 9
Spread ½ cup marinara across the bottom of a 9x13-inch baking dish. Arrange seared chicken in a single layer.
10Step 10
Spoon remaining marinara over each breast — roughly ½ cup per piece — then layer mozzarella over the sauce, followed by Parmesan on top.
11Step 11
Bake for 12–15 minutes until cheese is fully melted and edges begin to turn golden.
12Step 12
Rest 3 minutes out of the oven. Scatter torn basil over the top and finish with a drizzle of fresh lemon juice.
13Step 13
Serve immediately while the cheese is still bubbling.
Nutrition Per Serving
Estimates based on standard preparation. Adjustments alter macros.
🔄 Substitutions
Instead of Panko breadcrumbs...
Use Crushed whole grain cereal or panko mixed with ground almonds
Nuttier flavor and slightly faster browning. Higher fiber and protein content. Watch carefully during searing — almond coatings burn faster than plain panko.
Instead of All-purpose flour...
Use Whole wheat flour or 50/50 blend
Earthier, slightly denser coating. May need an extra dip in the egg wash if the flour feels too dry to adhere. Adds fiber and slows glucose absorption.
Instead of Store-bought marinara...
Use Homemade San Marzano tomato sauce
Simmer crushed San Marzanos with garlic, olive oil, and basil for 10 minutes. Eliminates added sugars and excess sodium. Noticeably brighter, fresher flavor.
Instead of Full-fat mozzarella and Parmesan...
Use 1.5 cups part-skim mozzarella and ¾ cup Parmesan
Saves approximately 80 calories and 7g saturated fat per serving. Slightly less creamy finish but still fully satisfying. The Parmesan carries the umami so the mozzarella reduction is barely noticeable.
🧊 Storage & Reheating
In the Fridge
Store in an airtight container for up to 3 days. The crust softens overnight — that's expected. It still tastes good; it just isn't crispy anymore.
In the Freezer
Freeze before adding sauce and cheese, after the sear. Layer between parchment and freeze for up to 2 months. Sauce and bake from frozen at 400°F for 20–22 minutes.
Reheating Rules
Reheat in a 375°F oven for 8–10 minutes uncovered. The oven restores some crust texture. Microwave is faster but ruins the breading — use it only if you don't care about texture.
❓ Frequently Asked Questions
Why does my breading fall off during cooking?
Two reasons: the chicken was wet when it went into the flour, or you didn't press the panko firmly enough. Dry the chicken completely, press the panko coating with your palm, and let the breaded cutlets rest for 5 minutes before searing so the coating has time to hydrate and bond.
Can I skip the searing step and just bake?
You can, but you'll lose the crust. Baking alone produces pale, soft breading that never develops the structural crunch you get from direct contact with hot oil. The sear sets the exterior. The bake finishes the interior. Both steps are load-bearing.
What marinara should I use?
Low-sodium is worth specifying here — most jarred marinara runs 400–500mg sodium per half cup, and you're using 2.5 cups total. That adds up fast. San Marzano-based sauces tend to be less sweet and more acidic, which balances the richness of the cheese better than sweeter domestic tomato sauces.
How do I know when the chicken is fully cooked?
Internal temperature of 165°F at the thickest part. At ⅜-inch thickness with a 12-15 minute bake after searing, you'll hit this reliably — but a thermometer is the only way to be certain. Cutting to check releases juices and dries the meat.
Can I make this ahead of time?
You can bread and sear the chicken up to 24 hours ahead, then refrigerate. When ready to bake, sauce, cheese, and bake as directed — add 3-4 extra minutes since the chicken is going in cold.
Is there a gluten-free version?
Substitute rice flour for all-purpose flour and use gluten-free panko (widely available). The crust texture is slightly more delicate but behaves similarly during searing. Everything else in the recipe is naturally gluten-free.

The Science of
Crispy Baked Chicken Parmesan (No Deep Fryer Required)
We turned everything on this page into a beautiful, flour-proof PDF cheat sheet. Print it out, stick it to your fridge, and never mess up your crispy baked chicken parmesan (no deep fryer required) again.
*We'll email you the high-res PDF instantly. No spam, just perfectly cooked meals.
AlmostChefs Editorial Team
We translate the internet's most popular cooking videos into foolproof, beginner-friendly written recipes. We analyze multiple methods, test them in our kitchen, and engineer a single "Master Recipe" that gives you the best possible result with the least possible stress.