Crispy Chicken Katsu (The Panko Crust Masterclass)
Japanese-style breaded chicken cutlets with a shattering panko crust, served over cool shredded cabbage with tonkatsu sauce. We broke down the three-stage breading system and frying physics to give you a foolproof technique that delivers restaurant crispness every time — in 35 minutes.
“Most home cooks ruin katsu in one of two ways: they fry in oil that's too cold and end up with a greasy, soggy crust, or they pound the chicken unevenly and get pieces that are raw in the thick center and overcooked on the thin edges. Neither problem is complicated to solve. You need a thermometer, a meat mallet, and five minutes of patience after breading. Everything else is just assembly.”
Why This Recipe Works
Chicken katsu is a study in contrast engineering. The entire point of the dish is the moment your teeth break through the crust — that audible shatter before hitting the tender, juicy chicken beneath. Everything in the technique exists to protect and amplify that moment. When it fails, it's not bad luck. It's physics that were ignored.
The Three-Stage Breading System
The flour-egg-panko sequence is not arbitrary tradition. Each layer serves a specific mechanical function. The flour dries the surface of the chicken and creates microscopic texture for the egg wash to grip. Without flour, the egg wash beads off the smooth protein surface like water off glass. The egg wash is a liquid adhesive — it flows into every groove of the flour coat and sets hard during frying, locking the panko in place. The panko is the payoff: an open, irregular lattice of coarse bread shards that fries up into a rigid scaffold filled with air pockets.
That scaffold is why panko produces a fundamentally different result than regular breadcrumbs. Fine crumbs pack tightly, leaving no air pockets, and the resulting crust is dense, heavy, and prone to oil absorption. Panko's shards leave gaps — gaps that hold air, gaps that create the shattering texture, gaps that make katsu katsu and not just fried chicken.
One detail most recipes skip: the resting period after breading. Five to ten minutes on a plate before frying allows the egg wash to partially dry and create a tacky, set surface. Skip it and you're putting unset adhesive into 375°F oil, where the thermal shock will tear the coating loose before it has a chance to bond.
The Oil Temperature Problem
Three hundred fifty to three hundred seventy-five degrees Fahrenheit is a narrow window, and it is the entire ballgame. Below 350°F, the breading absorbs oil at a rate faster than it can crisp. The panko fills with fat, turns dark, heavy, and translucent — all the air pockets collapse. The crust that was supposed to shatter now slouches. Above 375°F, the exterior scorches to dark brown before the chicken interior has time to reach 165°F, and you're left with burnt breading over raw meat.
A frying thermometer is not optional gear for serious katsu. It's the difference between frying and guessing. The breadcrumb test gives you a rough sense of readiness, but only a thermometer tells you you're in the window and staying there.
Oil temperature recovery between batches is equally critical. A cold 6-ounce chicken cutlet entering hot oil drops the temperature by 25-35 degrees instantly. Cook that second cutlet before the oil recovers and it fries at 325°F — precisely the temperature where the crust soaks through. Wait 90 seconds. Use the thermometer. Confirm recovery. Then fry.
The Drainage Question
Paper towels are the default — they're in every recipe, in every kitchen, and they actively undermine your crust. The steam generated by the hot chicken has nowhere to go when the bottom of the cutlet sits flat against wet paper. It wicks back up through the breading from below, softening the bottom layer within two minutes of draining. A wire rack suspended over a sheet pan lets that steam escape in all directions. The crust stays crisp. It's a minor equipment change with a disproportionate impact on the final texture.
The Cabbage Contrast
The cool, barely dressed cabbage slaw is not a garnish. It is a calculated textural and temperature counterweight to the hot, rich fried cutlet. Heavily dressing the cabbage — or worse, dressing it warm — collapses the contrast and turns the whole plate into one monotonous texture. The cabbage should taste like cabbage, lightly coated, cold from the fridge. Let the tonkatsu sauce carry the umami. Let the lemon wedge carry the acid. The cabbage just needs to be cold and clean.
That's the architecture. Hot, shattering, rich crust. Cold, crisp, neutral slaw. Tangy, complex sauce. Each element exists to make the others more distinct. Change one and you disturb the balance. Get all three right and you understand why this dish has been a staple of Japanese home cooking for over a century.
Where Beginners Mess This Up
Before we start, read this. These are the 4 reasons your crispy chicken katsu (the panko crust masterclass) will fail:
- 1
Skipping the resting step after breading: Dropping freshly breaded chicken straight into hot oil before the coating has set is the fastest way to lose your crust mid-fry. The egg wash needs 5-10 minutes to create a bond between the flour and panko layers. Skip this and the breading slides off in sheets as soon as it hits the oil.
- 2
Frying in cold or overheated oil: Under 350°F and the panko absorbs oil instead of crisping — you get a greasy, heavy crust that tastes like fried fat, not fried chicken. Over 400°F and the outside scorches before the interior hits 165°F. The window is 350-375°F, and it's narrow. Use a thermometer.
- 3
Uneven pounding: A chicken breast that's 1/2 inch thick on one end and 1/4 inch on the other will never cook evenly. The thin end dries out by the time the thick end is safe to eat. Pound to a uniform 1/4 inch across the entire surface — every part of the cutlet should hit the oil at the same time and finish at the same time.
- 4
Crowding the pan: Two cutlets in a pan built for one drops the oil temperature by 30-40 degrees instantly. The breading steams instead of fries, and you never recover the crust. Fry one piece at a time. It feels slow. It's the right call.
The Video Reference Library
Want to see it in action? Here are the exact videos we analyzed and combined to build this foolproof recipe translation:
The source video for this technique. Clear walkthrough of the three-stage breading system and visual cues for oil temperature and golden-brown doneness.
🛠️ Core Equipment
- Instant-read or clip-on frying thermometerThe 350-375°F frying window is not guesswork — it's physics. A thermometer is the difference between a crust that shatters and one that slouches. Non-negotiable if you want consistent results.
- Meat malletEven thickness is the single most important variable in katsu. A rolling pin or the bottom of a heavy skillet can work in a pinch, but a flat-faced mallet gives you more control over the final thickness.
- Large heavy-bottomed skilletMaintains oil temperature better than thin pans when cold chicken enters the oil. A [cast iron skillet](/kitchen-gear/review/cast-iron-skillet) is ideal — it holds heat like a thermal battery and recovers quickly between batches.
- Wire rack over a sheet panPaper towels trap steam under the cutlet and soften the bottom crust within minutes. A [wire cooling rack](/kitchen-gear/review/wire-rack) lets air circulate on all sides, keeping the crust crisp while you fry the remaining pieces.
Crispy Chicken Katsu (The Panko Crust Masterclass)
🛒 Ingredients
- ✦4 boneless, skinless chicken breasts (6-8 ounces each)
- ✦1/2 cup all-purpose flour
- ✦2 large eggs
- ✦1 teaspoon water
- ✦1 1/4 cups panko breadcrumbs
- ✦1/2 teaspoon kosher salt
- ✦1/4 teaspoon freshly ground black pepper
- ✦2 1/2 cups vegetable oil for pan-frying
- ✦1/2 cup tonkatsu sauce
- ✦3 cups shredded green cabbage
- ✦2 tablespoons Japanese mayonnaise (optional)
- ✦1 lemon, cut into wedges
👨🍳 Instructions
01Step 1
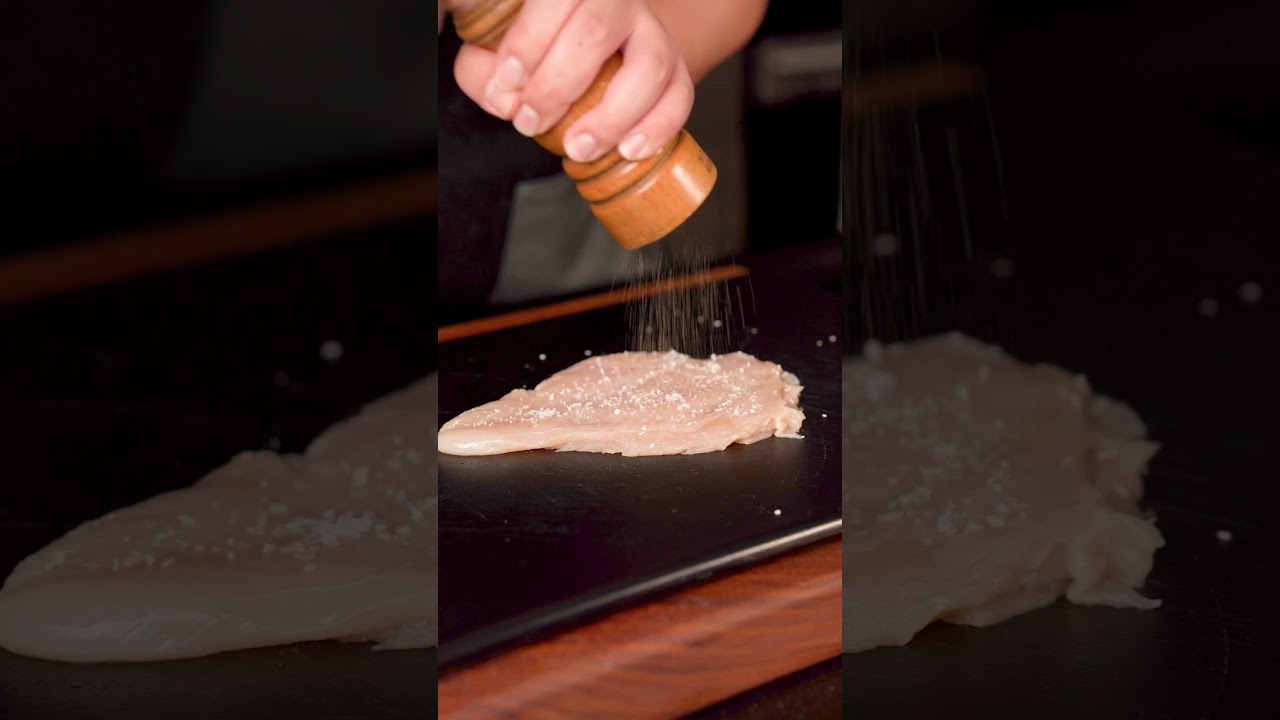
Pat each chicken breast completely dry with paper towels to remove all surface moisture.
02Step 2
Place one chicken breast between two sheets of plastic wrap and pound with a meat mallet to a uniform 1/4-inch thickness across the entire surface.
03Step 3
Repeat with the remaining three chicken breasts.
04Step 4
Set up a three-station breading line: flour mixed with salt and pepper in the first shallow bowl, eggs beaten with 1 teaspoon water in the second, and panko spread in the third.
05Step 5
Coat each cutlet in flour, shake off the excess, dip fully in the egg wash, then press into the panko until completely covered on both sides.
06Step 6
Rest the breaded cutlets on a clean plate for 5-10 minutes so the coating can set.
07Step 7
Heat the vegetable oil in a large heavy-bottomed skillet over medium-high heat until it reaches 350-375°F. Test with a dropped breadcrumb — it should sizzle immediately and turn golden within 30 seconds.
08Step 8
Carefully lower one cutlet into the oil and fry for 3-4 minutes until deep golden brown on the first side. Adjust heat as needed to maintain oil temperature.
09Step 9
Flip with tongs and fry for another 3-4 minutes until both sides are deep golden brown and the internal temperature reaches 165°F.
10Step 10
Transfer to a wire rack (not paper towels) to drain. Repeat with remaining cutlets one at a time, allowing the oil to return to temperature between each.
11Step 11
Toss the shredded cabbage with Japanese mayonnaise if using.
12Step 12
Slice each cutlet crosswise into strips. Serve immediately over the cabbage slaw with lemon wedges and tonkatsu sauce alongside.
Nutrition Per Serving
Estimates based on standard preparation. Adjustments alter macros.
🔄 Substitutions
Instead of Vegetable oil for frying...
Use Avocado oil or light olive oil
Both have adequate smoke points for the 350-375°F frying window. Avocado oil is nearly neutral in flavor; light olive oil adds a faint fruitiness that's barely detectable through the panko.
Instead of Panko breadcrumbs...
Use Panko mixed with grated Parmesan (3/4 cup panko + 1/4 cup Parmesan)
Richer, more savory crust with enhanced umami depth. May brown 30-60 seconds faster — watch closely toward the end of the fry.
Instead of Tonkatsu sauce (store-bought)...
Use Homemade: 1/3 cup ketchup + 2 tablespoons soy sauce + 1 tablespoon Worcestershire + 1 teaspoon honey + 1/2 teaspoon mirin
Slightly less sweet and more complex than most commercial versions. Reduces sodium by approximately 30%. Takes 2 minutes to make.
Instead of Shallow pan-frying method...
Use Oven-baking at 425°F for 12-15 minutes after spraying both sides with oil
Meaningfully less crispy exterior — the crust bakes rather than fries and lacks the shatter of the pan-fried version. Reduces total fat significantly. A reasonable weeknight compromise, not a replica.
🧊 Storage & Reheating
In the Fridge
Store cooked katsu in an airtight container for up to 3 days. The crust softens overnight — this is normal and unavoidable.
In the Freezer
Freeze uncooked breaded cutlets on a sheet pan until solid, then transfer to a freezer bag. Fry directly from frozen at 325°F for 5-6 minutes per side. Do not freeze cooked katsu — the crust turns to paste when thawed.
Reheating Rules
Reheat in a 400°F oven on a wire rack for 8-10 minutes. This partially revives the crust. Avoid the microwave entirely — it steams the breading from the inside and produces a limp, gummy coating.
❓ Frequently Asked Questions
Why does my panko coating fall off during frying?
Two causes: you skipped the resting period after breading (the coating needs 5-10 minutes to set before it hits the oil), or your chicken had surface moisture when you started breading. Pat completely dry before you touch the flour.
Can I use chicken thighs instead of breasts?
Yes, and many cooks prefer them. Thighs are more forgiving — the higher fat content means they stay juicy even if you slightly overshoot the internal temperature. Pound to the same 1/4-inch thickness. Cook time remains the same.
What's the difference between panko and regular breadcrumbs?
Panko is made from crustless white bread processed into large, irregular shards rather than fine crumbs. The coarser structure creates a dramatically crispier, lighter crust that holds its texture much longer after frying. Regular breadcrumbs produce a denser coat that goes soft quickly.
Do I need a thermometer, or can I eyeball the oil temperature?
You can use the breadcrumb test as a rough guide, but a thermometer gives you certainty. The frying window (350-375°F) is only 25 degrees wide. Below it the crust soaks; above it the outside burns before the inside cooks. A thermometer costs less than a ruined dinner.
Can I make katsu ahead of time?
You can bread the cutlets up to 4 hours ahead and refrigerate uncovered on a rack (not stacked — stacking traps moisture and softens the breading). Fry to order. The cooked katsu does not hold well — serve within 10 minutes of frying for the best crust.
What should I serve with chicken katsu besides cabbage?
Japanese steamed white rice is the traditional base. Miso soup alongside completes the meal. For a katsu curry, pour Japanese curry sauce over the sliced cutlet and rice. Pickled daikon or cucumber adds acid contrast that cuts the richness of the fried coating.

The Science of
Crispy Chicken Katsu (The Panko Crust Masterclass)
We turned everything on this page into a beautiful, flour-proof PDF cheat sheet. Print it out, stick it to your fridge, and never mess up your crispy chicken katsu (the panko crust masterclass) again.
*We'll email you the high-res PDF instantly. No spam, just perfectly cooked meals.
AlmostChefs Editorial Team
We translate the internet's most popular cooking videos into foolproof, beginner-friendly written recipes. We analyze multiple methods, test them in our kitchen, and engineer a single "Master Recipe" that gives you the best possible result with the least possible stress.