The Best Chicken Enchiladas (One-Pan Weeknight Fix)
Tender poached and shredded chicken rolled in warm tortillas, blanketed in enchilada sauce and molten cheese, baked until bubbling. We broke down the 50 most-requested home versions to identify exactly where the filling goes wrong — and how to fix it.
“Most homemade enchiladas fail at the same two points: dry, bland filling and cracked tortillas that split open in the oven. Both problems are avoidable. The filling goes dry because people skip the sour cream and broth emulsification step. The tortillas crack because they go into the dish cold. Solve those two things and everything else is just assembly.”
Why This Recipe Works
Enchiladas are not complicated. They are also not forgiving. The architecture is simple — filling, tortilla, sauce, cheese, oven — but each of those five elements has exactly one way to go wrong, and most home versions hit at least two of them. The result is a dish that looks right coming out of the oven but eats like a disappointing approximation of what you actually wanted.
The Filling Problem
Shredded chicken is the most common enchilada filling and the most commonly ruined one. People poach the breast, shred it, and dump it directly into tortillas with some seasoning. By the time those tortillas come out of a 350°F oven after 40 minutes, the chicken has expelled whatever residual moisture it had left and turned to dry fiber.
The fix is the sour cream and broth emulsification. When you combine shredded chicken with sour cream and a half-cup of chicken broth in a hot skillet, the fat from the sour cream coats each strand of chicken and creates a moisture barrier that survives the oven. The broth adds a cooking liquid that the filling can reabsorb if it starts to dry out. Together, they create a filling that stays cohesive from pan to plate. Skip this step — which many recipes do, calling it optional or decorative — and you are not making enchiladas, you are making a cheese delivery vehicle with texture problems.
The black beans and jalapeños are not afterthoughts. Black beans add body and fiber that give the filling structural density, preventing it from compressing into a wet paste under the weight of the sauce. The jalapeños (seeded, so the heat is manageable) contribute a brightness that cuts through the richness of the cheese and sour cream. Cumin does the aromatic heavy lifting — it is the single spice that makes the filling read as Mexican rather than generic.
The Tortilla Architecture
A rolled enchilada is a structural object. It needs to maintain its shape through assembly, sauce application, baking, and the five-minute rest before serving. Every part of that sequence puts mechanical stress on the tortilla, and a cold, brittle corn tortilla will fail somewhere in that chain.
Thirty seconds in a damp towel fixes this entirely. The steam softens the corn masa and raises the flexibility of the tortilla to the point where you can roll it tightly around a full filling without any cracking. The key is working fast — warmed tortillas lose pliability within a few minutes as they cool. For ten enchiladas, work in two batches of five, keeping the second batch wrapped and warm while you roll the first.
The seam-side-down placement in the baking dish is non-negotiable. The weight of the sauce and cheese above presses down on the seam and keeps it sealed during the entire bake. Placing them seam-side up means they will unroll under that pressure and spread open in the dish, turning your enchiladas into an open-faced situation that required twenty minutes of extra work for no reason.
The Two-Phase Bake
The covered phase exists to create a steam environment where the enchiladas heat through uniformly. Twenty-five minutes at 350°F with foil on produces even heat penetration all the way to the center of the dish, where the middle enchiladas — the last ones to reach temperature — need the most time.
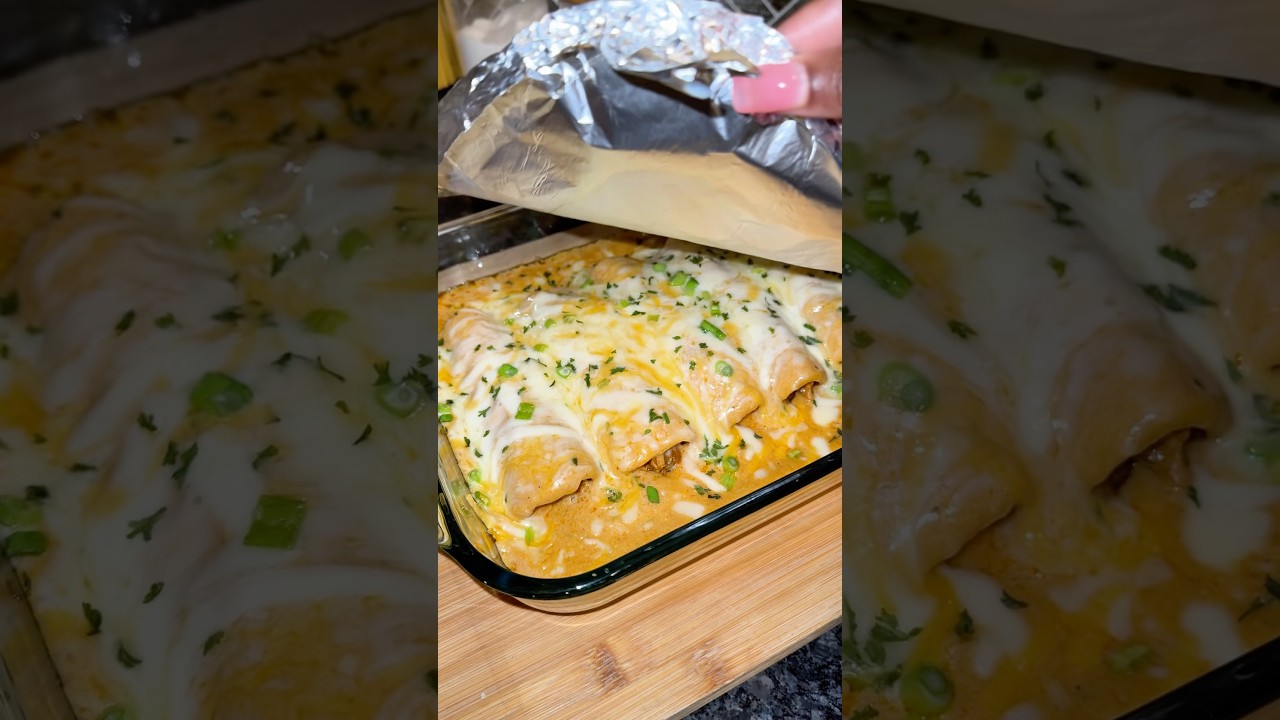
The uncovered phase is purely about the cheese. Molten cheese on top requires direct radiant heat from above, which foil blocks. Ten to fifteen minutes without the cover takes the cheese from barely melted to fully fused and bubbling at the edges. The visual cue is cheese that is pulling away slightly from the sides of the dish and showing light golden spots on the high points. Pull it at that moment, not before.
A 9x13-inch baking dish packed snugly with ten enchiladas is not an aesthetic preference — it is structural. The enchiladas support each other laterally and cannot unroll. Too much space in the dish and they will migrate, separate, and dry out on the exposed sides.
This is a weeknight dish. The technique is a 70-minute process with about 20 minutes of active work. The rest is oven time that requires nothing from you except restraint.
Where Beginners Mess This Up
Before we start, read this. These are the 4 reasons your the best chicken enchiladas (one-pan weeknight fix) will fail:
- 1
Cold tortillas that crack and split: Corn tortillas are brittle at room temperature. Trying to roll them without warming first guarantees splits and tears that let the filling spill out during baking. Thirty seconds in a damp towel in the microwave is the difference between a clean roll and a collapsed mess.
- 2
Dry, underseasoned filling: Shredded chicken alone is not a filling — it's a dry protein that will absorb every drop of moisture from your sauce. The sour cream and chicken broth mixture is what keeps the filling cohesive and moist through 40 minutes of oven heat. Skip it and you get sawdust rolled in a tortilla.
- 3
Not enough sauce on the bottom: The enchiladas sitting directly on bare baking dish is the fastest way to burn the bottom seam. The thin layer of sauce on the base acts as both a moisture barrier and a cooking medium. Skimping here means the bottom half of every enchilada overcooks while the top gets all the attention.
- 4
Pulling the foil too early: The covered phase is where the enchiladas steam through and the filling heats uniformly. Removing the foil too soon causes the tortillas to dry out and harden before the interior reaches temperature. Twenty-five minutes covered, then ten to fifteen uncovered for the cheese finish.
The Video Reference Library
Want to see it in action? Here are the exact videos we analyzed and combined to build this foolproof recipe translation:
The source video for this recipe. Clear technique walkthrough covering tortilla warming, filling construction, and the two-phase bake. Particularly useful for understanding the sauce layering sequence.
🛠️ Core Equipment
- 9x13-inch baking dishThe standard size fits ten rolled enchiladas snugly, which is exactly what you want — they support each other and hold their shape during baking. A smaller dish forces stacking; a larger one lets them slide and unroll.
- Large skilletThe filling comes together in one pan: onions, garlic, chicken, beans, sour cream, and broth all need room to combine without steaming each other. A crowded pan produces wet, uneven filling.
- Instant-read thermometerChicken breast has zero margin for error. Undercooked is a food safety issue; overcooked is a texture disaster. Pull at exactly 165°F and the shredded texture will be perfect.
- Aluminum foilCreates the covered steam environment for the first bake phase. Without it, the exposed tortillas harden and the cheese browns before the filling is fully heated through.
The Best Chicken Enchiladas (One-Pan Weeknight Fix)
🛒 Ingredients
- ✦2.5 pounds boneless, skinless chicken breasts
- ✦10 corn or flour tortillas (8-inch)
- ✦3 cups red enchilada sauce (store-bought or homemade)
- ✦2.5 cups shredded Monterey Jack and sharp Cheddar cheese blend
- ✦1 medium yellow onion, finely diced
- ✦3/4 cup sour cream
- ✦3 cloves garlic, minced
- ✦1.5 teaspoons ground cumin
- ✦1/2 cup chicken broth
- ✦1 can black beans, drained and rinsed
- ✦2 tablespoons olive oil
- ✦1/4 cup fresh cilantro, chopped
- ✦2 jalapeños, seeded and diced
- ✦Salt and freshly cracked black pepper to taste
👨🍳 Instructions
01Step 1
Place chicken breasts in a large pot and cover with cold water by 2 inches. Bring to a boil over medium-high heat.
02Step 2
Reduce heat to medium and simmer gently for 15-18 minutes until the internal temperature reaches 165°F.
03Step 3
Remove chicken with tongs and let rest on a cutting board for 5 minutes, then shred using two forks.
04Step 4
Wrap tortillas in a damp kitchen towel and microwave for 30 seconds until pliable and flexible.
05Step 5
Heat olive oil in a large skillet over medium heat. Add the diced onion and sauté for 3-4 minutes until softened.
06Step 6
Add the minced garlic and cook for 1 minute until fragrant. Add the shredded chicken, cumin, jalapeños, and black beans and stir to combine.
07Step 7
Mix in the sour cream and chicken broth, stirring until everything is evenly coated. Season with salt and pepper. The filling should be cohesive and slightly saucy, not dry.
08Step 8
Preheat oven to 350°F. Spread a thin, even layer of enchilada sauce across the bottom of a 9x13-inch baking dish.
09Step 9
Fill each warm tortilla with 2-3 tablespoons of chicken mixture, roll tightly, and arrange seam-side down in the baking dish.
10Step 10
Pour the remaining enchilada sauce evenly over the rolled tortillas, making sure all the exposed surfaces are coated.
11Step 11
Sprinkle the shredded cheese blend generously over the top.
12Step 12
Cover the baking dish tightly with aluminum foil and bake for 25 minutes.
13Step 13
Remove the foil and bake for an additional 10-15 minutes until the cheese is fully melted and bubbling at the edges.
14Step 14
Remove from oven and let rest for 5 minutes before serving.
15Step 15
Garnish with fresh cilantro and serve with your preferred toppings.
Nutrition Per Serving
Estimates based on standard preparation. Adjustments alter macros.
🔄 Substitutions
Instead of Sour cream...
Use Plain Greek yogurt (0% fat)
Slightly tangier and lighter. Reduces saturated fat while maintaining the creamy texture that keeps the filling moist. Works equally well in the filling — do not substitute on top as a garnish, where the texture difference is more obvious.
Instead of Corn tortillas...
Use Whole wheat flour tortillas
Easier to roll without cracking, higher fiber, slightly earthier flavor. The texture is more forgiving for beginners. Trade-off is a less traditional character.
Instead of Monterey Jack and Cheddar blend...
Use Pepper Jack and Oaxacan cheese
Pepper Jack adds heat. Oaxacan cheese (quesillo) melts in long strings rather than a solid mass, which gives you a stretchier, more visually dramatic top layer.
Instead of Red enchilada sauce (canned)...
Use Homemade sauce with fresh tomatoes, dried chiles, and low-sodium broth
Significantly brighter flavor and lower sodium. The trade-off is 30 additional minutes of prep. Worth it if you have the time; the canned version is a legitimate shortcut otherwise.
🧊 Storage & Reheating
In the Fridge
Store covered in the baking dish or in an airtight container for up to 3 days. The tortillas soften further as they sit, which some people prefer.
In the Freezer
Freeze fully assembled and unbaked for up to 2 months. Thaw overnight in the fridge and bake as directed, adding 10-15 minutes to the covered phase.
Reheating Rules
Add 2-3 tablespoons of water or extra enchilada sauce to the dish before covering with foil. Reheat at 325°F for 20 minutes covered. Microwave reheating dries out the tortillas — avoid it if possible.
❓ Frequently Asked Questions
Why do my tortillas crack when I roll them?
They're not warm enough. Corn tortillas are brittle at room temperature and will split under any rolling pressure. Wrap them in a damp paper towel and microwave for 30 seconds, then roll immediately while still pliable. If they cool down mid-assembly, reheat them again.
Can I use rotisserie chicken instead of poaching?
Yes, and it's a legitimate shortcut. Strip the meat from a rotisserie chicken, skip to the skillet step, and proceed from there. The flavor is slightly smokier and more developed than poached breast. The only trade-off is less control over the shred size.
How do I keep the enchiladas from getting soggy on the bottom?
The sauce layer on the bottom of the dish is actually what prevents sogginess — it acts as a cooking medium rather than letting the tortillas sit on bare hot ceramic. The mistake is using too much sauce underneath. A thin, even coat is correct. A pool of sauce will saturate the tortillas from below.
Can I make this ahead of time?
Yes. Assemble completely — sauce, filling, rolled tortillas, top sauce, and cheese — then cover tightly and refrigerate for up to 24 hours without baking. When ready to cook, add 10 minutes to the covered phase since you're starting from cold. Do not freeze after baking.
What's the right internal temperature for the finished enchiladas?
The filling should reach at least 165°F throughout. The best way to check is with an instant-read thermometer inserted into the center enchilada, which is the last one to heat through. If it reads below 160°F after the uncovered bake, re-cover with foil and give it another 10 minutes.
Can I make these vegetarian?
Easily. Replace the chicken with an additional can of black beans plus one can of pinto beans, or with 2 cups of sautéed mushrooms and diced zucchini. Use vegetable broth instead of chicken broth. The bake time stays the same. The filling will be slightly less dense, so reduce the broth by 2 tablespoons to compensate.

The Science of
The Best Chicken Enchiladas (One-Pan Weeknight Fix)
We turned everything on this page into a beautiful, flour-proof PDF cheat sheet. Print it out, stick it to your fridge, and never mess up your the best chicken enchiladas (one-pan weeknight fix) again.
*We'll email you the high-res PDF instantly. No spam, just perfectly cooked meals.
AlmostChefs Editorial Team
We translate the internet's most popular cooking videos into foolproof, beginner-friendly written recipes. We analyze multiple methods, test them in our kitchen, and engineer a single "Master Recipe" that gives you the best possible result with the least possible stress.