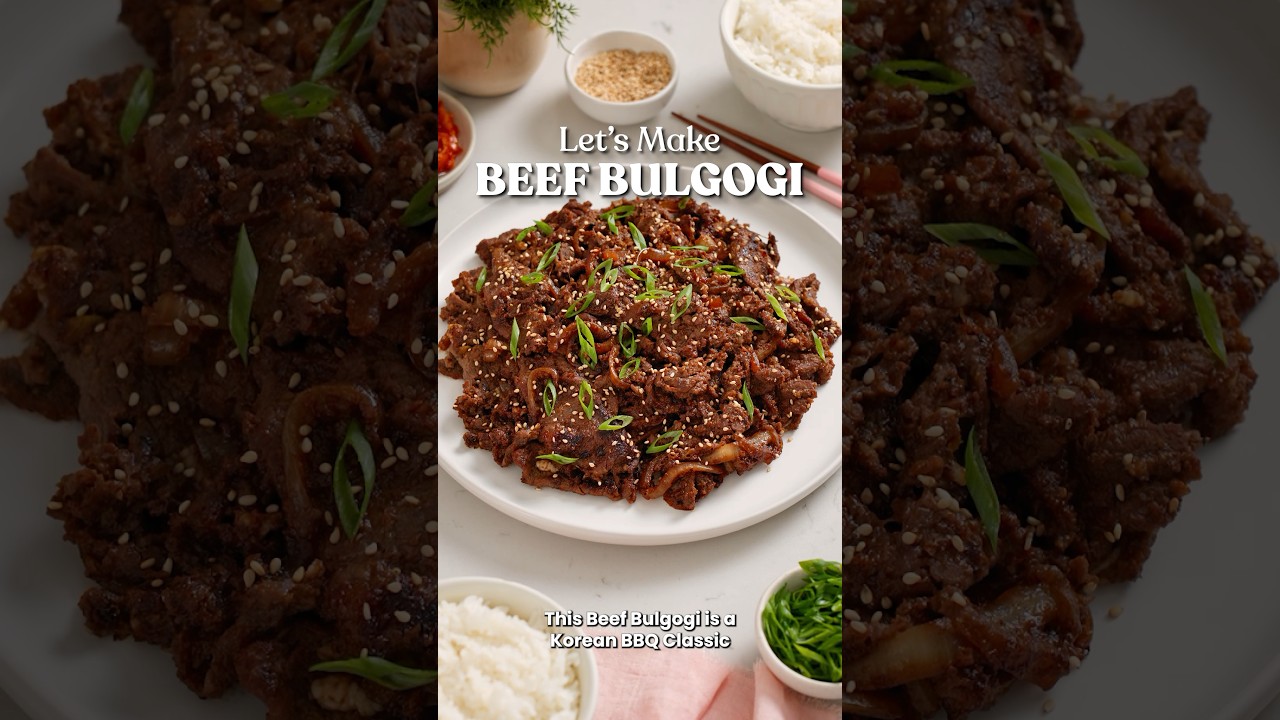
The Best Homemade Bulgogi (Caramelized Edges, Every Time)
Thinly sliced beef marinated in soy, ginger, garlic, and grated pear, then cooked hard and fast in a screaming-hot skillet until the edges char and the center stays juicy. We pulled apart the technique to show you exactly why most home bulgogi comes out steamed and gray — and how to fix it.
“Most homemade bulgogi tastes fine. Fine means gray, steamed meat in a pool of liquid with none of the char that makes Korean BBQ worth eating. The problem isn't the marinade — it's the pan technique. Get the skillet hot enough, work in small batches, and don't touch the meat for the first two minutes. That's the whole game.”
Why This Recipe Works
Bulgogi is not a marinade recipe. It's a heat management recipe. The marinade matters — the pear, the sesame, the soy — but every one of those flavors exists in serviceable form in a bottle you can buy at any Asian grocery. What you cannot buy is the caramelized char that happens when cold, marinated beef hits a screaming-hot cast-iron skillet and the surface moisture evaporates in under two seconds. That char is the whole point, and it only happens if you understand what kills it.
The Crowding Problem
When you add too much beef to the pan at once, two things happen simultaneously. First, the pan temperature drops — a cold mass of meat draws heat out of cast iron faster than the burner can replace it. Second, each piece of marinated beef begins releasing moisture the moment it hits heat. In a crowded pan, that moisture has nowhere to go. It pools, it steams the adjacent pieces, and you end up with gray, braised beef in a brown liquid. It looks like bulgogi. It does not taste like bulgogi.
The fix is ruthlessly simple: cook in three to four small batches. Let each batch sit undisturbed for two to three minutes before you even think about flipping. And before each piece of beef touches the pan, pat it dry. The marinade has already done its work on the interior of the meat — the surface wetness is now purely an obstacle to browning.
Why the Pear Matters
The grated Asian pear isn't a flavor component — it's an enzyme delivery system. Pear contains proteolytic enzymes (similar to those in pineapple and kiwi, but gentler) that cleave the peptide bonds in surface muscle fibers, softening the outer layer of the beef without heat. The result is meat that has a tender, almost silky exterior while retaining structural integrity in the center.
Four hours is the practical minimum for this enzymatic action to make a measurable difference. The practical maximum is about eight hours — beyond that, the surface fibers break down past the point of pleasant tenderness into something mealy and soft. Overnight marinades work because most refrigerators slow enzyme activity enough to stay within the safe window. A 24-hour marinade at 40°F is fine. A 24-hour marinade at 50°F is not.
The Freeze-Then-Slice Logic
Thin, uniform, against-the-grain slices are what give bulgogi its characteristic texture: tender shreds that still have some chew, not thick chewy chunks or paper-thin strips that disintegrate. Getting those slices consistently requires the beef to be firm. Room-temperature ribeye is soft, compressible, and will drag and tear under a knife.
One to two hours in the freezer changes everything. The fat partially solidifies, the muscle fibers firm up, and a sharp knife glides through clean cross-sections in a single pass. You're aiming for slices about 2-3mm thick — thin enough to cook through in under four minutes total, thick enough to survive the sear without drying out.
The Finishing Sauce Move
Reserving three tablespoons of the raw marinade before the beef goes in is a small step that pays disproportionate dividends. Beef that has marinated for four-plus hours loses some of the bright, sharp garlic and ginger punch as the flavors meld and mellow. The reserved sauce — poured over the meat during the final thirty seconds — reintroduces that sharpness at the end, creating a flavor that reads as layered rather than one-dimensional.
This is a classical Korean cooking technique. The same principle shows up in galbi, dakgalbi, and dak bulgogi: layer the same flavor at different stages to create depth instead of volume.
On the Char
The dark edges are not burning. They are caramelization — the Maillard reaction accelerated by the brown sugar in the marinade. At the temperatures a properly preheated cast-iron skillet reaches, the surface sugars brown in under ninety seconds. Pull the heat before you get there and you have sautéed beef. Stay with it past the point you're comfortable and you have bulgogi.
Every cook who makes this for the first time is afraid of those dark edges. Every cook who eats it realizes those dark edges are the entire reason to make it at home.
Where Beginners Mess This Up
Before we start, read this. These are the 4 reasons your the best homemade bulgogi (caramelized edges, every time) will fail:
- 1
Overcrowding the pan: This is responsible for roughly 90% of disappointing bulgogi. When you pile too much cold, wet, marinated beef into a skillet at once, the pan temperature drops immediately and the meat releases moisture faster than it evaporates. You end up braising, not searing. Work in three to four batches regardless of how impatient you are.
- 2
Skipping the pat-dry step: Surface moisture is the enemy of caramelization. The marinade that clings to the meat is mostly water and sugar — and wet sugar doesn't caramelize, it steams. Pat each batch dry before it hits the pan. The dry surface browns in seconds; the moist interior stays tender.
- 3
Slicing the beef at room temperature: Thin, even slices against the grain are non-negotiable for bulgogi texture. Soft, room-temperature beef compresses and tears under a knife. Partially freezing it for one to two hours firms up the muscle fibers and lets you cut clean, paper-thin slices with a standard chef's knife.
- 4
Using a non-stick pan on high heat: Non-stick coatings degrade at the temperatures required for proper searing. A cast-iron or stainless skillet that can take sustained high heat is what you need. The pan should be lightly smoking before the first piece of beef touches it.
The Video Reference Library
Want to see it in action? Here are the exact videos we analyzed and combined to build this foolproof recipe translation:
The source video for this recipe. Clear demonstration of the marinade ratio, partial-freeze slicing technique, and batch cooking approach that gets real char without burning.
🛠️ Core Equipment
- Cast-iron skilletHolds heat even when cold marinated beef hits the surface. Non-stick pans drop temperature too fast and can't recover quickly enough between batches — you'll steam every piece.
- Box grater or microplaneThe Asian pear needs to be grated, not chopped. Grated pear integrates into the marinade and distributes its tenderizing enzymes across every surface of the beef. Chunks just sit there.
- Sharp chef's knifeThin, against-the-grain slices define bulgogi's texture. A dull knife drags and tears partially frozen beef instead of cutting cleanly. If you own a slicing knife or boning knife, this is the moment to use it.
The Best Homemade Bulgogi (Caramelized Edges, Every Time)
🛒 Ingredients
- ✦2.5 pounds ribeye or sirloin beef, thinly sliced against the grain
- ✦0.75 cup low-sodium soy sauce
- ✦4 tablespoons brown sugar
- ✦3 tablespoons toasted sesame oil
- ✦5 cloves garlic, minced
- ✦1.5 tablespoons fresh ginger, grated
- ✦1 teaspoon freshly cracked black pepper
- ✦0.5 medium Asian pear, grated or pureed
- ✦3 tablespoons mirin or rice wine
- ✦1 medium yellow onion, sliced into thin rings
- ✦3 stalks scallions, chopped into 1-inch pieces
- ✦2 tablespoons sesame seeds, divided for garnish
- ✦1 tablespoon neutral oil for cooking, if needed
👨🍳 Instructions
01Step 1
Partially freeze the beef for 1 to 2 hours until firm but not completely frozen.
02Step 2
Whisk together soy sauce, brown sugar, sesame oil, minced garlic, grated ginger, black pepper, grated pear, and mirin in a large bowl until the sugar fully dissolves.
03Step 3
Reserve 3 tablespoons of the marinade in a small container and set aside for the finishing sauce.
04Step 4
Add the thinly sliced beef to the remaining marinade, coat every piece evenly, cover, and refrigerate for at least 4 hours or overnight.
05Step 5
Remove the beef from the refrigerator 15 minutes before cooking.
06Step 6
Working one batch at a time, remove beef slices from the marinade and pat dry with paper towels.
07Step 7
Heat a [cast-iron skillet](/kitchen-gear/review/cast-iron-skillet) over high heat until lightly smoking, about 2 to 3 minutes.
08Step 8
Add one batch of beef in a single layer. Do not stir. Cook for 2 to 3 minutes until the edges caramelize and char slightly.
09Step 9
Flip and cook 1 to 2 minutes more until cooked through but still slightly pink in the center.
10Step 10
Transfer to a serving platter. Repeat with remaining batches, letting the pan reheat to smoking between each one.
11Step 11
Add sliced onion to the same skillet and stir-fry for 1 to 2 minutes until softened and lightly charred.
12Step 12
Return all cooked beef to the skillet with the onions. Pour the reserved marinade over top and toss for 30 seconds.
13Step 13
Remove from heat. Garnish with scallions and sesame seeds. Serve immediately.
Nutrition Per Serving
Estimates based on standard preparation. Adjustments alter macros.
🔄 Substitutions
Instead of Asian pear...
Use Grated Fuji apple or 2 tablespoons fresh pineapple juice
Same enzymatic tenderizing effect. Apple adds a mild crispness; pineapple is more aggressive — don't marinate longer than 4 hours with pineapple or the beef will go soft.
Instead of Brown sugar...
Use Honey or maple syrup
Slightly less intense sweetness with more complex floral notes. Use 3 tablespoons instead of 4 — both are sweeter by volume than brown sugar.
Instead of Regular soy sauce...
Use Tamari or coconut aminos
Tamari is gluten-free and has deeper umami. Coconut aminos are lower sodium and add subtle sweetness — adjust salt if you go this route.
Instead of Sesame oil...
Use Avocado oil with 1 extra tablespoon sesame seeds
You lose the aromatic backbone but gain a cleaner fat profile. Toast the extra seeds in the dry pan before adding beef to compensate for some of the sesame fragrance.
🧊 Storage & Reheating
In the Fridge
Store cooked bulgogi in an airtight container for up to 3 days. The flavors mellow overnight but the char is gone — use leftovers in rice bowls, not as a standalone dish.
In the Freezer
Freeze the raw marinated beef (before cooking) for up to 2 months. Thaw overnight in the fridge and pat dry before searing. This is actually preferable to freezing cooked bulgogi.
Reheating Rules
If you must reheat, use a hot skillet for 60 to 90 seconds rather than a microwave. Microwave turns the beef rubbery and steams out what little char remains.
❓ Frequently Asked Questions
Why does my bulgogi taste steamed instead of caramelized?
Overcrowding. When too much cold, wet beef goes into the pan at once, the temperature drops and moisture pools before it evaporates. The meat braises in its own liquid. Work in three to four small batches, pat the beef dry first, and let the pan return to smoking temperature between each batch.
Can I use a different cut of beef?
Yes. Ribeye and sirloin are standard. Brisket works but needs longer marinade time — at least 8 hours — because the muscle fibers are denser. Avoid tenderloin; it's too lean, too expensive, and the texture turns odd when sliced thin and cooked fast.
Do I have to use Asian pear?
No, but understand what you're replacing. Asian pear contains proteolytic enzymes that break down muscle fibers in the outer layer of the beef, creating tenderness without heat. Grated Fuji apple has similar (slightly weaker) enzymes. Kiwi is too aggressive — it can make the surface mealy. Pineapple juice works but requires shorter marinade time.
Is bulgogi supposed to be sweet?
Yes, distinctly. The sweetness from the brown sugar and mirin is intentional and fundamental to Korean BBQ flavor. It balances the salt from the soy sauce and creates the caramelized char when the sugars hit high heat. If you want less sweetness, reduce the brown sugar by one tablespoon — don't eliminate it entirely.
What do I serve with bulgogi?
Steamed short-grain rice is standard. Banchan (Korean side dishes) like kimchi, pickled cucumbers, and spinach namul round out a proper spread. For a quick weeknight approach, butter lettuce leaves, rice, and sliced scallions is all you need.
Can I cook bulgogi in the oven or air fryer?
Technically yes, practically no. The oven doesn't generate enough direct surface heat for proper caramelization — you'll get gray, steamed beef. An air fryer can achieve some char but the thin slices dry out quickly and the batch size is too small to be practical. High heat, flat surface, small batches. That's the only real method.

The Science of
The Best Homemade Bulgogi (Caramelized Edges, Every Time)
We turned everything on this page into a beautiful, flour-proof PDF cheat sheet. Print it out, stick it to your fridge, and never mess up your the best homemade bulgogi (caramelized edges, every time) again.
*We'll email you the high-res PDF instantly. No spam, just perfectly cooked meals.
AlmostChefs Editorial Team
We translate the internet's most popular cooking videos into foolproof, beginner-friendly written recipes. We analyze multiple methods, test them in our kitchen, and engineer a single "Master Recipe" that gives you the best possible result with the least possible stress.